No products in the cart.
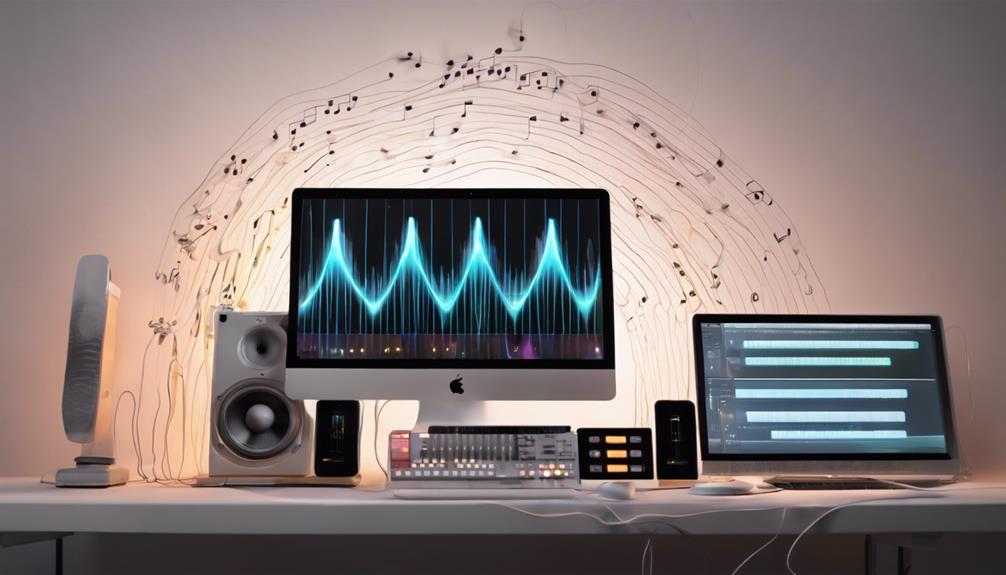
To start mastering audio online, you’ll need the right tools and an ideal setup. First, choose a quiet room and position your studio monitors and computer at ear level. Incorporate essential mastering software like iZotope Ozone, equipped with EQ, compression, and stereo imaging capabilities. Prepare your mix by ensuring the tracks peak between -3dB and -6dB, using reference tracks to balance the sound. Apply EQ to manage frequency balance, compression to control dynamics, and stereo imaging to enhance spatial depth. Each step refines your audio, ensuring it sounds great on any system. Continue exploring to maximize the full potential of your tracks.
Key Takeaways
- Start by setting your track levels between -3dB and -6dB to ensure clarity and prevent clipping.
- Utilize EQ to balance frequencies, enhancing clarity and reducing muddiness.
- Apply compression to maintain consistent levels and add punch to your mix.
- Enhance stereo imaging with careful panning and stereo widening to create an immersive sound field.
- Continuously compare your work to reference tracks to match professional standards and maintain a balanced mix.
Understanding Audio Mastering
Audio mastering, the essential final step in music production, polishes and optimizes your track’s sound for distribution. It involves a detailed mastering process breakdown, where the mastering engineer adjusts levels, equalization, dynamics, and stereo enhancement. This guarantees that your music maintains a cohesive and professional sound across various playback systems.
In mastering, it’s vital to achieve a balanced frequency spectrum, control dynamics, and maintain appropriate loudness levels. You must avoid common mastering mistakes such as over-compression, which can lead to a loss of dynamic range, making your track sound flat and lifeless. Similarly, excessive equalization might create an unnatural sound, detracting from the original quality of your mix.
Another frequent error involves incorrect loudness targeting. This can cause your track to either be too quiet, getting lost among other professional tracks, or too loud, resulting in distortion when played on certain devices. Always aim for a level that ensures both clarity and competitive volume without compromising the dynamic integrity of your track.
Mastering isn’t just about making your music louder; it’s about enhancing clarity, ensuring consistency, and making your final product sound impeccable on any system.
Essential Mastering Tools
As you explore the world of audio mastering, selecting the right software, such as iZotope Ozone, is pivotal.
You’ll also need high-quality studio monitors and headphones for precise sound assessment.
Understanding the roles of EQ, compression, and limiting will enhance your mastering effects application.
Selecting Mastering Software
When selecting mastering software, consider tools that feature essential functions like EQ, compression, and limiting. The right choice allows you to enhance your tracks with precision and ease. Here’s what you need to keep an eye on:
- Software Comparison and User Interface: A user-friendly interface can greatly streamline your mastering process. Compare different software to find one that best suits your workflow.
- Feature Customization: Look for software that offers extensive options for customizing mastering plugins and parameters.
- Mastering Plugins: Make sure the software includes high-quality plugins that cater to dynamic range control, spectral shaping, and overall sound enhancement.
These aspects are important for achieving professional-quality sound in your mastering projects.
Essential Hardware Requirements
After selecting the correct mastering software, you’ll also need the appropriate hardware to guarantee top-quality audio output. A high-quality audio interface is essential for accurate sound reproduction, ensuring that the nuances of your mix are captured. Pair this with studio monitors or headphones that offer a flat frequency response; this setup is essential for making informed decisions during mastering.
Quality cables and connectors are necessary for maintaining signal integrity, which is key in preserving the quality of your audio throughout the mastering process. Regular hardware maintenance is important to avoid any disruptions that could affect your output.
Additionally, consider integrating acoustic treatment like bass traps and diffusers in your workspace to achieve a balanced listening environment, critical for effective signal processing in mastering.
Mastering Effects Overview
Mastering effects, including EQ, compression, reverb, and stereo imaging, are essential tools that refine and enhance your audio’s quality. With these, you’ll employ advanced mastering techniques and explore creative sound manipulation to bring out the best in your tracks.
Here are three critical tools you need to know:
- Equalization (EQ): Adjust frequencies to balance the sound, enhancing clarity and resolving any tonal discrepancies.
- Compression: This tool controls the dynamic range, making your audio consistent in volume, which is vital for professional-quality sound.
- Stereo Imaging: Widen the stereo field and strategically position elements within the mix, creating a more immersive and engaging listening experience.
Preparing Your Mix
Before you tackle mastering, it’s essential you’ve set ideal track levels; this guarantees each element is heard clearly without overpowering others.
Consider the stereo field to enhance the spatial experience, balancing sounds between left and right channels for a cohesive mix.
Optimal Track Levels
To guarantee your mix is ready for mastering, aim for peak levels between -3dB and -6dB to avoid clipping and distortion. Maintain a balanced frequency spectrum to prevent any frequency from overpowering others, which is essential for a clean and professional sound.
Here are three key steps to prepare your mix for best track levels:
- Check Peak Levels: Use a reliable metering plugin to monitor peak levels and ensure they don’t exceed -3dB. This headroom is important for the mastering process.
- Balance Frequencies: Utilize an equalizer to adjust frequencies for a well-balanced mix. Listen critically and make subtle adjustments.
- Reference Tracks: Compare your mix with professionally mastered tracks to gauge overall volume and dynamic range, adjusting accordingly.
Stereo Field Considerations
When preparing your mix, consider panning instruments across the stereo field to enhance spatial depth and separation. Employ stereo imaging techniques like width adjustment to carefully control the perceived width of your mix elements. This adjustment is important for maintaining mix clarity and preventing your track from sounding muddy.
Be cautious with excessive stereo widening as it can lead to phase cancellation issues, impacting mono compatibility. Aim for a balanced stereo field, ensuring a clear center focus with vocals and essential elements, which are essential for a cohesive mix.
Utilize creative techniques like mid-side processing to fine-tune the balance between the center and sides of your mix, enhancing both clarity and impact.
Dynamic Range Control
After fine-tuning the stereo field, you’ll need to manage the dynamic range of your mix using compressors and limiters to guarantee a balanced and distortion-free sound. Mastering techniques like dynamic range balancing are vital for achieving audio clarity and effective volume control.
- Utilize Compression Wisely: Compressors help reduce the dynamic range by making loud sounds quieter and quiet sounds louder, enhancing overall consistency.
- Set Appropriate Thresholds: Avoid over-compression by setting thresholds that maintain the natural dynamics without causing unwanted distortion or clipping.
- Monitor the Output: Always check the final output to make sure it meets professional standards of loudness and clarity, maintaining a healthy balance throughout the track.
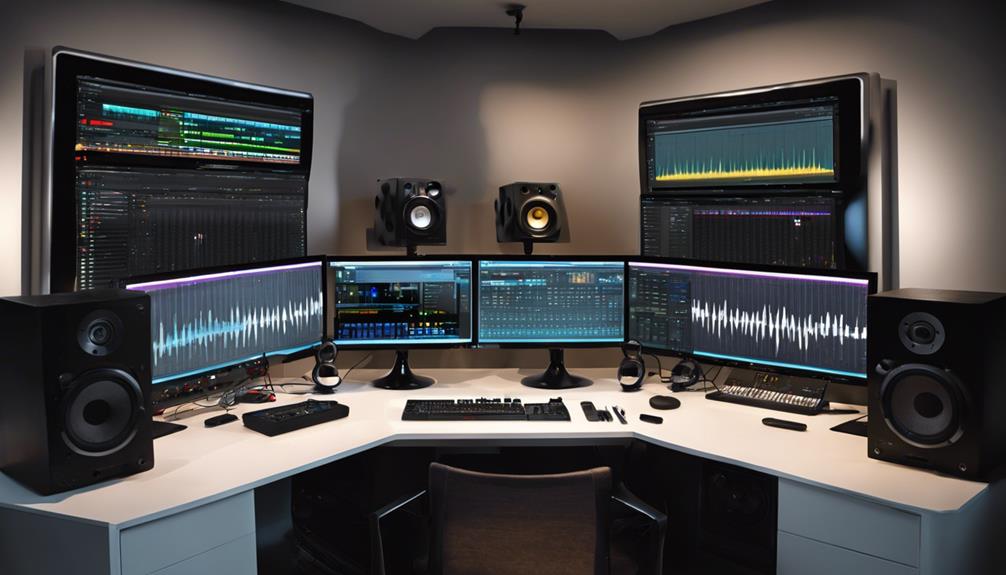
Setting Up Your Workspace
Choosing a quiet, well-ventilated room is essential when setting up your audio mastering workspace. This foundational choice impacts your ability to focus and the overall sound quality you’ll achieve.
Next, consider the ergonomics of your setup. Position your speakers and monitor at ear level; this alignment guarantees the most accurate sound perception. An ergonomic chair and desk will sustain your comfort during long sessions, preventing fatigue and promoting sustained concentration.
Lighting options are also important; opt for adjustable, soft lighting to reduce eye strain without introducing screen glare, which can obscure critical visual details on your monitors. Your workstation’s ambiance directly influences your productivity and ability to detect subtle nuances in the audio.
Room acoustics have a significant impact on sound reproduction. Use acoustic treatment such as bass traps and diffusers strategically around your workspace to minimize unwanted reverberations and reflections. Proper equipment placement further optimizes your room’s acoustics. Keep your speakers away from walls to prevent bass buildup and ensure there’s no obstruction in the path of sound waves.
Efficient cable management and organized placement of tools and equipment not only tidy your space but also reduce electronic interference and increase workflow efficiency. Keep everything within easy reach to maintain a streamlined mastering process.
Using Equalization Effectively
Mastering equalization (EQ) is essential for balancing the high, mid, and low frequencies in your audio mix to achieve professional-quality sound. Effective use of EQ enhances sound clarity and helps maintain the desired audio balance through precise frequency manipulation.
Here’s how you can optimize EQ adjustments to refine your tracks:
- Identify Frequency Issues: Start by pinpointing which frequencies are overpowering or lacking. Use a parametric EQ for surgical precision or a graphic EQ for broader adjustments. Boost or cut frequencies to mold your desired sound profile.
- Adjust Q Factor: The Q factor determines the width of the frequency band affected by your EQ adjustments. A narrower Q affects a smaller range, allowing you to target very specific issues without altering adjacent frequencies. Conversely, a wider Q can smooth out broader areas if your track feels unbalanced in general.
- Listen and Refine: After making your initial adjustments, listen to the track in different environments. This can reveal new areas that need tweaking and help you achieve a more consistent sound across various playback systems.
Compression Techniques
To effectively control the dynamic range of your track, mastering compression techniques is essential. Understanding the parameters like attack, release, ratio, and threshold will allow you to shape the dynamics with precision. For instance, setting a slower attack preserves the initial transient, adding life to your track, while a faster release can increase the perceived loudness.
Incorporating advanced compression techniques, such as parallel compression, adds punch and thickness without sacrificing the track’s natural dynamics. This involves mixing a heavily compressed version of the track with the uncompressed original. Multiband compression allows you to apply different settings to isolated frequency bands, achieving more detailed dynamic control and preventing muddiness.
Creative sidechain applications go beyond traditional uses. For example, you can use the kick drum to trigger compression on the bass track, ensuring that both elements do not compete for space, enhancing clarity and rhythm in your mix.
Here’s a quick guide to get you started:
| Parameter | Purpose |
|---|---|
| Attack | Controls how quickly compression starts after threshold is exceeded. |
| Release | Determines how soon after the signal drops below the threshold the compression stops. |
| Ratio | Sets the level of input signal reduction once it crosses the threshold. |
| Threshold | Defines the point at which compression begins. |
Master these settings to refine your compression skills and enhance your tracks significantly.
Enhancing Stereo Imaging
After mastering compression techniques, you can further refine your mix by enhancing stereo imaging, which creates a more immersive soundstage. Stereo imaging isn’t just about making sounds appear wider; it’s about strategically placing elements within a mix to achieve a detailed and engaging auditory experience.
Here’s how you can enhance your stereo imaging:
- Utilize Panning: Start by assigning specific positions in the stereo field to different elements. Panning helps in distributing audio elements spatially, allowing each component to stand out, reducing muddiness, and contributing to stereo width enhancement.
- Apply Stereo Wideners: These tools can increase the perceived stereo width of your mix. Be cautious, though; overuse can lead to a disjointed and phase-affected sound. Use them sparingly to add subtle depth without compromising the mix’s integrity.
- Adjust Delays: Small delay adjustments between the left and right channels can add a rich texture and enhance the spatial audio techniques. This method helps in creating immersive soundscapes that make the listener feel enveloped by the sound.
Adding Reverb and Ambience
Adding reverb and ambience effectively transforms your mix by introducing depth and creating a realistic or enhanced atmospheric context. When you’re mastering online, understanding the nuances of reverb applications and ambience effects is important. Reverb isn’t just about making things sound ‘echoey’; it’s about spatial manipulation, setting each element in its own sonic space.
You’ll want to experiment with different types of reverb—plate, hall, and chamber each have unique characteristics. Plate reverb, for instance, can add a bright, shimmering quality that’s great for vocals or snare drums. Hall reverb, on the other hand, is better suited for creating a deep, expansive sound, ideal for orchestral pieces or adding grandeur to a track.
Adjusting reverb parameters like decay time and pre-delay is essential. Decay time will determine how long the reverb lasts, while pre-delay sets the gap between the original sound and its reflection. This can help in avoiding muddiness in your mix, ensuring clarity and preserving the integrity of the original sound.
Using ambience effects involves more than just slathering on reverb. It’s about the creative use of these tools to enhance, not overpower, your track. Balance is key; a light touch often works best, allowing you to craft a compelling, immersive audio experience without overwhelming the core elements of your track.
Loudness and Maximization
Achieving ideal loudness and maximization in your tracks involves careful application of compression and limiting techniques to enhance perceived volume without introducing distortion. This is important for making sure your music stands out while maintaining a quality sound. By understanding and implementing the right loudness strategies and maximization tips, you’ll set your tracks up for competitive loudness levels that meet industry standards without sacrificing clarity.
Here are three key steps to get you started:
- Utilize Peak Limiting: Apply peak limiting to prevent your audio signals from exceeding the maximum threshold. This balances your track’s dynamics and avoids clipping, which is essential for clean output.
- Adopt Loudness Normalization: Embrace loudness normalization standards, such as LUFS, to make sure your track maintains consistent volume across various playback systems. This standardization is important for achieving a professional sound.
- Master Loudness Metering: Learn to use loudness metering tools effectively. These tools provide visual feedback on your track’s loudness levels, helping you make informed adjustments during the mastering process.
Quality Control and Listening
When selecting monitors for mastering, it’s vital you choose ones that provide a flat frequency response to guarantee accurate audio reproduction.
You’ll need to develop critical listening skills to detect subtle flaws and imbalances in your tracks effectively.
Monitor Selection Criteria
To guarantee excellent audio mastering results, you must carefully select monitors that offer flat frequency response and minimal distortion. Understanding the interplay between speaker placement, room acoustics, and monitor performance is crucial.
Here’s what you need to focus on:
- Frequency Response: Choose monitors that maintain a consistent output across all frequencies to make certain that no part of your mix is misrepresented or overshadowed.
- Distortion Levels: Look for monitors with the lowest possible distortion to preserve the purity of your audio. High distortion can color the sound and mislead your mixing decisions.
- Stereo Imaging: Ensure the monitors provide accurate stereo imaging for a precise spatial representation in your mixes, affecting how you perceive balance and placement.
Critical Listening Techniques
After selecting the right monitors, you’ll need to hone your critical listening skills to effectively evaluate the quality of your audio mastering. Utilizing high-quality studio monitors or headphones is essential for an accurate representation of audio details. Focus intently on the subtle nuances in dynamics, frequency balance, stereo imaging, and overall tonal characteristics. This enhances your audio perception and aids in precise sound interpretation.
Comparing your mastered tracks with reference tracks is crucial. It allows you to gauge the quality of your work and make the necessary adjustments. Remember, developing these critical listening skills requires practice and experience. As you refine these abilities, you’ll achieve consistently high-quality results in your mastering projects.
Identifying Audio Flaws
Identifying audio flaws during mastering requires a meticulous ear, as you’ll need to detect issues like background noise, distortion, and imbalances that compromise sound quality. Here are key steps to enhance your audio flaw detection and troubleshooting techniques:
- Utilize Various Listening Environments: Test your tracks on different audio systems and in varied acoustic settings to identify discrepancies that aren’t immediately evident.
- Employ A/B Comparison: Regularly switch between your track and high-quality reference tracks to expose areas needing improvement and verify your mastering aligns with industry standards.
- Analyze Technical Elements: Focus on frequency response, dynamics, and stereo imaging to spot common mastering mistakes and learn how to avoid them, ensuring a balanced and polished final product.
Exporting and Distribution
Choose the right file format, such as WAV or MP3, when exporting your mastered audio to guarantee compatibility with various distribution platforms. WAV files offer high-quality sound, ideal for lossless audio experiences, while MP3s provide greater compression, useful for digital streaming where bandwidth can be a concern. It’s critical to adjust your loudness levels according to the norms of platforms you’re targeting; for instance, –14 LUFS for Spotify and –16 LUFS for Apple Music. This guarantees your tracks play back consistently and aren’t turned down automatically by the platform.
Incorporate essential metadata in your tracks, including the track title, artist name, and album info. This not only aids in copyright protection but also enhances your marketing strategies by ensuring your tracks are properly indexed and easily discoverable across services. Utilize platforms like DistroKid or TuneCore for distribution; these services facilitate the placement of your music on major outlets like iTunes, Spotify, and Amazon Music.
Regular monitoring of your music’s analytics helps in adjusting your marketing strategies based on audience engagement and geographic popularity, maximizing your reach and effectiveness in the highly competitive digital music space.
Frequently Asked Questions
What Are the Basic Audio Mastering Steps?
You’ll adjust levels, apply EQ, and compress to enhance sound quality. Focus on dynamic range, stereo imaging, and use limiters to prevent clipping. Guarantee consistent volume and tonal balance across tracks.
How Do You Master a Song by Yourself?
To master a song yourself, you’ll need quality mastering software and a room with good acoustics. Balance EQ, apply multiband compression, use subtle limiting, and compare your work with professional reference tracks.
What Db Should My Mix Be Before Mastering?
You should aim for mixing levels around -6 dB to -3 dB before mastering. This loudness target prevents distortion and preserves dynamic range, ensuring a clean and balanced output in the mastering process.
How Do I Master My Audio?
To master your audio, you’ll need mastering software like iZotope Ozone. Guarantee your room acoustics are ideal to accurately assess sound. Apply EQ, compression, and adjust volume for a polished, professional output.
Conclusion
Now that you’ve mastered the basics, you’re ready to polish your tracks like a pro. Guarantee your mixes are clean and well-prepared before you start mastering.
Adjust your workspace for peak listening conditions, and use EQ and reverb to enhance your sound subtly. Don’t forget to manage loudness for a final, impactful touch.
Finally, conduct thorough quality checks with fresh ears before distributing your masterpiece. Immerse yourself, experiment, and refine your skills as you go!