-
1× £125.00 / Months and 10 Days free trial

Subtotal: £0.00


Subtotal: £0.00
To craft your music’s final sound, you’ll need to master mixing and mastering. Mixing adjusts track levels and placement, focusing on blending and balancing your audio landscape. Mastering then enhances this mix for a polished outcome, using techniques like EQ, compression, and stereo widening. You’ll need essential tools: a digital audio workstation, plugins, studio monitors, and an audio interface. Whether you choose DIY or professional help depends on bias, quality, and budget. Remember, mixing sculpts your track’s potential, while mastering guarantees a cohesive, clear final product. Exploring further will uncover detailed strategies to elevate your music.
Understanding the key differences between mixing and mastering is essential for any musician aiming to achieve a polished, professional sound in their music. Mixing is your initial step towards this goal, focusing on level adjustments and placement of individual tracks to create a cohesive mix. This involves fine-tuning volumes, panning, and applying effects to guarantee each element sits perfectly within the mix, allowing for clarity and balance across all components of your track.
Mastering, on the other hand, is about sonic enhancement, giving your music the final touch it needs to compete in the professional arena. It’s where the overall sound undergoes compression, equalization, and other processes to add polish, depth, and loudness, ensuring your music sounds its best across different playback systems. While mixing gives attention to the details within tracks, mastering focuses on the total sound, enhancing the mix’s overall quality to meet commercial standards.
It’s important to understand these distinctions as they guide you in perfecting your music, highlighting the necessity for different skills and ears in each process. Ultimately, grasping the nuances between mixing and mastering can profoundly impact the final quality of your music.
To achieve a professional-sounding mix, you’ll need to equip yourself with several essential tools, including a digital audio workstation (DAW), audio plugins, studio monitors, and an audio interface. These core components form the backbone of your mixing setup. When it comes to equipment selection, budget considerations are critical. You’ll find a wide range of options available, from entry-level to professional-grade gear. It’s important to invest wisely, prioritizing items that have a major impact on your sound quality, like quality monitors for accurate audio reproduction.
Adding a MIDI controller can enhance your workflow, offering hands-on control over virtual instruments and mix parameters. This integration can lead to a more intuitive and creative mixing process. However, even the best equipment can fall short without proper room acoustics. Acoustic treatment and soundproofing solutions are essential to create a sonically neutral environment. This step allows for precise mixing decisions, preventing misleading bass frequencies or echoes that could distort your perception of the mix.
Lastly, organizing your DAW session with track labeling, grouping, and a logical arrangement is crucial for efficiency. This organizational approach ensures a smooth workflow, allowing you to focus on the creative aspects of mixing without getting bogged down by clutter or confusion.
Mastering your music is the final step in bringing your tracks to life, ensuring they’re not only important but also resonate well across various playback systems.
You’ll need to understand mastering techniques, including the strategic use of EQ and compression, to enhance clarity and depth without sacrificing dynamics.
Additionally, adhering to loudness standards is essential for your music to achieve consistent volume and quality across all distribution platforms.
Diving into the art of mastering music, you’ll find that it requires precisely adjusting levels, frequencies, dynamics, and stereo image to elevate the final mix. Dynamic enhancement and stereo widening play critical roles here. By utilizing dynamic processing tools such as compressors and limiters, you’re able to refine the mix’s dynamics, guaranteeing a balanced and impactful sound. These tools help in maintaining consistency in volume, preventing any part from overwhelming the others.
Furthermore, mastering introduces harmonic excitement and peak control into the mix. Harmonic exciters add richness and depth by introducing additional harmonics, making the audio more vibrant and engaging. Peak control, achieved through maximizers and limiters, safeguards that the audio doesn’t clip, maintaining a clean and distortion-free sound. Together, these techniques polish and perfect the track, preparing it for its final presentation.
After exploring the dynamic enhancements and stereo widening techniques in mastering, let’s focus on how EQ and compression can further refine your music’s sound quality.
EQ frequency shaping is critical for adjusting the balance of frequencies, enhancing clarity and tonal quality. It allows you to carve out space for each element in your mix, guaranteeing no frequency range is overcrowded, which can muddy your sound.
Meanwhile, compression dynamics control guarantees a consistent volume level throughout your track, adding punch and cohesion. Mastering engineers meticulously apply these techniques to rectify frequency imbalances and dynamic inconsistencies, achieving a polished, professional sound.
Skillful use of EQ and compression is essential for a mix that translates well across various playback systems, ensuring your music resonates with your audience as intended.
Understanding loudness standards is crucial for guaranteeing your music maintains consistent playback volume across various platforms and devices. Loudness normalization and managing peak levels are key aspects of these standards, which involve adhering to specific LUFS targets. This ensures your tracks meet the dynamic range requirements and maintain clarity without distortion.
Here’s a quick overview of LUFS targets for popular platforms:
| Platform | LUFS Target | Dynamic Range |
|---|---|---|
| Spotify | -14 LUFS | High |
| Apple Music | -16 LUFS | Medium |
| YouTube | -13 LUFS | Medium |
| Tidal | -14 LUFS | High |
| Amazon Music | -14 LUFS | High |
Following these standards helps your music sound its best, regardless of where it’s played, and meets industry quality requirements for commercial releases.
When deciding between DIY and hiring professionals for mixing and mastering your music, it’s important to weigh the potential for bias against the benefits of a polished, competitive final product. DIY vs professional decisions often hinge on budget considerations, yet it’s essential to understand the implications of each choice. Mixing and mastering your own tracks might seem cost-effective initially, but personal bias can adversely affect the balance and quality of your music. This could lead to a less competitive final product, potentially undermining your efforts.
Outsourcing to professionals, on the other hand, guarantees a balanced and polished outcome. It enhances the overall quality and competitiveness of your music, elevating the listening experience. Although the costs for professional mixing and mastering are typically charged separately and can vary based on hourly rates or per-track fees, investing in these services can be strategic. A solid mix before mastering not only saves time but also reduces costs, making it an essential part of music production planning.
The mixing process involves meticulously blending and shaping individually recorded tracks to achieve a harmonious and impactful sound that resonates across various playback systems. As you immerse yourself in this essential phase, you’re not just adjusting volume levels or panning; you’re sculpting the audio landscape of your music. Understanding mixing concepts and adopting effective workflow strategies are key to revealing the full potential of your tracks.
Here are three vivid images to illustrate the process:
Mixing isn’t just about technical prowess; it’s an art form that requires a deep understanding of balance, stereo image, tonal balance, dynamics, and space. Tools like EQ, compression, and spatial processing are your brushes, and the studio monitors are your canvas. Embrace these mixing concepts and workflow strategies to steer your creative process, ensuring your music not only sounds professional but feels alive.
Mastering techniques, specifically equalization balancing and compression usage, play pivotal roles in finessing your final mix.
You’ll leverage equalizers to fine-tune frequencies for a balanced output, ensuring each element sits perfectly in the mix.
Meanwhile, understanding compression strategies aids in achieving the desired dynamics, enhancing the overall sound quality and impact of your music.
How can you guarantee your music’s final mix achieves that polished, professional sound? The answer lies in mastering the art of equalization balancing. By carefully adjusting frequency bands, you assure tonal balance and clarity. This process involves:
Through these techniques, you’ll achieve a more polished, professional, and cohesive sound, elevating your music to the standards of industry professionals.
Harnessing the power of compression in mastering greatly enhances the dynamic balance, level consistency, and overall sound quality of your music. Utilizing multiband compression enables precise dynamic shaping and frequency balancing across different bands, leading to a more polished sound.
Parallel compression, or New York compression, adds depth by mixing a heavily compressed signal with the original, enhancing impact without sacrificing dynamics. Understanding attack and release times is vital for effective transient control, shaping the attack of notes and the sustain of sounds, ensuring clarity and preventing muddiness.
Proper compression application during mastering not only improves clarity but also brings out intricate details, making your music more cohesive and professionally sounding.
Understanding the financial aspects of mixing and mastering is crucial, as costs can greatly vary based on the complexity of your music and the expertise of the engineer involved. Diving into the cost comparison, you’ll find mixing typically ranges from $500 to $1,500. This variation is influenced by the complexity of your tracks and the proficiency of the mixing engineer you choose. On the other hand, mastering is generally less expensive, with rates hovering between $40 and $180 per song. Factors such as the need for revisions can influence these costs.
For budget planning, consider the following:
Planning ahead for mastering after mixing not only streamlines the process but can also potentially reduce costs. Understanding these financial aspects ensures you’re well-prepared for the expenses involved in bringing your music to life.
While the time it takes to mix your tracks can greatly vary, mastering generally requires a shorter period, both influenced by the complexity and length of your music. Mixing can span a few hours per track on average, depending on the number of edits needed and the overall intricacy. Mastering, although quicker, still hinges on similar factors. Effective time management becomes essential here.
You’ll need to allocate adequate time for both processes, ensuring that neither is rushed, which could compromise the quality of your final product.
Cost efficiency also plays a significant role. Since mixing and mastering services often charge separately, understanding the time involved helps in anticipating expenses. Rates can depend on hourly services or per-track fees. By ensuring your mix is solid before moving to mastering, you not only save time but also potentially reduce costs by minimizing the need for revisions.
Planning your mastering phase immediately after mixing can further streamline your workflow. This foresight not only aids in time management but also in cost efficiency, preventing unnecessary delays and expenses. Remember, a well-planned timeline is key to a cost-effective and high-quality music production process.
Audio engineers frequently play a pivotal role in mixing and mastering music, guaranteeing the final product is balanced and polished. They specialize in adjusting volume levels, effects, panning, and overall sound quality to enhance the competitiveness and quality of the music. By utilizing tools like compression, limiters, EQ, and automation, audio engineers perfect the sound during these critical phases.
In your journey, understanding the roles and responsibilities of audio engineers is key. They’re not just technicians; they’re vital contributors to the creative process. Here’s what you can expect them to bring to the table:
Working with audio engineers means tapping into a wealth of knowledge that can significantly elevate your music. Their involvement ensures that your tracks aren’t just heard but felt, encapsulating the essence of your creative vision.
Before delving into the mixing process, it’s important that you’ve accurately recorded and organized all individual tracks to guarantee a smooth workflow. Track organization is the backbone of an efficient workflow, enabling you to navigate through your session effortlessly. This step involves labeling and color-coding each track for easy identification. It’s not just about aesthetics; it’s about maintaining clarity throughout the mixing process.
Next up is the critical phase of noise reduction and preparation. You’ll need to scrutinize each track for any signs of clipping, distortion, or noise issues. Addressing these problems early on is essential to make sure they don’t compromise the quality of your mix. Normalizing track volumes to a consistent level is another key preparation step. This avoids any sudden jumps or drops in volume, providing a more cohesive listening experience.
Furthermore, cleaning up your tracks is imperative. Eliminate unnecessary noise, clicks, pops, or other unwanted artifacts. This cleanup phase is about refining your tracks to achieve a cleaner, more professional mix. Remember, the time and effort you put into preparing your tracks for mixing can have a significant impact on the final outcome.
As you finalize your master, understanding mastering chain essentials is essential for adding the necessary polish.
Ensuring your tracks meet loudness standards compliance is key to maintaining competitive volume without sacrificing quality.
Conducting thorough quality control checks guarantees your music stands out with a professional, industry-standard sound, ready for distribution.
To finalize your master, you’ll need to carefully navigate through the mastering chain essentials, including EQ, compression, limiting, and dithering, each playing a critical role in enhancing the final mix. Focusing on signal chain optimization within your mastering chain is crucial for achieving a polished sound. Similarly, maintaining workflow efficiency throughout the mastering process guarantees a smooth shift from one stage to the next, preventing bottlenecks and fostering creativity.
Guaranteeing your mastered track complies with loudness standards is a vital step in the mastering process, as it ensures consistent playback levels across different listening platforms. Utilizing LUFS meters, a central tool in loudness metering techniques, allows you to measure and adjust the loudness levels of your track accurately. This ensures that your music meets industry guidelines without sacrificing its dynamic range.
Best practices include aiming for a target loudness level that aligns with the norms of major streaming services. While loudness normalization brings the benefit of uniform playback volume, a potential drawback is the reduction of dynamic contrast if not managed carefully. Adhering to these standards is essential for a cohesive listening experience and to prevent your tracks from standing out for the wrong reasons.
Quality control checks are crucial for mastering, as they involve meticulously evaluating audio quality, making adjustments, and confirming your final mix meets industry standards. This phase includes a thorough audio fidelity assessment to guarantee the highest sound quality and employs mastering software comparison techniques to select the best tools for your project.
Adhering to quality assurance protocols and leveraging the expertise of a mastering engineer with the right qualifications are pivotal. These steps guarantee your music achieves improved clarity, depth, loudness, and consistency across various playback systems.
Before you distribute your music, it’s pivotal to conduct a final check to make sure all tracks adhere to industry standards for quality and consistency. This step is vital for distribution optimization and involves making final tweaks to guarantee your music not only sounds professional but also meets the technical requirements of various platforms.
For quality assurance, the last steps include verifying that your mastered tracks maintain appropriate levels, frequencies, and dynamics for ideal playback. It’s also important to confirm the overall balance, stereo image, and depth, ensuring a polished and cohesive sound across all tracks.
| Aspect | Checkpoint | Goal |
|---|---|---|
| Levels & Dynamics | Ensure no clipping and dynamic consistency | Best Playback |
| Stereo Image | Verify width and balance | Coherent Sound Experience |
| Metadata | Confirm accuracy and completeness | Platform Compliance |
Lastly, check for any imperfections, artifacts, or distortions that may detract from the listening experience. Preparing the metadata, track order, and format specifications according to distribution platform requirements is also essential. This thorough final check guarantees your music is distribution-ready, offering your audience the finest possible listening experience.
The best way to learn mixing and mastering involves exploring various software choices, seeking mentorship opportunities, and constantly practicing with diverse music genres to refine your technical skills and precise audio engineering techniques.
To start mixing and mastering music, you’ll need essential gear like a DAW and monitors. Focus on optimizing room acoustics with treatments for accurate sound. Practice and patience are key to mastering these skills.
Mixing a song typically takes several hours, influenced by project complexity and your experience level. Mastering may require less time but also depends on these factors. Planning and skill can streamline the process.
Your mix should be around -6dB to -3dB before mastering to avoid the loudness war and preserve dynamic range. This headroom prevents distortion, ensuring a balanced master. Monitor levels closely in your DAW.
In summary, you’ve navigated the intricate domains of mixing and mastering, understanding their distinct roles and the pivotal tools required.
Whether you’ve decided to tackle this journey DIY or enlist a professional, preparation and knowledge are key. By meticulously preparing your tracks and thoroughly engaging with the mastering process, you’re setting your music up for ideal distribution.
Remember, the final check guarantees your masterpiece is distribution-ready, marking the culmination of your dedication and hard work.

Find out how these top 5 free audio mastering tools can transform your music production—discover the secrets inside!
Read More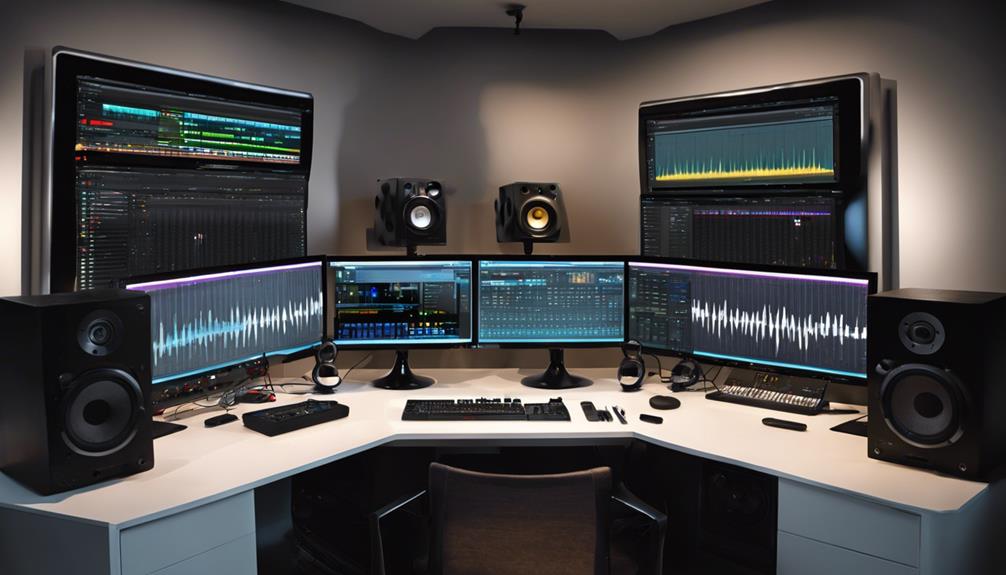
Find out which top 3 free audio mastering software solutions of 2024 will elevate your sound projects to professional levels—discover more inside!
Read More
Immerse yourself in the art of online audio mastering with this beginner's guide—discover the secrets to transforming your mixes into professional-quality tracks.
Read More