-
1× £199.00
Subtotal: £199.00


Subtotal: £199.00
To set up your audio mastering chain hardware, begin by choosing a high-quality analog-to-digital converter like the Burl B2 for balanced analog warmth and digital clarity. Integrate a parametric or linear phase EQ to precisely shape your audio frequencies. Add SSL G-Series or Vari-mu compressors to manage dynamics while maintaining tonal balance. Utilize color processors such as tube saturation for extra warmth. Finalize with a precise limiter, carefully setting thresholds to manage peaks without distorting the sound. Connect all hardware with balanced cables to maintain signal integrity. Properly calibrated, these steps will greatly enhance your mastering process, revealing deeper nuances in your projects.
To effectively master your audio, you must first understand how mastering hardware enhances your sound with unique characteristics such as warmth, color, and saturation. These elements are introduced through signal coloring techniques, pivotal in distinguishing between analog and digital processing. Analog units typically impart a natural, warm tonality due to inherent nonlinearities and subtle harmonic distortions, which can enrich the audio signal. On the other hand, digital processors offer precision and recallability but might lack the distinct sonic footprint of their analog counterparts.
Integrating this hardware into your setup involves understanding the hardware signal flow and how each piece interfaces with your digital audio workstation (DAW) via an audio interface. The signal flow path is essential: it begins at the DAW, travels through the audio interface, moves into the mastering hardware for processing, and then returns to the DAW. This routing is facilitated by using balanced cables (typically XLR or TRS) to ensure high-quality signal transfer and minimal noise interference.
You need to calibrate levels between your hardware and DAW carefully to maintain excellent signal integrity and avoid clipping or excessively low signals. Proper integration and calibration not only preserve the quality of your audio but also leverage the full potential of your mastering hardware for an impeccable final product.
Selecting the right analog-to-digital converter is essential for ensuring your audio maintains its quality and fidelity throughout the mastering process. When you’re aiming for a balance between analog warmth and digital precision, the choice of converter can make all the difference. Burl B2 converters come highly recommended for their ability to preserve the lush, warm tonal qualities of analog audio while ensuring the clarity and detail of digital audio isn’t compromised.
Revive Audio presents a more budget-friendly option, offering converters that don’t skimp on performance. These units provide a robust solution for mastering engineers looking to maintain high standards without breaking the bank. Similarly, Vintage Maker delivers competitive options that align well with mastering demands, ensuring that you don’t have to sacrifice quality for affordability.
If you’re considering bulk purchases or outfitting a larger studio, High Voltage Audio in Australia offers attractive deals on multiple units. Their offerings can help you scale your setup efficiently while ensuring each part of your chain reflects both technical excellence and cost-effectiveness.
Selecting the appropriate equalizer, an essential element in your mastering chain, involves evaluating frequency bands and ensuring the device provides superior precision and minimal noise for excellent audio quality. You’ll want to explore various EQ types based on your specific needs for frequency shaping.
Parametric EQs are highly versatile, allowing you to adjust the frequency, bandwidth, and gain. This flexibility is vital for fine-tuning specific parts of the frequency spectrum without affecting others, making it a go-to for precise adjustments. If maintaining the natural phase relationships in your audio is a priority, you should explore linear phase EQs. These are designed to preserve phase coherence across the frequency spectrum, ensuring a more transparent sound that faithfully represents the original recording.
For those looking to add a touch of analog warmth, vintage EQs might be your best bet. These units are renowned for their ability to color and enhance the audio subtly while still providing effective frequency shaping. By carefully selecting the right type of EQ for your mastering chain, you’ll enhance the overall sound quality, ensuring that your audio outputs are both pristine and dynamic.
Integrating compressors into your mastering chain is essential for managing dynamics and refining the sonic character of your audio. You’ll want to choose compressors that not only control peaks but also contribute to the overall tonal balance. Consider transparent compressors like the SSL G-Series for subtle level adjustments without altering the original sound too much.
For adding warmth and character, vari-mu compressors such as the Manley Variable Mu are your go-to. These units excel in smoothing out the audio while providing a pleasant harmonic distortion that enhances the listening experience. To tackle frequency-specific issues, turn to multiband compressors like the FabFilter Pro-MB. These allow you to apply compression to isolated bands, giving you precise control over complex mixes.
Don’t shy away from advanced compression techniques. Parallel processing, for instance, can be a game-changer. By blending the compressed signal with the original, you maintain dynamic integrity while beefing up the track. Additionally, experiment with sidechain compression for more creative compression applications. This technique uses the dynamics of one element to control the compressor acting on another, essential for achieving that polished, professional sound.
As you explore adding color processors to your mastering chain, it’s essential to choose the right units that align with the specific tonal characteristics you’re aiming for.
Whether you’re applying tube saturation, harmonic distortion, or transformer coloration, each processor must be meticulously selected and integrated.
Carefully tweaking the settings on these processors can dramatically refine and define the final output of your tracks, ensuring they carry the precise sonic signature you desire.
When choosing color processors, assess how they’ll complement your existing setup and the specific sonic enhancements they offer. Color processors, such as tube-based units or tape emulators, can deeply enrich your sound by adding warmth, saturation, or even subtle distortion. However, understanding their benefits and drawbacks is essential.
Here’s a quick guide on some popular types and their key settings:
| Type | Key Settings |
|---|---|
| Tube-based Units | Drive, Output |
| Harmonic Enhancers | Enhance, Frequency |
| Tape Emulators | Bias, Saturation |
| Analog Saturation | Tone, Mix |
Each processor’s settings allow you to fine-tune the coloration effect, giving you control over the enhancement techniques to achieve the desired tonal quality.
To effectively apply color processors in your mastering chain, you’ll need to understand how each type modifies the audio signal to achieve the desired impact on your final mix. These units, such as tube preamps, tape emulators, and analog consoles, introduce harmonic distortion, saturation, and specific tonal characteristics that can greatly enhance the sonic texture of your recordings.
Begin adjusting the settings on your color processors to precisely tailor the audio’s warmth and character. Focus on signal manipulation and tone shaping as you fine-tune parameters on devices like analog EQs and compressors. These tools are essential for adding desired coloration, saturation, and harmonics to your mix.
Experiment with various settings to find the ideal combination that enhances the character of your audio without compromising its original integrity.
Fine-tuning these processors is vital; slight adjustments can greatly affect the outcome. Use these tools strategically within your mastering chain, aiming to impart a cohesive and pleasing sonic signature to your final mix. Remember, the goal is to achieve a balance that complements your audio’s natural qualities.
As you finalize your audio mastering chain, understanding the types of limiters available is essential to tailoring your sound specifically. You’ll need to set the limiter thresholds precisely to control dynamic peaks without introducing unwanted distortion.
Each limiter type offers unique characteristics and response times, influencing how aggressively it reacts to signal peaks.
Understanding the different types of limiters is essential for effectively finalizing your audio mastering chain. You’ll want to grasp how each type operates to choose the best one for your project. Here’s a breakdown:
Now that you know the types of limiters available, setting the correct limiter threshold is essential to mastering your audio without compromising its quality. To control the maximum peak levels effectively, you’ll need to focus on peak management. Start by setting the limiter threshold to make sure it matches the desired loudness level and maintains the overall dynamic range of your track. It’s vital to avoid excessive limiting, as this can lead to distortion and disrupt the natural dynamics of the music.
Use the visual feedback from your limiter’s metering to carefully monitor the gain reduction applied. Threshold optimization involves a delicate balance, aiming to achieve the desired loudness without sacrificing audio quality.
To connect your hardware to the DAW, first make sure your audio interface has enough inputs and outputs. This step is important for maintaining a seamless flow between your devices and guaranteeing that all parts of your mastering chain are integrated without any signal loss or degradation.
Here is a clear step-by-step guide to setting up your connections:
Once you’ve connected your hardware units to the DAW, it’s essential to calibrate levels accurately to guarantee there’s no signal distortion or loss. Start with adjusting the output levels of the master bus. You’ll need to confirm these are set to nominal levels, which typically hover around 0 dBFS, depending on your specific equipment and desired headroom.
Next, focus on the input sensitivity of each hardware unit in your mastering chain. Adjust these so they align with the output levels you’ve set on your DAW. This step is important to maintain a consistent level and quality of the audio signal throughout the chain, preventing any clipping or unnecessarily low levels that could compromise the audio quality.
Additionally, perform output calibration on each hardware unit before the signal re-enters the DAW. This involves fine-tuning the output levels to ensure they sync perfectly with the DAW’s input. Use precise metering tools to check for any discrepancies and adjust accordingly.
As you evolve into mastering effects application, it’s vital to select essential effects that enhance your mix without overshadowing its original quality.
Consider the order of your signal chain carefully; the sequence in which you insert your hardware units can greatly impact the final sound.
Make sure you’re bypassing any plugins previously applied, to allow your hardware effects to work on an uncolored signal, achieving a clear and precise enhancement.
Selecting the right effects for your mastering chain, such as EQs, compressors, and limiters, is essential for achieving the precision and quality desired in your final audio output. Here’s how to optimize your effect chain for both creative soundscaping and technical finesse:
Experiment with these tools to fine-tune your audio, ensuring a polished and impactful final product.
Why should you carefully consider the order of effects in your mastering chain? Signal chain optimization is vital in mastering techniques to guarantee the highest quality audio output.
Initially, use corrective EQ to address any spectral imbalances, laying a solid foundation. Following this, dynamic processors, particularly compressors, further shape the audio’s dynamics, making it consistent and controlled.
Integrate stereo imaging and harmonic enhancement after these foundational steps to enhance depth and richness. This structured approach in your hardware configurations and audio processing strategies aids in achieving a clear, impactful sound.
To guarantee precision in your audio mastering process, start by using high-quality studio monitors that offer a flat frequency response. Proper speaker placement is important, as it affects how sound waves interact in your studio environment, impacting the accuracy of what you hear.
Here’s how to effectively monitor and adjust your output:
Implementing these steps will enhance your mastering results, ensuring a professional sound quality in your final productions.
After ensuring your master’s output levels are finely tuned and accurate, it’s time to focus on exporting the final master to meet various distribution standards. Applying advanced mastering techniques, you’ll need to generate high-resolution versions tailored for different platforms.
For instance, a 320kbps MP3 file is essential for promotional uses and easy sharing, ensuring that your track is accessible without compromising too much on quality.
To adhere to the best audio export strategies, confirm that the export settings exactly match those of your original session. This precision preserves the sonic integrity of your final master, ensuring that the sound remains true to your artistic vision.
Exporting in various formats, such as uncompressed WAV files for high-resolution streaming services, allows your music to meet the technical requirements of each platform while maintaining the highest quality.
In a mastering chain, you’ll incorporate EQ techniques to balance frequencies and use stereo expansion for broader imaging. Include compressors, limiters, and enhancers to dynamically refine and enhance the overall sound quality.
You should consider mixing into a mastering chain to refine your mixing philosophy and understand chain implications better. It offers early sonic adjustments, ensuring consistency and clarity in your final production.
For mastering, you’ll need high-quality EQs, compressors, and limiters. Don’t overlook mastering software essentials and room acoustic treatments to guarantee precision and accuracy in your audio output. Invest wisely in your gear.
You should place the limiter at the end of your mastering chain. This position maximizes its effectiveness in controlling peaks, impacting the stereo field, and ensuring a consistent, polished output without unwanted distortion.
Now that you’ve set up your mastering chain, it’s crucial you fine-tune each component.
Guarantee your analog-to-digital converter delivers pristine clarity, your EQ balances tones precisely, and your compressors add the necessary punch without distortion.
Don’t overlook the color processors; they’re essential for that signature sound.
Calibrate levels meticulously, apply effects judiciously, and monitor the output closely.
Finally, export your master with confidence, knowing each element of your hardware chain has been optimized for the best audio quality.

Save on beginner audio mastering hardware to learn essential skills affordably and unleash your creative potential—discover how to start without breaking the bank.
Read More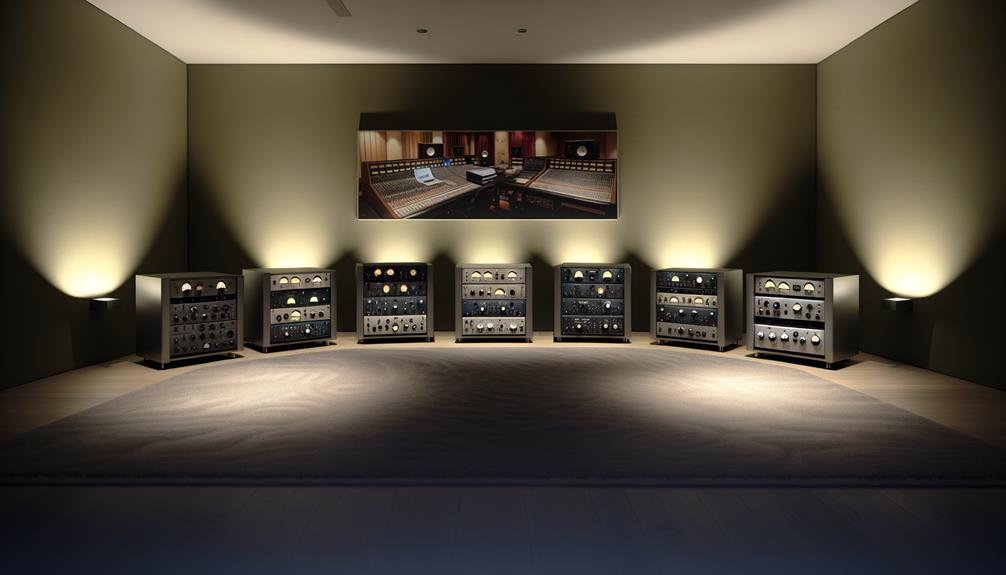
Perfect your tracks with industry-leading compressors like UAD Shadow Hills and Cytomic The Glue; discover which fits your mastering needs best.
Read More