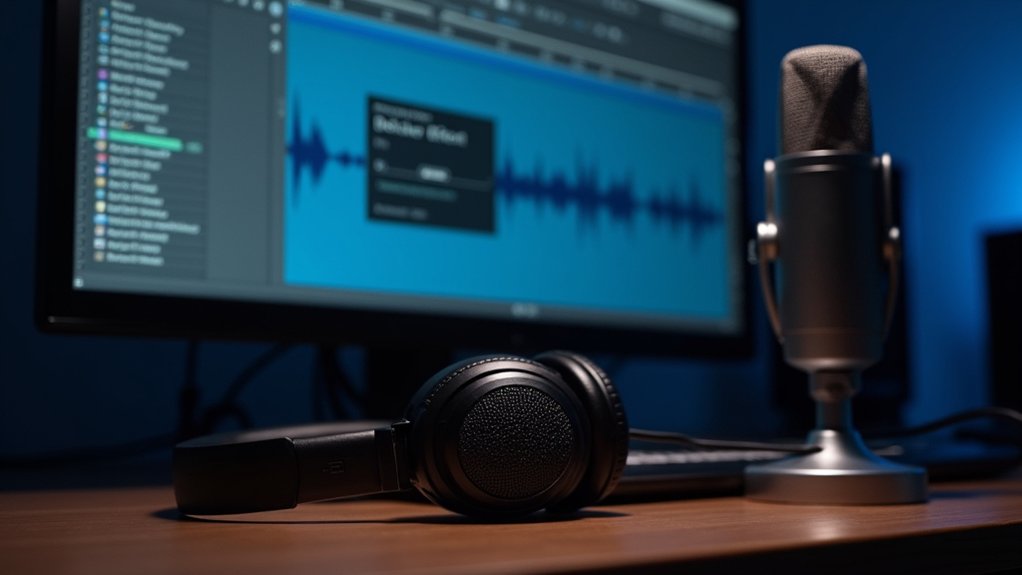
The Time Shift Tool in Audacity allows users to move audio clips precisely along the timeline or between tracks. Begin by selecting the desired clip with the Selection Tool, then activate the Time Shift Tool to drag the clip horizontally for fine alignment or vertically to reposition between tracks. Zooming in enhances control, and the snap-to-grid feature guarantees accurate placement without overlap. Further techniques and advanced methods can optimize editing efficiency as users progress.
Key Takeaways
- Activate the Time Shift Tool to drag audio clips horizontally along the timeline for precise placement.
- Zoom in on the waveform for finer control and accurate alignment of clip start and end points.
- Use the snap-to-grid feature to lock clips to exact time positions and prevent accidental misalignment.
- To move clips between tracks, simply drag them vertically while the Time Shift Tool is active.
- Ensure all tracks share the same sample rate before moving clips to avoid timing errors or misalignment.
Understanding Clips and Tracks in Audacity
In Audacity, audio is systematically organized into clips, which serve as the fundamental units for manipulation and arrangement within tracks. Each track can contain one or multiple clips, allowing for flexible editing workflows.
Tracks can be configured as mono, containing a single audio channel, or stereo, containing two channels for broader sound staging. Clips within tracks can be independently renamed, facilitating precise organization and efficient identification during complex projects.
An empty track serves as a container, awaiting the addition of new clips or the transfer of existing ones. When moving clips between tracks, it is essential to guarantee that the destination track offers adequate space to accommodate the clip in its entirety, preventing overlap or truncation.
Track-level settings apply uniformly to all contained clips. It is important to employ noise reduction techniques for improved audio quality after splitting the tracks.
Moving Audio Clips Horizontally on the Timeline
To reposition audio clips horizontally on the Audacity Timeline, the user must first select the desired clip using the Selection Tool before activating the Time Shift Tool.
Accurate alignment is achieved by zooming in for finer control and visually confirming the relationship between adjacent clips. This process guarantees that clips are shifted precisely without introducing timing errors or misalignment within the project structure.
Selecting and Shifting Clips
Efficient manipulation of audio clips on the Audacity timeline relies on accurate selection and horizontal shifting techniques. Users intending to move clips must first employ the Selection Tool to isolate individual or multiple audio clips.
Subsequently, activating the Time Shift Tool—identified by its bidirectional arrows—enables direct horizontal movement of the selected clip(s) along the timeline. For improved precision, zooming in using Cmd + 1 (or Ctrl + 1) is recommended before initiating the shift.
Key procedural steps include:
- Select the desired clip(s) with the Selection Tool.
- Switch to the Time Shift Tool to move clips horizontally.
- Zoom in for granular control over placement.
Maintaining these disciplined methods guarantees precise and efficient editing when working with complex audio sessions in Audacity.
Ensuring Accurate Alignment
Successful audio editing in Audacity often depends on precise horizontal alignment of clips, a task facilitated by the Time Shift Tool. To move a clip with maximum control, users should first zoom in on the Timeline using Cmd + 1 (Mac) or Ctrl + 1 (Windows), allowing for granular adjustments.
Accurate alignment is further guaranteed by monitoring sample rates across tracks; discrepancies may cause clips to drift out of sync. Prior to shifting, the Selection Tool can isolate specific audio segments, targeting only the intended material.
For ideal results, the snap-to-grid feature can be activated, helping clips lock seamlessly in place, or users may visually align waveforms to adjacent clips. This process-focused approach guarantees audio elements start and end exactly as required for professional results.
Shifting Clips Between Tracks Vertically
When shifting clips between tracks vertically in Audacity, users must first add a new audio track by selecting the appropriate option for mono or stereo under Tracks > Add New.
The Time Shift Tool enables precise dragging of clips across tracks, facilitating rearrangement and organization.
It is vital to guarantee compatibility between the clip type and the target track to preserve audio format integrity.
Adding New Audio Tracks
Navigate to Tracks > Add New and select either Mono Track or Stereo Track to add a new audio track in Audacity, depending on specific project requirements.
This step is crucial when the project demands additional layers, such as voiceovers or background music, to be managed efficiently. Once a new track is added, the Time Shift Tool can be utilized to move audio clips vertically between tracks.
Careful attention must be paid to track type compatibility—mono clips should be moved to mono tracks, and stereo clips to stereo tracks. Proper spacing must also be guaranteed to prevent audio overlap and playback issues.
- Add new tracks to organize separate audio elements.
- Move clips vertically, maintaining track format integrity.
- Ascertain target tracks have sufficient space for precise alignment.
Dragging Clips Across Tracks
After new audio tracks have been added to accommodate separate audio elements, the next step involves repositioning audio clips between these tracks for ideal project organization.
To move clips vertically in Audacity, users first confirm the presence of multiple tracks—created via Tracks > Add New > Mono Track or Stereo Track. The Time Shift Tool, identifiable by its bidirectional arrows icon, is then selected.
By clicking and dragging the desired audio clip up or down, the user can shift it between tracks, such as repositioning mono clips onto mono tracks for best audio fidelity. It is essential to preemptively create sufficient space in the destination track to prevent overlap, ensuring precise playback alignment.
Utilizing timeline zoom further facilitates meticulous vertical alignment during this dragging process.
Ensuring Track Type Compatibility
Track compatibility is a critical factor in maintaining audio integrity when shifting clips vertically between tracks in Audacity. The Time Shift Tool enables users to reposition clips, but attention must be paid to track type compatibility to prevent audio artifacts and improper channel routing.
Moving a mono clip to a stereo track, or vice versa, can result in playback anomalies or unintended mixing effects. To optimize workflow and guarantee seamless project assembly, consider the following technical guidelines:
- Verify Track Type: Confirm that the destination track matches the source clip (mono-to-mono, stereo-to-stereo) to preserve channel structure.
- Check Track Settings: Ensure sample rate and format of the destination track match the source for accurate playback and synchronization.
- Utilize Tools Together: Combine the Time Shift Tool with the Selection Tool for precise vertical alignment across compatible track types.
Creating Space for New Audio Clips
When preparing to insert new audio clips in Audacity, users must first create space by selecting the desired segment with the Selection Tool and removing it via Edit > Remove Special > Split Cut or the Ctrl + X shortcut. This process excises the selected audio, generating a gap on the Timeline. Following removal, the Time Shift Tool—represented by the bidirectional arrows icon—enables users to drag adjacent audio clips precisely into the newly available space. For adding external or copied audio, the cursor is positioned at the blank area, and the content is inserted using Ctrl + V. Verifying changes by playback guarantees seamless integration of the new material. In addition, managing multiple tracks facilitates organization, particularly when synchronizing elements like voiceovers, interviews, or background music within the project. Utilizing the Time Shift tool allows for accurate positioning of audio clips, which is essential for maintaining the quality and flow of the audio project.
Splitting Tracks Into Individual Audio Clips
Segmenting audio tracks into discrete clips in Audacity enhances granular control during editing workflows.
To split the clip, users employ the Selection Tool to highlight the target audio section directly on the Timeline. This highlighted region is then separated from the rest of the track via Edit > Clip Boundaries > Split, or by using Cmd + I (Mac) or Ctrl + I (Windows).
Each resulting clip becomes an independent audio entity, which can be repositioned with the Time Shift Tool. For efficient segmentation, Audacity also provides automated detection of silence gaps.
Key steps include:
- Highlight the audio region with the Selection Tool.
- Execute the split with Edit > Clip Boundaries > Split or shortcut.
- Use Edit > Audio Clips > Detach at Silences for automated segmentation.
When splitting clips, it is essential to verify edits align with intended start and end points through playback to ensure accuracy.
Trimming, Renaming, and Merging Clips
Refining audio clips in Audacity involves precise trimming, systematic renaming, and efficient merging to optimize project structure and editing efficiency. Trimming is executed by dragging clip edges or utilizing the Trim Audio command, confining audio to a selected region while non-destructively concealing unselected portions. The Edit > Remove Special menu, including Split Delete, allows targeted segment removal without introducing silence, enhancing editing precision. Renaming clips is accomplished by double-clicking the clip name in the track panel, facilitating coherent organization and swift identification within complex projects. Merging adjacent clips is streamlined through Edit > Audio Clips > Join or by right-clicking, consolidating segments for simplified manipulation. The resultant merged clip inherits the properties of the initial selection, ensuring continuity in applied effects and settings across the unified audio segment. When trimming, zooming in on the waveform helps achieve precise selection of start and end points, ensuring the desired audio portion is accurately retained.
Time-Stretching and Pitch Adjustment of Clips
While Audacity provides a range of basic editing tools, precise control over clip timing and pitch is facilitated through dedicated time-stretching and pitch adjustment functions.
Time-stretching audio clips is performed by holding the Alt key and dragging the clip’s edge, which simultaneously modifies both speed and pitch. For independent pitch adjustment, users can hold Alt and press the Up or Down arrow keys to change pitch in semi-tone increments without affecting playback speed.
Users should be aware that time-stretching impacts effects and may alter the stereo image, particularly if clips are not split into mono tracks beforehand. Additionally, improper placement of time-stretched clips can generate hidden audio data. High-quality stretching algorithms ensure clarity in sound modifications during pitch adjustments.
- Hold Alt and drag to time-stretch audio clips.
- Use Alt + arrow keys for pitch-only changes.
- Split stereo tracks before time-stretching for ideal fidelity.
Efficient clip navigation and selection in Audacity relies on mastering a combination of mouse actions, keyboard shortcuts, and context menu commands. Selecting an entire clip on a track is performed by a simple left-click within the waveform, instantly highlighting the audio segment for editing. To traverse between clip boundaries, Alt + , and Alt + . enable rapid movement to the previous or next clip, respectively. The context menu, accessed by right-clicking the waveform, provides direct access to essential editing functions. Precision selection of audio within a clip is achieved via the Selection Tool. Additionally, transport menu options allow cursor movement to adjacent clip boundaries, optimizing workflow across multiple tracks. Employing the Time Shift Tool allows users to move audio tracks with precision, ensuring optimal narrative flow for podcast production.
| Action | Method | Result |
|---|---|---|
| Select Entire Clip | Left-click waveform | Highlights full clip |
| Previous Clip Boundary | Alt + , | Moves cursor to prior clip |
| Next Clip Boundary | Alt + . | Moves cursor to next clip |
| Context Menu Options | Right-click waveform | Access edit/clip functions |
| Isolate Audio Segment | Selection Tool | Selects specific audio region |
Managing Sample Rates and Alignment for Precise Editing
Beyond proficient navigation and selection of clips, precise editing in Audacity requires careful management of sample rates and track alignment. Differing sample rates, such as 48000 Hz and 44100 Hz, can cause misalignment, impacting the accuracy of edits and the effectiveness of phase-related processes.
To guarantee all tracks align properly, users must standardize sample rates before employing the Time Shift Tool. This is performed by selecting Tracks → Resample and setting all tracks to a consistent rate. Failure to align tracks can result in erroneous clip timing and phase cancellation issues during mixing.
Key steps for managing sample rates and alignment:
- Verify and document each track’s sample rate.
- Use Tracks → Resample to match sample rates across tracks.
- Confirm temporal alignment before editing or phase inversion.
To improve compatibility and avoid issues, export audio as “WAV (Microsoft) signed 16-bit PCM” after ensuring the project sample rate matches the desired output rate.
Frequently Asked Questions
How Do I Precisely Move Audio in Audacity?
To achieve precise audio alignment and track manipulation in Audacity, one selects the Time Shift Tool, zooms in for fine control, guarantees uniform sample rates, and uses the Selection Tool to isolate or reposition specific audio segments on the timeline.
What Does the Time Shift Tool Do in Audacity?
The Time Shift Tool in Audacity enables users to perform precise audio editing by horizontally repositioning audio clips along the timeline. This process guarantees accurate track alignment, facilitates detailed organization, and allows for seamless integration of multiple audio elements.
How Do You Move Tracks by Time in Audacity?
To move tracks by time in Audacity, users engage in audio editing by selecting the Time Shift Tool, then drag tracks horizontally for precise track alignment. Utilizing zoom enhances accuracy, while matching sample rates guarantees proper synchronization between audio clips.
What Happened to the Time Shift Tool in Audacity?
The current question addresses changes to Audacity features, specifically the Time Shift tool. In recent versions, the Time Shift functionality has been integrated into the Selection Tool, requiring users to activate it via a modifier key rather than a dedicated icon.
Conclusion
Mastering Audacity’s time shift tool empowers users to manipulate audio clips with accuracy, whether moving segments horizontally along the timeline or vertically between tracks. By understanding clip management—splitting, trimming, and merging—editors can structure projects efficiently. Incorporating time-stretching and pitch adjustments further refines the final output. Guiding clips, maintaining alignment, and managing sample rates guarantee seamless integration. Through these detailed processes, precise audio arrangement in Audacity is both achievable and repeatable for complex editing tasks.