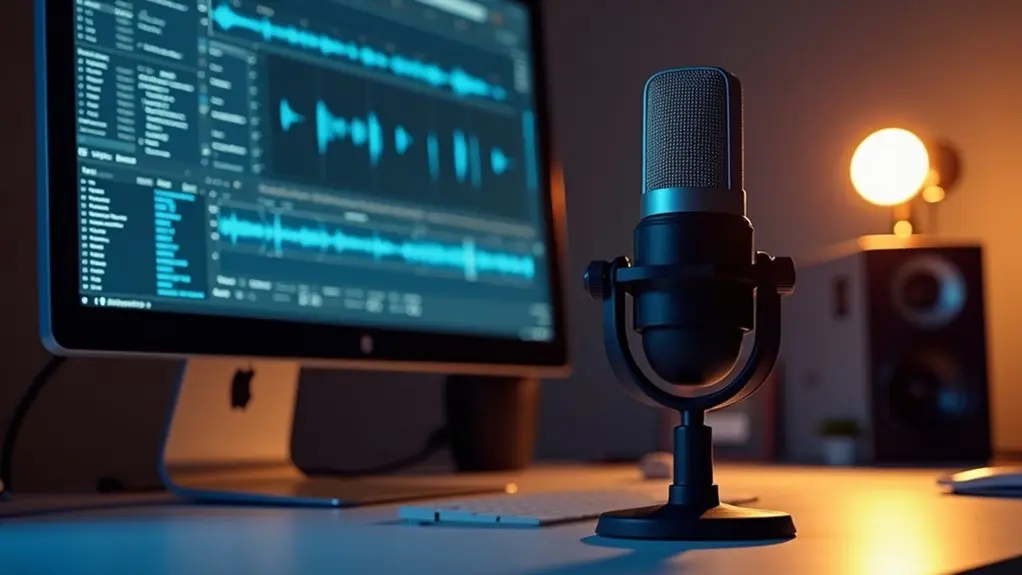
For broadcast-quality voice-over in Audacity, select a large-diaphragm condenser microphone and configure the sample rate to 44100 Hz, 16-bit mono. Maintain input peaks between -12 dB and -6 dB. Capture a clean noise profile and apply tailored noise reduction. Use high-pass EQ below 80 Hz and light compression at a 2.5:1 ratio. Normalize peaks to -3 dB. Export as WAV for maximum fidelity. Strategic processing further refines professional vocal clarity beyond these foundational steps.
Key Takeaways
- Set your sample rate to 44100 Hz or 48000 Hz, 16-bit depth, and record in mono for optimal voice-over fidelity and easy editing.
- Use a large-diaphragm condenser microphone with a pop filter, positioned 6-8 inches away, and record in an acoustically treated space.
- Adjust recording levels so peaks hit between -12 dB and -6 dB to avoid distortion and ensure clean, clear audio.
- Apply Noise Reduction in Audacity using a precise noise profile, and fine-tune settings to remove background noise without degrading vocal quality.
- Enhance clarity with EQ (high-pass below 80 Hz, slight mid-boost), gentle compression (2.5:1 ratio), and normalize peaks to -3 dB before export.
Setting Up Audacity for Optimal Voice Recording
Configuring Audacity for ideal voice recording requires precise calibration of core audio parameters and hardware settings.
Initiate setup by maneuvering to Audacity’s Preferences and selecting a sample rate of 44100 Hz or 48000 Hz, coupled with a 16-bit depth, to guarantee peak fidelity and compatibility.
Audio channels should be explicitly set to Mono, which streamlines post-production and minimizes file size.
Within the device toolbar, verify the correct input device is selected, ensuring the intended microphone is active.
Adjust input volume so recorded levels consistently peak between -12 dB and -6 dB, balancing signal clarity with headroom to avert digital distortion.
Employ a pop filter and maintain a 6-8 inch distance, speaking at a slight angle, to mitigate plosive transients and preserve vocal intelligibility.
Before exporting your final audio, make sure to set the sample rate to match your desired output quality, as this ensures the final product retains the intended sound fidelity and compatibility.
Choosing the Right Microphone and Recording Environment
Selecting a large-diaphragm condenser microphone is critical for capturing the full vocal spectrum and maximizing transient response in voice-over applications.
Microphone placement at a distance of 6–8 inches, combined with a pop filter, mitigates plosive artifacts and reduces proximity effect.
Acoustic treatment of the recording environment, such as installing absorptive panels and minimizing reflective surfaces, further guarantees signal integrity by suppressing ambient noise and reverberation.
Selecting Quality Microphones
Microphone selection underpins the fidelity of any voice-over workflow, directly influencing frequency response, transient detail, and overall vocal intelligibility.
Employing a quality microphone—such as a dynamic Shure SM7B or a condenser Audio-Technica AT2020—is foundational for capturing nuanced vocal timbres and maximizing audio quality. Ideal results are achieved by maintaining a proximity of 6-8 inches from the microphone, which controls the proximity effect and reduces breath noise.
Incorporating a pop filter is essential; it attenuates plosive sounds generated by hard consonants, preserving vocal clarity. To further refine the signal chain and mitigate unwanted coloration:
- Select microphones with tailored vocal response curves.
- Use pop filters for plosive attenuation.
- Perform rigorous level monitoring to preclude distortion and unwanted background noise.
Optimizing Recording Space
While even the most advanced audio equipment cannot compensate for a poorly treated environment, enhancing the recording space is critical for achieving professional-grade voice-over results.
Selecting a high-quality condenser microphone is essential, as its sensitivity and frequency response directly influence audio clarity. Microphone placement—ideally 6-8 inches from the mouth and slightly off-axis—minimizes plosive artifacts and breath noise. Integrating a pop filter further attenuates transient peaks caused by plosives such as “P” and “B.”
The recording environment must be acoustically neutral; minimizing background noise from electronic devices and utilizing soft furnishings or acoustic panels to absorb sound reflections is imperative.
Iterative testing of microphone positions and alternate recording spaces enables systematic identification of favorable conditions, maximizing clarity and minimizing unwanted acoustic interference.
Configuring Sample Rate, Bit Depth, and Channels
Configuring Audacity for voice-over production requires precise adjustments to sample rate, bit depth, and channel configuration within the Preferences menu. Utilizing a sample rate of 44100 Hz or 48000 Hz and a 16-bit depth optimizes the balance between audio fidelity and file efficiency. Selecting mono channel further streamlines the workflow by reducing data overhead and simplifying subsequent editing processes. For optimal recording quality, high-quality microphones such as CAD E100S or Blue Yeti are recommended to capture clear and professional sound.
Optimal Sample Rate Selection
Selecting ideal sample rate, bit depth, and channel configuration is critical for achieving professional-grade voice-over recordings in Audacity. The sample rate directly impacts the frequency range and the clarity of the captured audio, serving as a foundational parameter for high quality, professional audio.
Industry standards dictate using a sample rate of either 44100 Hz or 48000 Hz, ensuring both compatibility and quality recording across most platforms. Consistency between the selected sample rate and project settings mitigates potential resampling artifacts or playback issues.
For best results, the following technical approach is recommended:
- Choose a sample rate of 44100 Hz for general voice-over, 48000 Hz for broadcast or video.
- Verify project sample rate matches input device configuration.
- Conduct environment-specific tests to determine best fidelity versus resource usage.
Choosing Bit Depth
After establishing an appropriate sample rate, attention shifts to configuring bit depth and channel settings within Audacity’s preferences.
Bit depth fundamentally impacts audio quality by determining the dynamic range and noise floor during recording. For voice-over applications, a 16-bit depth is the industry standard, balancing high-fidelity audio capture with manageable file sizes, particularly when exporting in WAV format.
While higher bit depths, such as 24-bit, offer incremental improvements in dynamic range, the resulting files require increased storage and processing resources, with negligible perceptible benefits for spoken word content.
Selection of Mono channels is imperative for voice-over recording, as it streamlines workflow and optimizes disk usage. Users should verify these settings under Audacity’s Preferences to guarantee that audio quality is maximized for professional deliverables.
Adjusting Input Levels and Mic Placement
Optimize input levels by setting the Audacity recording volume to achieve consistent peaks between -12 dB and -6 dB, minimizing the risk of digital clipping while preserving dynamic range.
It is imperative to select the correct input device within Audacity’s Preferences to guarantee the designated microphone is utilized for maximum fidelity.
Proper mic placement is critical: position the microphone approximately 6-8 inches from the mouth, employing a pop filter to attenuate plosive sounds and improve vocal clarity.
Additionally, orienting the microphone slightly off-axis relative to the mouth further mitigates direct breath noise interference.
To enhance overall sound quality, consider using professional-grade microphones to improve capture quality and ensure a clean recording.
- Set input volume in Audacity for peaks between -12 dB and -6 dB.
- Use a pop filter to suppress plosive sounds, enhancing vocal clarity.
- Position microphone 6-8 inches away and slightly off-axis to minimize breath noise.
Applying Noise Reduction for Cleaner Audio
Optimizing noise reduction in Audacity begins with isolating a representative segment of background noise to establish an accurate noise profile. Precision in this initial capture directly influences the algorithm’s ability to discriminate between unwanted noise and desired vocal frequencies. Subsequent adjustment of reduction parameters—such as threshold, sensitivity, and frequency smoothing—enables tailored attenuation, ensuring maximal noise suppression without introducing processing artifacts. To effectively minimize unwanted sounds, highlight a segment of audio that contains only background noise before obtaining the noise profile.
Capturing Accurate Noise Profile
A crucial step in achieving professional voice-over quality in Audacity involves capturing an accurate noise profile to facilitate effective noise reduction. This process requires isolating a segment consisting exclusively of ambient noise—free from speech or transient sounds—to avoid contaminating the Noise Profile.
By maneuvering to Effect > Noise Reduction and selecting “Get Noise Profile,” Audacity benchmarks the spectral characteristics of the unwanted background, enabling precise subtraction during subsequent processing.
To enhance audio quality and preserve overall volume integrity, users should execute the following:
- Select a clean noise-only section for ideal Noise Profile extraction.
- Use “Get Noise Profile” in the Noise Reduction effect to analyze unwanted frequencies.
- Apply the Noise Reduction process to the entire track, ensuring consistent noise removal across all audio regions.
Fine-Tuning Reduction Settings
Precision in noise reduction hinges on methodical parameter adjustment within Audacity’s Noise Reduction effect. After capturing the noise profile, practitioners must set the Noise Reduction parameters judiciously to optimize overall audio quality.
The recommended baseline—12 dB for Noise Reduction (dB), 6 for Sensitivity, and 3 for Frequency Smoothing (bands)—acts as a starting point, but fine-tuning is essential. Operators should utilize the Preview function to monitor changes in real time, ensuring that noise attenuation does not induce artifacts or degrade the vocal timbre.
Excessive reduction compromises quality, introducing a hollow or metallic character. By incrementally adjusting settings and continuously previewing, users strike a balance between diminishing background noise and preserving the integrity of the voice-over, achieving a clean, professional result.
Using Equalization to Enhance Vocal Clarity
While post-processing voice recordings, equalization (EQ) serves as a critical tool for isolating and manipulating specific frequency bands to optimize vocal intelligibility and tonal balance.
Employing the Filter Curve in Audacity, practitioners can surgically enhance vocal clarity by targeting defined frequency ranges and applying measured gain adjustments. For instance, attenuating frequencies below 80 Hz eliminates low-end rumble, mitigating muddiness.
Subtle boosts—approximately +3 dB—within 165-255 Hz for female voices and 85-155 Hz for male voices augment warmth and tonal richness without imparting artificial coloration. The real-time preview function is indispensable for iterative assessment and fine-tuning.
Consider the following workflow:
- Apply a high-pass filter below 80 Hz to reduce muddiness
- Boost frequency bands specific to gender for warmth and presence
- Utilize real-time preview for precision monitoring
A flat line in the Filter Curve EQ interface represents unaltered audio frequencies, providing a starting point for precise frequency adjustments.
Recommended Compression Settings for Balanced Dynamics
Compression, as a dynamic range control mechanism, is essential for evening out vocal levels and ensuring intelligibility in voice-over production.
Ideal compression settings in Audacity begin with a Threshold set to approximately -18 dB, targeting lower volume levels and capturing subtle vocal nuances without compromising natural tonality.
Employing a Ratio of 2.5:1 yields moderate gain reduction, enhancing speech clarity while retaining expressive dynamics. The Noise Floor should be established at -40 dB, effectively excluding background noise from compression influence.
Attack Time is ideally configured at 1.81 seconds, preserving transient articulation by allowing initial signal peaks to pass uncompressed. Release Time, set to 11.1 seconds, facilitates gradual gain restoration, preventing perceptible volume fluctuations and ensuring cohesive dynamic flow throughout the voice-over track.
Proper configuration minimizes noise floor and enhances clarity, contributing to a polished and professional sound in your voice-over recordings.
Normalizing Audio for Consistent Loudness
After dynamic processing stages, normalizing audio in Audacity is a critical operation to standardize peak amplitude and achieve uniform loudness across a voice-over track.
The normalize function recalibrates the audio’s maximum amplitude, typically setting the peak at -3 dB, which prevents overload and guarantees consistent loudness throughout the project. This step is performed by selecting the entire audio track (Ctrl + A), directing to Effect > Normalize, and defining the desired peak amplitude parameter.
Normalization is process-essential for achieving industry-standard output, particularly in podcasts and audiobooks. It is best applied post-compression, as compression can alter loudness levels. Normalizing audio ensures peak amplitude normalization to prevent distortion and improve audio clarity.
Key benefits include:
- Maintains consistent loudness across all audio segments
- Eliminates unintended volume disparities
- Prepares audio for professional distribution standards
Limiting Peaks to Prevent Distortion
Peak limiting constitutes a crucial safeguard in the voice-over production chain, functioning to constrain transient audio spikes and prevent digital clipping exceeding 0 dBFS.
In audio editing software such as Audacity, the Limiter effect systematically attenuates segments of the audio signal that surpass a user-defined threshold. Practitioners typically set the peak amplitude by configuring the Limit (dB) parameter to -2 dB, thereby enforcing a soft limit that suppresses distortion without degrading tonal integrity.
This process is ideally executed post-normalization to guarantee uniform loudness prior to limiting peaks. Utilization of the waveform display provides a visual reference to identify outlier transients.
Consistent monitoring of audio levels during both tracking and editing mitigates the risk of exceeding the limiting threshold, yielding professional-grade, distortion-free output. Noise Reduction and Dereverb Plugin methods can further enhance audio clarity by targeting persistent background noise and echo, ensuring the final product maintains vocal intelligibility and professional quality.
Using Spectrogram and Other Tools for Quality Control
While waveform analysis offers a basic overview of amplitude fluctuations, employing the Spectrogram view in Audacity enables granular inspection of frequency content across the temporal range.
The spectrogram visually maps energy distribution across frequency bands, facilitating the detection of anomalies such as clicks, glitches, or persistent noise. Through these spectral insights, operators can precisely target problematic regions for noise reduction and equalization, enhancing vocal clarity without sacrificing critical harmonics.
Customizable display parameters further improve the ability to isolate frequency-specific artifacts. Integrating the spectrogram with auxiliary tools such as the Equalizer and Compressor heightens the fidelity of post-production workflows.
Key quality control practices include:
- Visualizing transient noises masked in waveforms.
- Isolating and reducing broadband or tonal noise.
- Monitoring frequency overlap for maximum vocal clarity.
Exporting Your Voice-Over With the Best Settings
Once post-processing has been completed and audio integrity has been verified, exporting the voice-over in Audacity requires selecting ideal file format and encoding parameters to guarantee broadcast-standard deliverables.
To export the audio, navigate to File > Export > Export Audio, then select the preferred output type. For maximum fidelity, opt for the WAV file format, which preserves all sonic detail without lossy compression.
For distribution where file size is a concern, the MP3 format is suitable—ensure a minimum bit rate of 128 kbps for professional-grade clarity.
Prior to export, normalize the audio peak amplitude to -3 dB, securing consistent loudness and preventing digital clipping. Assign a logical filename and save location to streamline asset management.
Conduct cross-device playback verification post-export.
Remember to utilize a bit depth of 24-bit during the editing process to capture a broader dynamic range and minimize distortion.
Troubleshooting Common Issues in Voice-Over Production
How can persistent technical issues undermine voice-over production workflows? Systematic troubleshooting is essential to maintain ideal audio recording quality. Common challenges include improper input configuration, fluctuating volume, and the need to reduce plosive sounds.
Confirming the microphone is correctly set as the input device in Audacity’s Preferences eliminates signal routing errors. Input volume must be calibrated to peak between -12 dB and -6 dB, preventing distortion and maintaining headroom.
- Misconfigured input devices can make recording unusable due to routing errors.
- Background noise infiltration often requires targeted Noise Reduction, utilizing precise noise profiling and batch processing for clean output.
- Excessive breath or plosive artifacts necessitate deploying noise gating or pop filters, fine-tuning threshold parameters to reduce plosive sounds during vocal passages.
Implementing acoustic treatments like heavy curtains and foam panels can further enhance recording quality by absorbing sound and reducing unwanted reverb.
Precision in these interventions guarantees professional, consistent results.
Frequently Asked Questions
How to Make Your Voice Sound More Professional in Audacity?
Achieving a professional voice in Audacity involves precise microphone placement, optimizing room acoustics, and performing vocal warm ups. Advanced editing techniques such as noise reduction, equalization, compression, and normalization further refine vocal timbre, clarity, and overall audio fidelity.
What Are the Best Voice Over Settings for Audacity?
Ideal Audacity voice-over settings emphasize voice clarity tips such as precise microphone placement advice, implementing noise reduction techniques with spectral profiling, and applying audio editing essentials like dynamic range compression, peak normalization, and consistent sample rate/bit depth configuration for professional results.
How to Get the Best Audio Quality on Audacity?
Achieving ideal audio quality in Audacity necessitates high-fidelity audio equipment, strategic microphone placement, and rigorous soundproofing techniques within the recording environment. Coupled with appropriate input gain staging, these factors greatly mitigate ambient noise and enhance signal-to-noise ratio during capture.
What Is the Best Audio Recording Setting for Audacity?
Ideal audio recording settings in Audacity require utilizing a high-quality audio interface, selecting a condenser microphone, controlling the recording environment for minimal noise, and applying advanced editing techniques such as spectral noise reduction, compression, and precise equalization during post-production.
Conclusion
Optimizing Audacity for voice-over requires meticulous calibration of input gain, selection of high-fidelity sample rates (44.1–48kHz), and deployment of 24-bit depth for dynamic range. Critical steps include spectral analysis for artifact detection, multi-band noise reduction, and transient limiting to maintain headroom. Strategic mic placement and environmental attenuation further reduce acoustic anomalies. Exporting finalized audio in lossless PCM formats guarantees preservation of sonic integrity. Adhering to these protocols ensures broadcast-quality, artifact-free voice-over deliverables.