

No products in the cart.
So, you’ve decided to take the plunge and explore the depths of Antares Autotune in FL Studio, but where do you begin?
Well, let’s start by unraveling the mysteries of this powerful tool and how to wield its potential to enhance your vocal tracks.
Whether you’re a seasoned producer or just dipping your toes into the world of pitch correction, understanding how to navigate and harness the capabilities of Antares Autotune is crucial for achieving that professional sound.
But fear not, for with the right guidance, you’ll soon be sculpting pitch-perfect performances in no time.
Contents
hide
Key Takeaways
- Download and install Antares Autotune from the official website or an authorized distributor.
- Configure the settings of Antares Autotune, such as utilizing the Low Latency feature and experimenting with the Formant Knob.
- Apply Antares Autotune to vocal tracks in FL Studio by opening the plugin and adjusting the settings for pitch correction.
- Fine-tune the pitch correction in Antares Autotune using the Formant Knob, Resetting Buttons, Tracking Knob, and Graph Mode.
Installing Antares Autotune in FL Studio
To install Antares Autotune in FL Studio, follow these steps:
- Download the software from the official website or an authorized distributor.
- Run the installer and follow the on-screen instructions to complete the installation process.
After the installation is complete, you need to ensure that FL Studio detects and activates the Antares Autotune plugin. Here’s how:
- Open FL Studio and go to the ‘Options’ menu.
- Select ‘Manage Plugins’ from the dropdown menu.
Now, you need to check if the Antares Autotune plugin is detected and activated. If it doesn’t appear in FL Studio, follow these steps:
- Check the plugin search path settings in FL Studio.
- Make sure the correct folder is being scanned for plugins.
Once you have successfully installed and activated the Antares Autotune plugin, you can easily access it from the FL Studio plugin browser. This will allow you to use it in your projects.
Remember to double-check that the plugin is activated and working properly before using it in your music production.
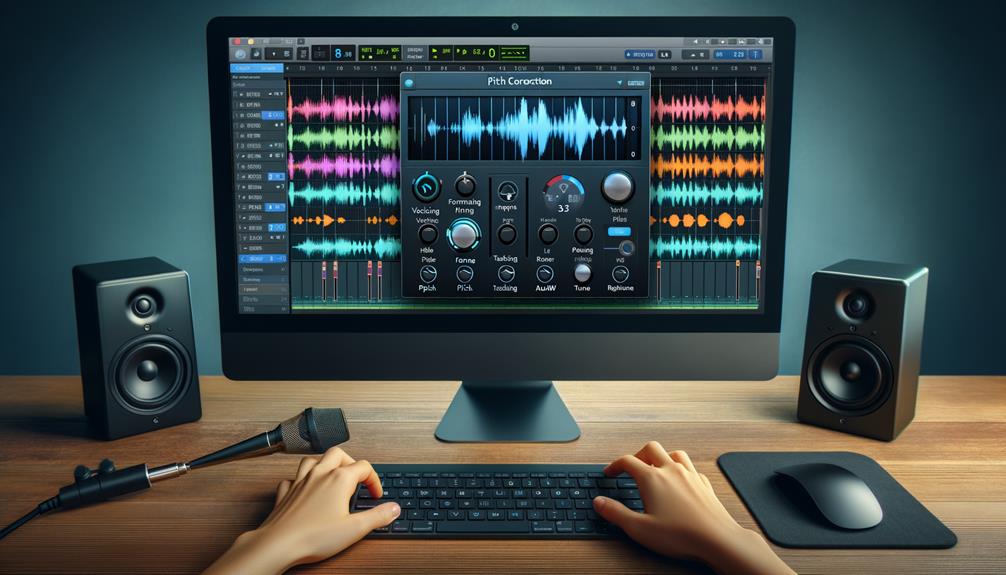
Configuring Antares Autotune Settings
You can configure Antares Autotune settings to customize the vocal sound in real-time using features such as the Low Latency feature and the Formant Knob. Here’s how to optimize the settings for an innovative vocal sound:
- Low Latency Feature: Utilize this feature to reduce resource usage while maintaining high-quality mode. It’s especially beneficial for users with mid or low budget PCs, enabling them to use Autotune without straining their system resources.
- Formant Knob: Experiment with real-time vocal sound manipulation, creating effects like a baby pitch voice or a dark scary voice. This feature is easy to use and can be automated for creative mixing purposes, adding unique character to your vocals.
- Resetting Buttons: Save time and ensure consistency in vocal tuning by double-clicking or pressing alternate and double-clicking to reset buttons to their original settings. This prevents accidental changes to Autotune settings and maintains the desired sound.
- Tracking Knob: Adjust the accuracy of Autotune when tuning vocals to enhance precision. This easy-to-use feature provides flexibility based on the cleanliness of vocal recordings, ensuring optimal vocal tuning results.
Applying Antares Autotune to Vocal Tracks
After configuring the Antares Autotune settings to optimize the vocal sound, the next step is to apply the software to your vocal tracks in FL Studio. This process is easy to use and can significantly enhance the quality of your vocal recordings.
First, open the Antares Autotune plugin on the vocal track you want to tune. Once the plugin is open, you can easily adjust the settings to achieve the desired level of pitch correction. The low latency feature ensures smooth real-time performance, even on mid or low budget PCs, allowing you to use Antares Autotune without excessive strain on your system.
Utilize the formant knob to experiment with different vocal effects, such as a baby pitch voice or a darker, scarier tone. Additionally, the tracking knob provides flexibility to adjust the accuracy of vocal tuning based on the cleanliness of your recordings.
With the reset buttons and graph mode for pitch correction and shifting, Antares Autotune offers a user-friendly interface for precise vocal editing in FL Studio.
Fine-Tuning Pitch Correction in Antares Autotune
Explore the advanced pitch correction capabilities of Antares Autotune by fine-tuning settings for optimal vocal performance.
- Formant Knob: The real-time adjustment feature allows for creative manipulation of vocal sound, creating various effects such as a baby pitch voice or a dark, scary voice. It’s really easy to use and provides a versatile tool for manipulating vocal tonality during playback.
- Resetting Buttons: Double-clicking or pressing alternate and double-clicking resets buttons to their default settings, saving time and effort compared to manual readjustments. This ensures consistency and prevents accidental alterations to Auto-Tune settings, maintaining the integrity of vocal tuning settings.
- Tracking Knob: The accuracy of Auto-Tune can be adjusted based on the recording environment. Higher values enhance accuracy in quiet recording spaces, while lower values compensate for ambient noise in project studios. This feature provides flexibility to accommodate different recording conditions, enhancing the precision of vocal tuning, adapting to varying recording environments.
- Graph Mode: This mode enables pitch correction and shifting of vocals, providing a clear visual representation of vocal notes for precise adjustments. Accessed by changing the graph mode within the Auto-Tune interface, it’s really easy to use and facilitates seamless pitch modification.
Tips for Optimizing Antares Autotune Performance

Optimizing Antares Autotune performance involves leveraging the advanced pitch correction capabilities discussed in the previous section, ensuring efficient use of resources and precise vocal tuning. To achieve optimal performance, consider the following tips:
| Tips for Optimizing Antares Autotune Performance | Description |
|---|---|
| Low Latency Feature | Enable the Low Latency feature in Auto-Tune for smooth operation on mid or low budget PCs without excessive resource consumption. This ensures real-time pitch correction with minimal system strain. |
| Formant Knob | Experiment with the Formant Knob to creatively alter vocal sounds in real-time. Adjusting the formant can produce effects such as the popular “baby pitch” or a deeper, darker vocal tone, adding a unique touch to your tracks. |
| Resetting Buttons | Utilize the Resetting Buttons to quickly revert back to default settings. This saves time and ensures consistency in vocal tuning, especially when working on multiple tracks or sections within a project. |
Frequently Asked Questions
How Do I Add Autotune to FL Studio?
To add Auto-Tune to FL Studio for vocal processing, simply install the plugin and open it in the software. Adjust the settings like formant and tracking knobs to achieve the desired vocal effects, enhancing your sound effortlessly.
How Do I Add Antares Autotune?
To integrate Antares Autotune, simply install the plugin in your FL Studio. Then, access it from the plugin menu and apply it to your vocal track. Experiment with the various settings to achieve the desired pitch correction and vocal effects.
Does FL Studio Have Stock Autotune?
No, FL Studio doesn’t have stock Autotune. However, it features NewTone, a native pitch correction plugin. For advanced capabilities, you can integrate third-party Autotune plugins. NewTone and these plugins allow professional vocal tuning within FL Studio.
What Is the Best Autotune Plugin for FL Studio?
When comparing autotune plugins for FL Studio, consider ones like Auto-Tune and Waves Tune Real-Time for innovative vocal tuning. These plugins offer advanced features like low latency, formant control, and graphical pitch correction for creative vocal effects.
Conclusion
So there you have it! Using Antares Autotune in FL Studio is a great way to enhance your vocal tracks.
By installing the plugin, configuring the settings, applying it to your vocals, and fine-tuning the pitch correction, you can achieve professional-quality results.
Don’t forget to optimize performance by using the low latency feature and experimenting with the formant knob.
With these tips, you’ll be well on your way to creating amazing music with Antares Autotune in FL Studio.


