No products in the cart.
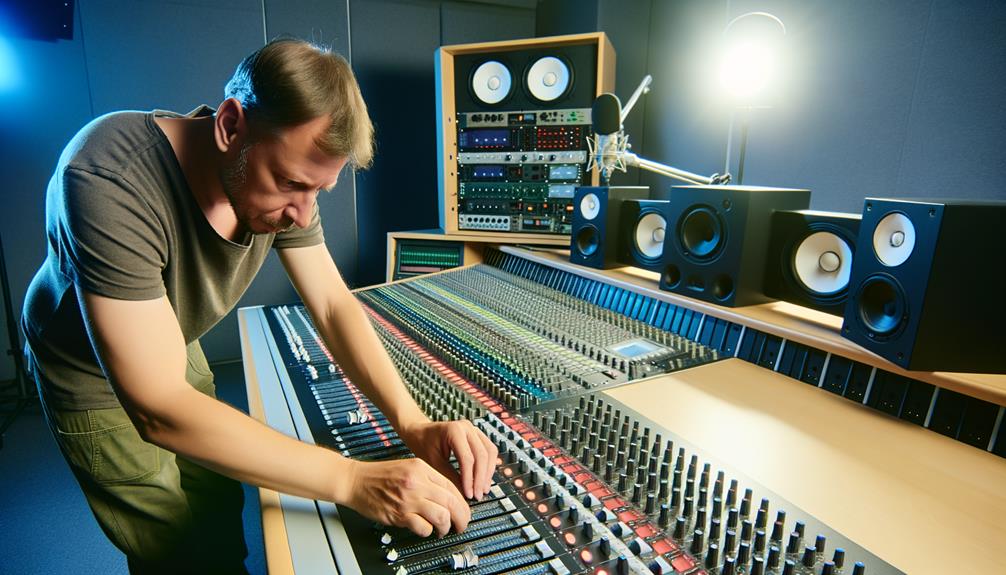
To achieve balance in your audio EQ, start by identifying the dominant frequencies using a spectrum analyzer. Next, make sure you’re cutting frequencies that muddy the mix and subtly boosting those that enhance its elements. Concentrate on low-end management, ensuring your bass doesn’t overpower but supports the track. For mid-frequencies, avoid over-boosting to prevent masking, and aim for clarity by making incremental changes. Use high-pass filters discriminately to retain fullness while controlling highs for clarity and to prevent listener fatigue. Employing these strategies judiciously will mark a clear path to cleaner, more professional-sounding mixes that reveal further nuances in sound management.
Key Takeaways
- Use a spectrum analyzer to visualize and identify overlapping or problematic frequencies.
- Apply subtle cuts to reduce muddiness and enhance clarity without altering other frequencies drastically.
- Boost dominant frequencies slightly to highlight key elements of the mix, ensuring they stand out cleanly.
- Employ high-pass and low-pass filters judiciously to clean up unnecessary low and high frequencies without thinning the sound.
- Regularly compare the EQ’d track against reference tracks to maintain a balanced and competitive sound quality.
Understanding Frequency Spectrum
To effectively balance your audio mix, it’s essential to understand the frequency spectrum, which is segmented into sub-bass, bass, low mids, mids, upper mids, and highs. Each of these ranges plays a critical role in the overall sound, and knowing which instruments typically occupy these areas can dramatically improve your EQ spectrum analysis and help achieve a cleaner mix.
Frequency range identification is the first step in audio mixing. For instance, the sub-bass (20-60 Hz) includes the lowest frequencies, often felt rather than heard, like the rumble of a bass drum. The bass range (60-250 Hz) covers the fundamental notes of the rhythm section, important for the drive of most genres. Moving up, the low mids (250-500 Hz) often contain the lower range of guitars, pianos, and richness of the lower human voice.
Mastering these distinctions allows you to manipulate the EQ settings to enhance or suppress certain elements without affecting others, essential for maintaining tonal balance. Remember, each adjustment impacts the overall texture and clarity of your mix, so continual adjustment and analysis are key to achieving the desired sound.
Low-End Management Techniques
Monitoring low-end frequencies with a spectrum analyzer guarantees you accurately gauge their distribution in your mix. This tool is essential when you’re aiming to achieve a clear and robust bass frequency response. By visualizing the low-end, you can pinpoint areas that are either too prominent or lacking, enabling precise EQ adjustments.
When working with bass-heavy sections, consider looping these parts to focus your EQ techniques specifically on refining the balance. This method helps in isolating problematic frequencies and ensures that your adjustments create the desired impact without unintended consequences in other parts of the spectrum.
Another effective approach is to level-match reference tracks within your EQ tools. This isn’t just about volume; it’s about consistent perceived loudness in the low-end across different sections of your mix. By comparing your track to well-balanced reference tracks, you can discern discrepancies in low-end management and adjust accordingly.
Lastly, don’t hesitate to apply low shelf EQ adjustments. These are important for aligning your track’s low-frequency balance with that of your reference tracks, establishing a solid foundation that supports the rest of your mix. This technique allows for a controlled and consistent bass response, essential for a professional-sounding track.
Mid-Frequency Adjustment Strategies
As you shift focus to mid-frequency adjustment strategies, it’s essential to identify vocal clarity issues that often reside within this range.
Employ harmonic balance techniques to make sure that instruments blend smoothly without overpowering the vocals.
Pay careful attention to how adjustments between 250Hz and 3kHz can drastically alter the perceived clarity and depth of your mix.
Identify Vocal Clarity Issues
Focus on the 1 kHz to 3 kHz range to pinpoint and resolve vocal clarity issues in your audio mix. This specific frequency area is important for enhancing vocal intelligibility. When you’re dealing with vocal EQ troubleshooting, addressing this range can greatly improve clarity and make sure vocals don’t get lost among other sounds.
- Boost Presence: Increase slight gains around 2 kHz to enhance vocal presence without harshness.
- Cut Muddiness: Reduce frequencies slightly at 1 kHz to diminish muddiness and improve articulation.
- Avoid Over-Boosting: Keep adjustments subtle to prevent frequency masking with other instruments.
- Listen in Context: Always EQ vocals while playing back other tracks to ensure they blend well.
- Iterate Adjustments: Make incremental changes and repeatedly test to find the perfect balance for clarity enhancement.
Harmonic Balance Techniques
To effectively enhance your mix’s warmth and presence, consider boosting mid-range frequencies using a broader ‘Q’. This approach, known as mid-range sculpting, allows for a more natural integration of sound elements, emphasizing the harmonic content without overwhelming the mix.
Employ frequency masking techniques to prioritize which instruments dominate these essential frequencies, ensuring clarity and reducing sonic clutter.
Additionally, use frequency separation techniques to delineate instruments in the mix, avoiding harmonic distortion effects that can arise from frequency overlap. Careful application of these strategies will prevent harshness, maintaining a clean and dynamic sound stage.
High-Frequency Control Methods
As you explore high-frequency control methods, utilizing high-pass filters allows you to remove unwanted low-end frequencies that muddy your mix.
Adjusting shelf equalization can effectively boost or attenuate certain high-frequency ranges, tailoring the clarity and brightness of your tracks.
These techniques are essential for maintaining a balanced mix and preventing ear fatigue in your final audio output.
Utilizing High-Pass Filters
High-pass filters are essential for trimming frequencies below a specified threshold, thereby eliminating unwanted low-end rumble and enhancing mix clarity. When you’re mastering the art of audio mixing, understanding how to use high-pass filters can significantly improve your sound’s quality. These filters are vital for maintaining a clean and focused mix, especially in crowded arrangements.
- Set the threshold carefully: Find the right cut-off point to avoid losing essential body from your tracks.
- Listen critically: Adjust the high-pass filter while continually monitoring the impact on your sound.
- Use sparingly: Overuse can lead to a thin mix.
- Experiment with slopes: Steeper slopes for more drastic cuts, gentler ones for subtler changes.
- Prioritize tracks: Apply more aggressively on tracks that don’t require strong low ends.
Master these filter techniques and frequency precision to elevate your audio mixes.
Adjusting Shelf Equalization
Adjusting shelf equalization often dramatically transforms the high-frequency response, enhancing the clarity and brightness of your audio mix. When you employ this technique, you’re engaging in a crucial frequency shaping method that boosts or cuts all frequencies beyond a certain threshold—typically impacting the tonal balance and contributing to the overall mixing aesthetics.
In audio mastering, the precise application of high-frequency shelf EQ is crucial. It enhances the airiness and sparkle in vocals or instruments, essential for a polished, professional sound. By mastering how shelf EQ modifies the frequency spectrum, you can achieve the desired tonal character, ensuring your mix is both vibrant and meticulously balanced.
Utilizing Dynamic EQ
Dynamic EQ lets you precisely manage specific frequencies in your mix, adapting in real time to signal levels to maintain sonic clarity. This tool is a cornerstone of dynamic processing and is particularly useful in handling frequency dynamics that can otherwise compromise the quality of your audio. Unlike static EQ settings, Dynamic EQ reacts to the audio signal and applies only necessary adjustments, ensuring a balanced output without constant manual tweaking.
Here are some key insights on utilizing Dynamic EQ effectively:
- Set Appropriate Thresholds: Determine the level at which the Dynamic EQ should start affecting the signal. Too low a threshold may lead to over-processing.
- Adjust Ratio Carefully: This controls the intensity of the dynamic effect. A higher ratio means more aggressive frequency attenuation or boosting.
- Frequency Specificity: Focus on problematic frequencies. Dynamic EQ allows for precise control, avoiding the alteration of other harmonic content.
- Monitor Gain Reduction: Keep an eye on how much attenuation is being applied to avoid an unnatural sound.
- Use Side Chain Inputs: For advanced control, use side chain inputs to trigger frequency adjustments based on another signal’s levels.
The Role of Harmonic Balancing
Why is harmonic balancing essential in audio production?
It guarantees that all frequency components harmonize perfectly, enhancing both clarity and depth in your recordings. Harmonic balancing is about fine-tuning the frequency levels so that harmonics align with the fundamental tones, important for avoiding muddiness and ensuring a clean, well-defined sound. This alignment not only improves tonal richness but also supports a polished mix with remarkable depth and dimension.
In mastering your tracks, incorporating frequency masking techniques into your mastering chain is crucial.
These techniques help in managing how different sounds interact within the same frequency range, preventing any one element from overpowering others unnecessarily—this is key to maintaining balance across all harmonics.
Furthermore, you must consider harmonic distortion and its impact on stereo imaging.
Controlled harmonic distortion can add warmth and fullness to your mix but needs careful adjustment to preserve the integrity of stereo imaging. This balance ensures that each element sits well in the mix, providing a cohesive and harmonious blend that resonates well across various playback systems. By mastering these aspects, you elevate the overall quality of your audio production, ensuring it sounds professional and immersive.
Tips for Equalizer Settings
When adjusting your EQ settings, it’s essential to identify and resolve frequency overlaps that can muddy your mix. Focus on the highs and lows; boosting or cutting these ranges can dramatically affect the clarity and punch of your audio.
Use spectrum analyzers to pinpoint exact frequencies needing adjustment and make sure your tweaks enhance the overall sound quality without introducing artifacts.
Identify Frequency Overlaps
To effectively manage your mix, start by using a spectrum analyzer to pinpoint where different sounds overlap in frequency ranges. Identifying these overlaps is important for tackling frequency masking and enhancing the clarity of your tracks.
Here are strategies to help you handle frequency overlaps:
- Utilize EQ Cuts: Apply narrow cuts to minimize specific frequency clashes between instruments.
- Enhance Frequency Separation: Allocate unique frequency spaces for each instrument to avoid muddiness.
- Adjust EQ Gains Sparingly: Use subtle adjustments to prevent over-EQing, which can degrade sound quality.
- Apply Dynamic EQ: Target frequency ranges that dynamically interfere with each other during particular segments.
- Monitor Consistently: Regularly check your adjustments with a spectrum analyzer to maintain clarity and balance across the frequency spectrum.
Adjust Highs and Lows
Adjusting the high and low frequencies in your mix is important for achieving a clear and balanced sound. Boosting high frequencies above 8kHz enhances the clarity and sparkle in vocals and instruments, vital for sparkle enhancement. Conversely, cutting low frequencies between 20-60Hz helps eliminate rumble and muddiness, refining the overall mix clarity.
Implementing a high-pass filter to effectively remove unwanted low-end frequencies further cleans up the audio.
Experimentation with these EQ settings is key to discovering the ideal balance that provides both tonal balance and definition. By methodically adjusting highs and lows, you’ll guarantee each audio element maintains its distinct tonal definition, ultimately leading to a more polished and professional sound.
Avoiding Common EQ Mistakes
Avoiding common EQ mistakes guarantees your mix retains its natural warmth and character while enhancing clarity. When you’re mastering EQ troubleshooting techniques, it’s important to understand the delicate balance between over-processing and achieving the perfect mix. Frequency masking can obscure your mix’s finer details, so careful adjustment is necessary to make sure every element shines through.
Here are five critical tips to help you navigate EQ adjustments without falling into common pitfalls:
- Limit High-Pass Filter Use: Avoid thinning your mix by using high-pass filters sparingly. Overuse can remove essential low-end warmth.
- Be Cautious with Aggressive Boosts: Keep boosts under 5dB to avoid distortion and maintain sound authenticity. This restraint helps preserve the track’s natural dynamics.
- Choose the Right EQ Plugin: Invest in high-quality EQ plugins that offer precision and transparency. This is essential for maintaining sound integrity and ensuring EQ workflow efficiency.
- Avoid Excessive Adjustments: Subtle changes often yield the best results. Over-EQing can lead to an unnatural and processed sound.
- Start with Minimal Cuts or Boosts: Implement small adjustments first and evaluate the impact before making further changes. This method allows for more controlled and effective EQ modifications.
Reference Tracks for EQ Matching
Using reference tracks effectively allows you to precisely match EQ settings and guarantee your mix achieves a professional tonal balance. The importance of reference tracks lies in their role as benchmarks that guide your EQ decisions. You’ll find that these tracks provide a clear standard for frequency distribution and sound quality, ensuring your adjustments enhance rather than detract from the mix.
However, while the benefits of EQ matching through reference tracks include improved consistency and accuracy, there are limitations and pitfalls to take into account. One major limitation is the potential for over-reliance, which can stifle your creative input and lead to a mix that lacks originality. Furthermore, mismatches in recording environment or equipment between the reference and your own track can lead to skewed EQ decisions.
To mitigate these issues, select reference tracks that closely align with your production’s intended sound and context. Analyze them critically to identify both prominent and subtle frequency characteristics. Use this analysis to inform your EQ adjustments, ensuring they’re made judiciously and in a way that complements the unique elements of your own track. This approach maximizes the effectiveness of reference tracks while preserving the distinctiveness of your mix.
Advanced EQ Automation Tips
While reference tracks provide a static benchmark for EQ settings, advanced EQ automation offers you the flexibility to make dynamic adjustments that adapt to changes within your track. By employing advanced EQ techniques, you can enhance the clarity and depth of your mix through precise, adaptive frequency modulation and custom EQ curves.
Here are some essential tips for mastering advanced EQ automation:
- Automate Frequency Bands: Shift frequency bands dynamically in response to the musical elements. This approach helps in maintaining clarity and balance throughout the track.
- Adjust Gain and Q Factor: Automate gain settings and Q factors for surgical precision, allowing you to emphasize or diminish specific frequencies at different moments.
- Respond to Audio Signal Changes: Set up dynamic EQ that reacts to signal thresholds, ensuring the best tonal balance based on the audio content.
- Create Movement and Depth: Use frequency modulation to introduce movement in your audio, giving life to static elements.
- Program Evolving Textures: Employ custom EQ curves to progressively shape the sound, crafting evolving textures that enhance the listener’s experience.
These techniques equip you with the control to refine your sound dynamically, catering to both subtle nuances and broad tonal shifts.
Frequently Asked Questions
How Do You Balance a Sound Equalizer?
To balance a sound equalizer, start by understanding room acoustics and applying EQ techniques. Identify and cut problem frequencies, adjust bands subtly, and use reference tracks to make sure your adjustments are effective.
What Frequencies Should I EQ Out?
To EQ out problematic resonances, target 200-500Hz for muddiness, 400-800Hz for boxiness, and 5-8kHz for harshness. Enhance harmonics by carefully boosting relevant upper frequencies for clarity without causing ear fatigue.
How Do You Balance Frequencies?
To balance frequencies, you’ll adjust EQ bands, enhancing stereo imaging and dynamic control. Focus on cutting problematic frequencies subtly, aiming for a balanced spectrum that supports a clear, polished audio output.
What Is the Best Frequency for Mastering Eq?
The best frequency for mastering EQ depends on your track, but mastering plugins and stereo imaging enhancements often focus on adjusting frequencies from 20Hz to 20kHz to optimize audio balance and clarity.
Conclusion
Now that you’ve explored key EQ techniques, remember to manage your low-end carefully, adjust mid-frequencies with precision, and control high frequencies delicately.
Utilize dynamic EQ to handle complex signals and refine your settings based on professional reference tracks.
Always avoid common EQ pitfalls by not over-processing.
Apply advanced EQ automation to enhance dynamic content accurately.
By following these strategies, you’ll achieve a balanced, clear, and professional audio mix that stands out in any listening environment.