Audacity is a cross-platform audio editor enabling users to record, import, and edit sound files with precise tools. After installation, configure audio devices in preferences and set input/output hardware. Record new tracks or import files, then use the selection and split tools for non-destructive editing. Apply effects like noise reduction, fades, and normalization to enhance clarity. Export audio in standard formats with embedded metadata. Step-by-step guidance will reveal advanced features and efficient editing workflows.
Key Takeaways
- Download and install Audacity from the official website, then configure your audio input and output devices in Preferences.
- Record audio by connecting a microphone, clicking the red “Record” button, and stopping when finished.
- Import audio files by dragging them into Audacity or using File > Import, and edit using cut, split, and trim tools.
- Remove unwanted noise using Effects > Noise Reduction and improve quality with normalization or amplification features.
- Export your edited audio in your preferred format, fill in metadata, and review settings before sharing the final file.
Setting Up Audacity on Your Computer
Before initiating any audio projects in Audacity, users must first obtain the latest compatible version from the official website, selecting the appropriate installer for their operating system—Windows, Mac, or Linux.
During the section on setting up Audacity on your computer, installation requires administrative permissions; users should follow on-screen instructions to guarantee correct file placement and program registration.
Post-installation, it is essential to configure audio device preferences: navigate to Preferences and select the desired input and output hardware, as well as set the appropriate sample rate for maximum fidelity. Users on macOS should install Soundflower or a similar virtual audio device to capture system audio effectively.
For those working with proprietary audio formats (such as M4A or WMA), integration of the FFMPEG library is mandatory.
This section guarantees Audacity is fully operational before proceeding, establishing a robust foundation for audio editing workflows.
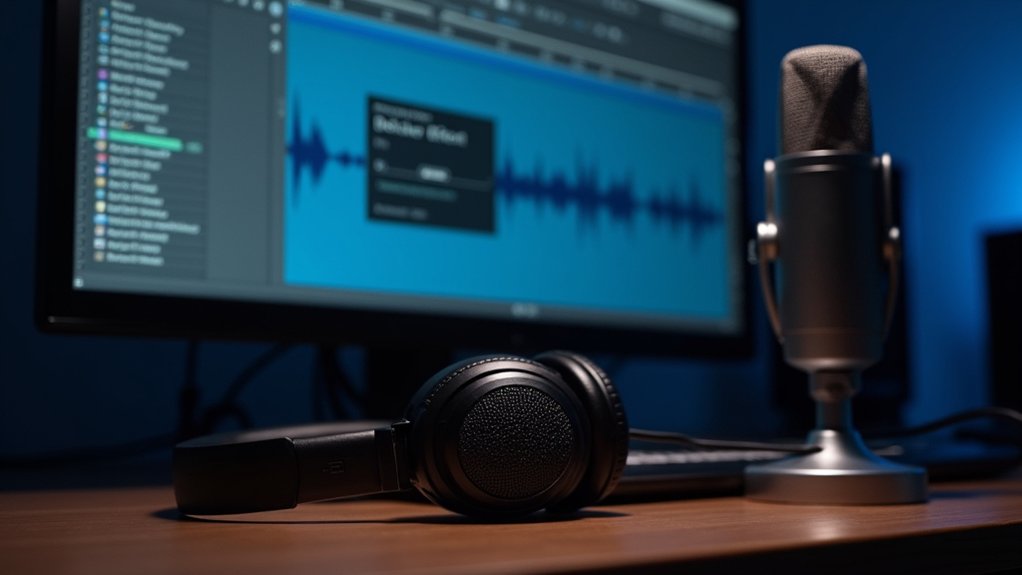
Orientation within Audacity’s user interface begins with the main workspace, dominated by the waveform display, which visually represents imported or recorded audio as undulating blue patterns—larger blobs correspond to increased amplitude, while sharp spikes signify transient peaks. Audio file manipulation is facilitated by rounded handle bars on each audio clip, allowing users to drag and reposition segments for precise editing. The layout is theme-dependent; the Classic theme may differ from the latest version 3.6 interface. For enhanced level analysis, the RMS display can be activated, adding another layer of visual feedback. Extensive documentation is accessible via the support site or reference manual for troubleshooting and feature exploration. Utilizing noise reduction techniques in Audacity helps maintain audio clarity during editing.
| UI Element | Functionality |
|---|---|
| Waveform Display | Visualizes amplitude of audio file |
| Handle Bars | Move or trim audio clips |
| RMS Display | Shows average loudness |
| Support Site | User guidance and troubleshooting |
| Reference Manual | In-depth, searchable instructions |
Recording Your First Audio Track
To begin recording in Audacity, the user must first connect a microphone and select it as the input device within the software’s preferences menu. Initiating audio capture is accomplished by clicking the red “Record” button, while the session is terminated by pressing “Stop.” This process guarantees that the selected input is accurately tracked and stored within the project for subsequent editing. Users can enhance their recordings by creating an Aggregate Device to combine multiple audio sources, ensuring balanced and high-quality sound capture.
Setting Up Microphone
Microphone configuration in Audacity requires initial hardware connection and system-level recognition. Properly setting up microphone hardware is essential for ideal audio capture during recording. Following a structured approach guarantees the microphone is recognized and selected as the primary input source within Audacity.
Attention to input volume calibration prevents signal distortion and promotes clean audio acquisition. To streamline the setting up microphone process, users should adhere to the following steps:
- Connect the microphone to the computer and verify system-level detection in audio settings.
- Launch Audacity and navigate to the device toolbar, selecting the desired microphone as the active input.
- Adjust the input volume slider within Audacity to achieve proper gain without peaking.
- Visually confirm readiness by observing the input level meter for real-time signal response.
Starting and Stopping Recording
Once the microphone has been configured and verified within Audacity, the recording process can commence. Starting and stopping recording is governed via the transport toolbar. The red “Record” button initiates audio capture from the selected input device, as specified in the dropdown menu adjacent to the microphone icon. During recording, real-time monitoring of the waveform display is critical; amplitude variations (blue blobs) correspond to input volume. To halt recording, the user clicks the brown “Stop” button, which finalizes and renders the waveform on the timeline. Temporary interruptions employ the yellow “Pause” button, which enables seamless resumption. Below is a procedural summary:
| Action | Toolbar Button | Functionality Description |
|---|---|---|
| Start | Red Record | Begin audio capture from input |
| Pause | Yellow Pause | Temporarily halt without finalizing |
| Resume | Yellow Pause | Continue from last paused position |
| Stop | Brown Stop | End recording and render waveform |
| Monitor Input | Waveform | Visualize amplitude and signal levels |
Importing Existing Audio Files
Importing existing audio files in Audacity involves accessing the File menu, selecting Import, and choosing Audio, or alternatively, dragging and dropping the desired file directly into the workspace. This process is vital for users wishing to manipulate previously recorded content.
Audacity supports standard formats such as WAV and AIFF natively; however, importing proprietary formats like M4A or WMA necessitates the installation of the FFMPEG library for full compatibility.
Upon successful importing, the software renders the audio as a waveform, providing a visual metric for sound level assessment and stereo channel verification.
- Navigate to File > Import > Audio for precise control.
- Drag-and-drop functionality accelerates importing existing audio files.
- Confirm FFMPEG is installed for expanded format support.
- Visually inspect waveform display for correct stereo representation.
Editing and Cutting Audio Sections
Editing and cutting audio sections in Audacity involves selecting specific portions of the waveform for deletion, trimming, or splitting. Users can employ the selection tool to highlight segments for removal or utilize the Split Clip function to divide audio at precise points. Trimming can be executed by adjusting clip boundaries, allowing for reversible, non-destructive edits. Audacity supports various audio formats, including MP3, WAV, FLAC, AIFF, and OGG, enhancing its versatility in handling different audio types.
Selecting Audio for Deletion
Audacity enables users to efficiently remove unwanted audio by selecting and deleting specific sections within a waveform.
The process of selecting audio for deletion is essential for refining content and maintaining clean, professional results. The waveform interface visually represents amplitude, allowing users to pinpoint areas for removal with accuracy.
Here is a concise, process-driven approach:
- Identify Section: Visually inspect the waveform for undesirable portions, using larger blue blobs as indicators of louder segments.
- Select Audio: Click and drag across the targeted area to highlight the precise section intended for deletion.
- Execute Deletion: Press the Delete or Backspace key to instantly remove the highlighted audio from the track.
- Verify Edit: Play back the modified audio to confirm quality and guarantee seamless continuity post-deletion.
This workflow guarantees ideal results when selecting audio for deletion.
Trimming and Splitting Clips
Harnessing precise control over audio content, users can refine their projects by trimming and splitting clips within the Audacity interface.
Trimming a clip involves hovering over the upper third of a clip’s edge until the trim tool appears, then clicking and dragging to adjust its length. This process is non-destructive, preserving the original audio data for reversible editing.
Splitting clips is accomplished by clicking at the desired split point on the waveform, right-clicking, and selecting “Split Clip,” or using the Ctrl+I (Cmd+I) shortcut. This action separates audio into distinct clips, allowing for granular modifications.
Selecting a specific waveform region and splitting further enhances organizational capability. The visual waveform guides accurate selection, optimizing workflow, and supporting efficient audio editing through precise trimming and splitting clips.
Reducing Background Noise
Eliminating unwanted ambient noise from an audio track involves isolating a representative segment of pure background noise, typically found during silent portions of the recording.
In Audacity, noise reduction is a multi-step process that demands precision to avoid introducing audio artifacts or diminishing vocal clarity. The workflow is as follows:
- Isolate Noise Profile: Highlight a section containing only background noise, then access Effect > Noise Reduction and select “Get Noise Profile” to capture the noise signature.
- Apply to Target Audio: Select the full track or desired regions, return to Effect > Noise Reduction, and adjust parameters such as reduction level, sensitivity, and frequency smoothing.
- Preview Adjustments: Use the “Preview” function to audit changes and refine settings for best results.
- Commit Noise Reduction: Click “OK” to apply, ensuring a cleaner, more professional audio output.
Before applying the reduction, make sure to record a few seconds of silence in your audio file, which can be used for a more accurate noise profile.
Applying Fades and Effects
Applying fades in Audacity involves selecting specific regions of an audio track and using the Fade In or Fade Out functions to achieve smooth volume shifts.
Additional enhancements, such as Reverb or Equalization, are accessible via the Effect menu and can be tailored to the selected audio segment.
Users can preview changes in real time and revert any undesired effects with the undo command for precise control during editing.
Creating Smooth Fade Effects
Creating smooth fade effects in Audacity involves precise manipulation of audio volume over time to guarantee seamless shifts. Mastery of fade effects is essential for avoiding abrupt starts or ends in audio projects.
Operators can utilize Audacity’s built-in tools to generate both fade-in and fade-out effects with accuracy. The process is governed by deliberate selection and application of effects or manual adjustments for advanced control.
To effectively implement fade effects, consider the following procedural steps:
- Select the desired section at the start of a clip, then apply Effects > Fade In to achieve a gradual volume increase.
- For diminishing volume, select the end section and use Effects > Fade Out.
- Employ the Envelope Tool (F2) for custom fade curves via control points.
- Adjust the selection length to fine-tune fade duration and guarantee smooth shifts.
Enhancing Audio With Effects
Enhance audio tracks in Audacity by employing a range of built-in effects designed to optimize sound quality and achieve professional results. Users can apply the Fade In effect to highlighted clip beginnings via Effects > Fade In, ensuring seamless shifts. To conclude segments professionally, select the end and use Effects > Fade Out. Noise Reduction is achieved by sampling a noise profile, then applying Effects > Noise Reduction to minimize unwanted background sounds. For precise loudness adjustments, Effects > Amplify increases volume without distortion, especially effective with the RMS display turned on for accurate monitoring. Additionally, Effects > Truncate Silence removes extended pauses, improving pacing. The following table summarizes key effects:
| Effect | Primary Function |
|---|---|
| Fade In/Out | Smooth volume shifts |
| Noise Reduction | Remove background noise |
| Amplify | Adjust loudness (RMS display) |
Adjusting Volume and Normalization
When refining audio tracks in Audacity, precise volume adjustment and normalization are essential to achieve ideal sound quality and consistency.
Volume corrections are performed using the Effects menu, where selecting Amplify allows users to increase or decrease the track’s loudness according to specific requirements.
Normalization, accessed via Effects > Normalize, recalibrates the overall volume to a uniform level across the track, maintaining the dynamic range.
To guarantee accuracy during the adjusting volume process, activating the RMS (Root Mean Square) display provides a visual reference for average levels.
Critical considerations include:
- Use Amplify to fine-tune audio loudness.
- Apply Normalize to guarantee consistent track volume.
- Monitor RMS values for precise level adjustment.
- Check for clipping post-adjustment to avoid distortion.
- Utilize Loudness Normalization to tailor your audio to industry standards and ensure consistent listener experience across different playback systems.
Splitting, Moving, and Trimming Clips
Manipulating audio segments in Audacity relies on efficient use of the split, move, and trim functions to structure a project with accuracy.
Splitting is achieved by selecting the precise point on the waveform and using the “Split Clip” function via right-click or the Ctrl+I (Cmd+I) shortcut. For ideal accuracy in splitting, users should zoom in on the waveform, ensuring clean changes at edit points.
To move clips, click and drag the rounded handle bars at the clip edges, facilitating precise arrangement within the timeline.
Trimming is performed by hovering over the upper third of a clip’s edge and dragging to the desired length; this method is non-destructive and reversible.
Regular saving of the project mitigates the risk of data loss during editing, ensuring that your work is preserved and can be easily retrieved if needed.
These tools collectively enable meticulous adjustment and sequencing of audio content for coherent results.
Exporting Your Finished Audio Project
Finalize an Audacity project by exporting the edited audio to a preferred file format using the “Export Audio” function located in the File menu.
Exporting your finished audio project involves a sequence of steps to guarantee ideal compatibility and quality for distribution. Users should be detail-oriented in naming conventions, file type selection, and metadata organization.
The following steps outline the technical process:
- Navigate to File > Export Audio to access export options for your finished audio project.
- Select a file format (e.g., MP3, WAV, OGG) based on intended use; MP3 is standard for digital distribution.
- Assign a descriptive file name and configure metadata tags such as artist and track title for accurate identification.
- Execute the export, resulting in a finalized audio file ready for uploading or sharing.
For enhanced audio clarity, consider applying a high-pass filter before the export process to remove any low-frequency noise that may affect the quality of your final output.
Frequently Asked Questions
Is Audacity Easy-To-Use for Beginners?
Audacity’s user interface employs intuitive navigation, waveform visualization, and accessible toolbars. Beginners efficiently execute audio import, selection, trimming, and effect application. Integrated tutorials and community resources facilitate rapid skills acquisition, supporting a streamlined, process-oriented editing workflow for novices.
What Are the Basic Steps for Editing Audio?
Basic audio editing steps involve importing the audio file, selecting and deleting unwanted regions, applying audio filters for noise reduction or equalization, splitting and trimming clips for precision, then exporting the finalized track with updated metadata in the desired format.
Is Audacity No Longer Free?
The Current Question concerns Audacity’s cost structure. Despite ongoing development and community involvement, no Licensing Changes have compromised its free, open-source status. Users retain unrestricted access to features, with optional donations supporting sustainability, across all supported operating systems.
What Is the Disadvantage of Audacity?
The primary disadvantage of Audacity lies in user limitations, including the absence of native support for advanced audio formats, non-intuitive multi-track editing, limited real-time effects processing, and lack of integrated video editing functionality for seamless audio-video synchronization.
Conclusion
In conclusion, Audacity provides a robust suite of tools for beginner-level audio editing. By methodically setting up the software, maneuvering its interface, and utilizing functions such as recording, importing, and precise waveform editing, users can achieve professional outcomes. Applying effects, normalization, and volume adjustments guarantees peak audio quality. Efficient clip management through splitting and trimming streamlines workflow. Finally, exporting projects in varied formats completes the process, making Audacity a thorough solution for foundational audio production tasks.