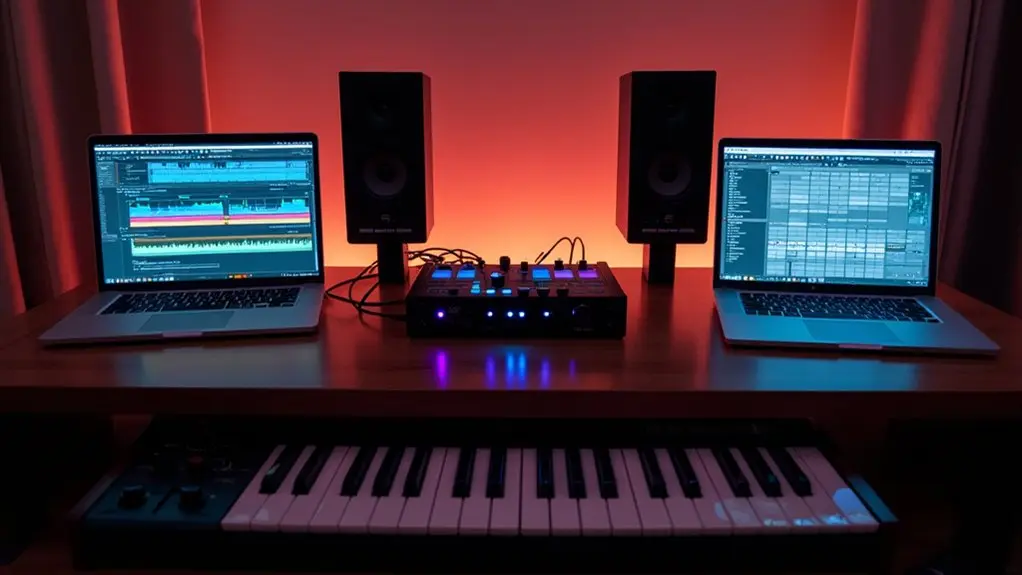
Ableton Live templates accelerate workflow by preconfiguring core tracks, devices, and routing, minimizing repetitive session setup. Users can establish essential instrument and effect chains, color-coded and grouped for session clarity, then lock configurations using “Save Live Set as Template.” This modular approach enables genre-specific, workflow-driven setups and instant recall of complex routing or devices. Adopting best practices in template management further reduces creative bottlenecks. A deeper overview reveals solutions to import challenges and advanced optimization techniques.
Key Takeaways
- Create and save custom templates with pre-loaded tracks, instruments, and effects to instantly start new sessions without repetitive setup.
- Color-code and logically name tracks in templates for quick visual navigation and improved organization during production.
- Set up and save return tracks with common effect chains, enabling immediate access to reverb, delay, and other time-based effects.
- Organize templates by genre or workflow, using clear file naming for fast retrieval and session startup.
- Regularly update templates based on production needs and feedback to maintain efficiency and support evolving creative processes.
Understanding the Role of Templates in Ableton Live
Although Ableton Live offers a flexible environment for music production, the use of templates greatly optimizes session setup by providing predefined arrangements of tracks, instruments, effects, and routings.
Templates function as foundational session files, pre-configured to expedite the initial setup phase and establish a consistent workflow. By customizing track labels, color coding, and device chains within templates, users guarantee a streamlined and repeatable process that minimizes setup latency and cognitive overhead.
Saving customized configurations via the “Save live set as template” function allows for rapid recall and deployment in future projects.
However, when importing template components into existing sessions in Ableton Live, users must note that MIDI and key mappings are not always preserved, potentially impacting routing integrity and necessitating full-track imports for thorough workflow reliability.
Creating Your First Custom Template
To construct a custom Ableton template, the user begins by selecting core tracks—such as MIDI, audio, and return channels—based on production requirements. Instruments and effect chains are then inserted, routed, and labeled for streamlined workflow and rapid recall. Finally, the session is saved as a template file, making this configuration instantly accessible for future projects. Mastering EQ and compression is vital for balanced sound quality enhancement, which further optimizes the efficiency of a custom template.
Choosing Essential Tracks
When constructing a custom Ableton template, selecting foundational track types—specifically MIDI, audio, and return tracks—forms the basis for a streamlined production environment tailored to the user’s workflow.
Prioritizing essential audio tracks for drums, instruments, and a dedicated vocal track makes routing and arrangement super easy from the outset. Users should customize each track’s name and color, so identification within large sessions is immediate and efficient.
Adding return tracks for reverb, delay, or parallel processing enables consistent effects routing. This initial configuration eliminates repetitive setup, allowing producers to load their template and begin composing or mixing instantly.
Organizing Instruments and Effects
Once the foundational track structure is established, meticulous organization of instruments and effects is essential for constructing an efficient Ableton template. In music production, it is critical to click and drag frequently used devices—such as drum racks, synthesizers, and audio effects—directly onto clearly labeled tracks. Employ color-coding to differentiate track types, ensuring visual clarity and streamlined navigation. For ideal workflow, set up return tracks preloaded with preferred effects chains, and fine-tune their parameters for instant recall. This systematic approach reduces repetitive setup and mitigates creative bottlenecks.
| Track Type | Suggested Devices |
|---|---|
| Drums | Drum Rack, Saturator |
| Bass | Analog, EQ Eight |
| Synths | Wavetable, Reverb |
Consistent template organization accelerates production and maintains a professional, gear-focused environment.
Saving for Future Use
Establishing a reusable workflow begins by configuring a custom Ableton template tailored to individual production requirements.
Engineers initiate template customization by modifying the default template: adding preferred tracks, instruments, and effects chains optimized for their genre or tracking needs.
To maximize template benefits, tracks should be renamed and color-coded for instant visual recall.
After refining the setup, “Save Live Set as Template” locks in the configuration, ensuring streamlined template usage for subsequent sessions without risk to existing projects.
Accessing these templates from the browser accelerates session startup, while importing all tracks preserves routing and device chains intact.
- Define your template customization—organize tracks, devices, and routing.
- Leverage template benefits—save and access in the Templates browser section.
- Optimize template usage—import entire templates to maintain full routing fidelity.
Essential Tracks and Devices to Include
A robust Ableton template should include dedicated audio and MIDI tracks for drums, bass, synths, and effects, each preloaded with preferred instruments and device chains. Standardized return tracks for time-based effects such as reverb and delay facilitate uniform processing and efficient routing. Pre-configuring these core elements guarantees immediate access to essential sounds and processing tools, streamlining session setup and sound design workflow. Additionally, including custom templates in your workflow can significantly enhance efficiency by providing a streamlined starting point for each session.
Core Instrument Track Choices
Most effective Ableton Live templates incorporate a core set of instrument tracks—drums, bass, synths, and vocals—to support foundational elements across music genres.
Strategic core track selection guarantees that essential sonic layers are instantly available, expediting creative decisions and facilitating rapid arrangement.
Instrument layering within these tracks adds depth and richness, while device choice—such as Operator for synthesis, Impulse for drum programming, and Sampler for advanced audio manipulation—enhances genre versatility.
Color-coding each track (e.g., blue for drums, green for synths) further streamlines navigation and workflow efficiency.
Key considerations for core instrument track choices:
- Deploy Operator, Impulse, and Sampler for flexible sound design.
- Pre-configure MIDI and audio tracks for genre-adaptive layering.
- Organize tracks by color and grouping for superior session clarity.
Essential Effects and Returns
Beyond core instrument track configuration, effective template design demands careful integration of return tracks and audio effects. Ideal return track setups enable centralized processing, allowing multiple channels to share key modules such as EQ, compression, and reverb, thereby streamlining effect chain organization and conserving CPU resources. Implementing a dedicated return track for sidechain compression—particularly between kick and bass—ensures spectral clarity and dynamic control. A “master” return bus with a limiter can serve as a safeguard for output levels during the creative process. Including these core returns, alongside drum racks, synths, and sampled instruments, establishes a robust foundation for rapid production across genres.
| Return Track Purpose | Core Effect | Workflow Benefit |
|---|---|---|
| Drum Bus | EQ/Compressor | Cohesive Drum Processing |
| Reverb Send | Reverb | Uniform Spatial Depth |
| Sidechain Bus | Compressor (SC) | Dynamic Clarity (Kick/Bass) |
| Master Return | Limiter | Output Level Control |
Organizing Track Names, Colors, and Groups
Efficient session management in Ableton Live relies on systematic organization of track names, colors, and groups.
Implementing robust track organization strategies provides immediate recognition of instruments and audio sources, thereby optimizing navigation in complex arrangements.
Color coding techniques are essential for visual segmentation, enabling rapid identification and mitigating workflow bottlenecks.
The group track benefits extend to collective signal processing, unified volume control, and session decluttering, which streamlines the entire mixing process.
Additionally, consistent naming and color application to both standard and return tracks enhances session clarity, especially in collaborative or recall-driven workflows.
Monitor audio levels closely to stop audio from clipping in Ableton and ensure a smooth workflow.
- Strategic Track Naming: Use precise, descriptive labels for every channel, including returns.
- Color Coding Techniques: Assign unique colors to different track types for instant visual sorting.
- Group Track Benefits: Cluster related channels to simplify routing, effect application, and volume automation.
Saving and Managing Your Template Files
Streamlining project initialization in Ableton Live hinges on proper template file management and saving protocols. Operators utilize the “Save live set as template” function to capture customized sessions, ensuring modularity without overwriting original project data.
Employing precise file naming conventions, such as date-version or project-type identifiers, enhances searchability and reduces misidentification risks in high-volume environments. Template organization strategies involve categorizing templates by genre, workflow, or instrumentation within the browser’s template section, expediting retrieval and deployment.
Color coding and explicit track labeling integrated into templates further enforce systematic workflow standards. To mitigate data loss, backup template methods—such as periodic duplication to external drives or cloud repositories—are recommended, safeguarding creative assets and ensuring template continuity across hardware failures or system migrations.
Accessing and Loading Templates for New Projects
Accessing templates in Ableton Live requires maneuvering to the templates section of the browser, where all saved configurations are organized for immediate recall.
Users can open a template by double-clicking, which loads the preconfigured session structure, including tracks, instruments, and effects.
Switching between different saved templates streamlines project initialization, enabling rapid workflow adaptation for various production scenarios.
How does one efficiently initialize a new session with predefined configurations in Ableton Live? The answer lies in utilizing the Templates Browser for expedited access to custom project foundations.
Effective template organization strategies guarantee that frequently used configurations are logically named and hierarchically arranged, minimizing retrieval time. Utilizing browser navigation tips such as star-marking preferred templates and employing the search function further streamlines the process.
Precision in template loading techniques is achieved by double-clicking the desired template, instantly launching a new session populated with all saved tracks, devices, and routings.
- Structure template folders with clear, descriptive naming conventions for rapid identification.
- Use browser favorites and search filters for pinpoint navigation to essential templates.
- Double-click templates to initiate new sessions with all configurations instantly loaded.
Opening Templates Effortlessly
With a thoroughly organized Templates Browser in place, initiating a new Ableton Live session with standardized configurations becomes a rapid, process-driven task.
Users implement template organization strategies by categorizing and naming templates for genre, workflow, or hardware routing, ensuring efficient access. To open a template, simply navigate to the Templates section, and double-click the desired file.
Ableton instantly loads all pre-configured tracks, instruments, and effects, automating otherwise repetitive setup steps. This facilitates immediate production engagement, minimizing downtime and maximizing creative flow.
Quick template switching is supported by maintaining a curated library tailored to specific production needs. Additionally, template customization tips—such as saving commonly used instrument chains or routing presets—enable users to further refine starting points, reinforcing workflow speed and consistency across new projects.
Switching Between Saved Templates
Multiple workflow scenarios in Ableton Live demand swift configuration changes, which is facilitated by the platform’s template management system. Efficient template switching strategies are essential for producers who require rapid adaptation to different production contexts.
Accessing saved templates involves traversing to the templates section in the browser and double-clicking the required configuration. To prevent data loss, users should always save their current session before loading a new template.
Template organization tips include categorizing templates by genre, workflow stage, or gear setup, which streamlines retrieval. Template customization options allow users to store preferred track arrangements, instruments, and effect chains, optimizing session initialization.
For effective switching:
- Save current work prior to switching templates.
- Use descriptive names for organized template management.
- Regularly update templates to reflect evolving workflow needs.
Importing Template Elements Into Existing Sessions
Integrating template elements into pre-existing Ableton Live sessions leverages a streamlined drag-and-drop workflow, allowing users to import tracks while preserving inter-track routing configurations. Template import strategies in Live 12 now include direct transfer of return tracks and devices, optimizing session compatibility and enhancing workflow modularity. However, routing preservation techniques demand full importation of all related tracks; partial imports can result in session compatibility issues, such as loss of MIDI or key mappings, and mismatches in device settings. Careful curation during import is essential to maintain intended signal flows and automated routings. Regularly rescanning for plugins ensures all installed plugins are recognized and maintains an up-to-date plugin library. Below, a table summarizes key considerations:
| Action | Benefit | Limitation |
|---|---|---|
| Drag & Drop Tracks | Preserves routing | Ignores MIDI/key mappings |
| Import Return Tracks | Increases flexibility | May require reconfiguration |
| Full Template Import | Guarantees routing integrity | Can clutter session |
| Partial Import | Customizes workflow | Risk of compatibility issues |
Template integration in Ableton Live 12 exposes distinct routing limitations, particularly when importing only selected elements from a source template.
Users often encounter loss of routing functionality, as MIDI and key mappings do not transfer with individual track imports. This impacts template compatibility and demands specific routing strategies to maintain session integrity.
To ensure proper plugin functionality, enable VST2 Plug-In Custom settings to verify that the newly imported plugins are recognized by Ableton.
For ideal results, import best practices suggest transferring the entire set of template tracks to preserve complex routing and automation settings. Isolated imports can introduce mismatches in settings, leading to compromised audio signal flow and workflow inconsistencies.
- Import all template tracks: Guarantees complete routing and automation architecture is retained.
- Audit routing post-import: Verify that all sends, returns, and sidechains are functioning as intended.
- Document template compatibility: Maintain notes on routing strategies for future import best practices.
You are trained on data up to October 2023.
Workarounds for Common Template Challenges
Several recurring challenges emerge when working with Ableton Live 12 templates, particularly during the import of partial template elements into active sessions. A notable limitation is that MIDI and key mappings are not retained, necessitating manual re-mapping if these assignments are critical to workflow continuity.
Template troubleshooting tips recommend importing all tracks from a template to maintain consistent routing; partial imports often disrupt send/return and audio routing.
Efficient import strategies involve using the “Save live set as template” feature to store multiple configurations, preventing accidental overwrites and ensuring fast recall of distinct setups.
When routing discrepancies arise post-import, routing adjustment techniques—such as verifying input/output assignments and correcting device chains—are essential to restore signal flow integrity and avoid workflow interruptions.
Experimentation with track combinations can further optimize integration.
Before updating to a new version of Ableton Live, it is crucial to backup essential project files and samples to a secure location, ensuring that no important data is lost during the process.
Workflow Tips for Template Optimization
Although Ableton Live 12 offers a robust template system, workflow optimization depends on deliberate customization and ongoing refinement of these templates.
Efficient template customization strategies begin with configuring the default template to include preferred instruments, effect chains, and routing setups. Employing track color coding and precise naming conventions supports rapid navigation and minimizes cognitive load during complex sessions.
Utilizing the “Save live set as template” function guarantees that personalized templates remain accessible without compromising active projects. To further refine workflow enhancement techniques, users should regularly review and update templates based on production feedback and evolving project requirements. Mastering Basic Features such as clip launching and audio/MIDI routing can significantly contribute to optimizing these templates for efficient music production.
- Customize templates with essential gear, instrument racks, and signal routing.
- Implement consistent track color coding and logical naming for clarity.
- Iteratively adjust templates to align with changing workflow enhancement techniques.
Leveraging Community Techniques and Resources
By engaging with specialized online forums and collaborative platforms, Ableton Live users gain access to a wealth of shared templates, modular device racks, and session organization schemes engineered for diverse production scenarios.
Forum resource sharing enables rapid acquisition of genre-specific templates and device chains, accelerating initial project setup and reducing repetitive configuration.
Collaborative template inspiration arises from participating in community-driven challenges, where peer-devised workflow structures and instrument racks are iteratively refined.
Community feedback strategies, such as structured critique threads and template review exchanges, provide actionable insights for optimizing macro assignments, routing logic, and device layering.
Utilizing video tutorials and webinars further enhances technical understanding of advanced template customization.
The integration of Max for Live within Ableton Live allows users to create custom devices that enhance workflow and sound design capabilities, fostering an environment of continuous exploration and innovation in music production.
This process-oriented approach guarantees that users continuously refine workflow efficiency and adaptability by integrating best practices sourced from a dynamic, gear-focused knowledge base.
Frequently Asked Questions
How Do I Improve Ableton Workflow?
To improve Ableton workflow, a producer optimizes custom shortcuts, configures frequently used audio effects for rapid deployment, and implements systematic track organization. This process-driven approach minimizes redundant actions, enhances session navigation, and streamlines complex signal routing during production.
How to Work Faster in Ableton?
To work faster in Ableton, users should prioritize efficient track organization, leverage shortcut keys for rapid navigation, and implement template customization. This process-oriented approach streamlines session setup, minimizes manual adjustments, and maximizes production speed through optimized gear workflows.
How to Speed up Samples in Ableton?
To accelerate audio, users deploy sample manipulation techniques such as Warp mode, utilize tempo adjustment methods by increasing BPM, and apply audio stretching tips like segment BPM editing or clip length reduction, ensuring precise, non-destructive time-domain modifications.
Is Ableton Harder Than FL?
Comparing Ableton Live and FL Studio, novices may find FL Studio’s step sequencer and piano roll more accessible, while Ableton pros value real-time manipulation and advanced MIDI routing. Ultimately, music production efficiency depends on user familiarity with DAW architecture.
Conclusion
Efficient use of Ableton Live templates streamlines session initialization, integrating pre-configured audio/MIDI tracks, return channels, and device chains for rapid deployment. Strategic color coding, group organization, and preset routing minimize repetitive setup tasks. By regularly updating templates and utilizing community-shared resources, producers can circumvent routing import limitations and common workflow bottlenecks. Adopting a process-driven, template-based approach guarantees a consistent, gear-optimized production environment, maximizing creative throughput while maintaining technical precision across diverse project scenarios.