
To slice audio in Audacity, import your track, then use the Selection Tool to highlight segments. For precise edits, zoom in and apply the Split command (CTRL+I or CMD+I) to divide sections. Use label tracks to mark and organize slices, and rearrange clips by dragging them along the timeline. Fade effects can smooth shifts. Export your edited segments as needed. A step-by-step approach reveals even more effective techniques and creative workflows for beatmaking and arrangement.
Key Takeaways
- Use the Selection Tool to highlight and isolate the exact audio sections you want to slice.
- Split audio at cursor or selection boundaries with CTRL + I (CMD + I on Mac) for fast, precise cuts.
- Add labels at slice points to organize segments and streamline beatmaking or rearrangement.
- Drag and rearrange sliced clips along the timeline for creative audio restructuring.
- Export individual slices or the entire rearranged project with customized quality and metadata settings.
Setting Up Audacity for Efficient Slicing

Before beginning the slicing process, users should ascertain Audacity is properly configured for efficient audio editing. Download and install the latest version of Audacity from the official website to access the most up-to-date features and bug fixes.
Upon launching Audacity, select the correct input and output audio devices from the main interface to guarantee ideal recording and playback. Familiarity with the user-friendly interface is essential; it provides streamlined navigation to critical tools such as the selection tool and edit menu.
Users can import files containing audio tracks via the File > Import > Audio option or utilize the drag and drop capability for convenience. To enhance precision during slicing, leverage the zoom feature to closely analyze waveform details, ensuring accurate selection and editing within the audio project. Incorporating export formats overview when finalizing your trimmed audio can ensure that the audio quality meets specific requirements for its intended use.
Importing and Visualizing Audio Tracks
With Audacity properly configured, the next step involves importing audio files for editing. Users can import audio by selecting File > Import > Audio or by dragging and dropping supported files directly into the Audacity window. Audacity accommodates a wide range of audio file formats, including MP3, WAV, FLAC, AIFF, and OGG, streamlining the editing process without requiring prior conversion. Once audio tracks are imported, they are visualized as waveforms in the timeline, displaying amplitude changes that represent audio dynamics. To facilitate precise selection of audio segments, users can zoom in on the waveform, enabling detailed inspection. Utilizing the selection tool in conjunction with zoom features allows for accurate identification and isolation of specific sections, which is essential for effective subsequent editing. It is crucial to adjust sample rate and channels in the Quality section to enhance the recording quality, ensuring optimal audio fidelity during editing.
Using the Selection and Slicer Tools for Precision Cuts

To achieve precise edits in Audacity, users employ the Selection Tool to highlight specific audio segments, utilizing the zoom function for meticulous adjustment along the waveform.
For cutting and trimming audio, the Selection Tool enables the user to accurately define the highlighted section. Proceeding to the Edit menu and choosing Audio Clips > Split or using the shortcut CTRL + I (CMD + I on Mac) separates the highlighted section into distinct audio clips. These clips can then be moved or deleted independently, supporting creative rearrangement and professional audio workflows.
For more complex edits, combining the Selection Tool with the Slicer Tool allows for multiple splits in a single pass by dragging across desired sections.
Always verify edits by listening to changes, ensuring cuts make precise, seamless adjustments. Regular saving of the project mitigates the risk of data loss during editing, ensuring that your work is preserved and progress is not lost.
Labeling and Organizing Slices for Beatmaking
While precise slicing is essential for beatmaking, effective organization of those slices within Audacity is equally important for efficient workflow.
Utilizing Audacity’s label track feature, users can insert labels at specific points of their audio slices by maneuvering to Edit > Labels or using the shortcut Ctrl + B. For heightened accuracy, the “Add Label at Playback Position” option enables marking slices in real time. Naming each label according to the beat or segment aids clarity and makes audio projects easier to organize.
Multiple label tracks can be created for different song sections, such as verses or choruses, streamlining movement and editing. Consistently saving the project preserves the structure and annotations, ensuring no loss of organization during the beatmaking process and facilitating future editing sessions. Additionally, employing the Time Shift tool for accurate positioning of audio clips can further enhance the organization and synchronization of your audio slices.
Rearranging and Exporting Your Sliced Audio
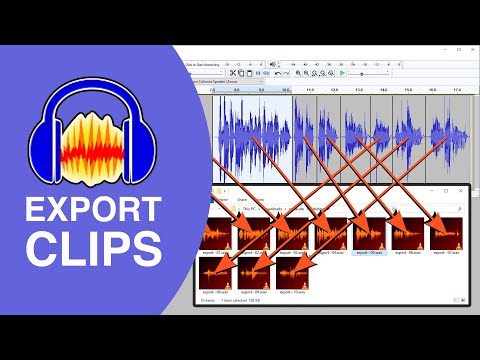
After organizing and labeling audio slices, the next step involves rearranging these segments within Audacity for the desired playback sequence. Users can rearrange the order of sliced audio by clicking and dragging each clip along the timeline. To achieve a seamless shift, apply Fade In and Fade Out effects from the Effect menu at the boundaries of audio slices. Once satisfied with the arrangement, it is essential to export the project in the preferred audio formats. This is done by traversing to File > Export, where metadata tags—such as track title and artist—can be added for proper identification. For ongoing projects, using File > Save Project preserves the sliced audio arrangement for future editing.
To ensure a high-quality export, adjust settings for bitrate mode and overall quality as needed, then click Save and follow additional prompts to finalize the process.
- Rearrange the order of slices via drag-and-drop.
- Apply Fade In/Fade Out for seamless shift.
- Export with metadata tags and save project for revisions.
Frequently Asked Questions
How to Slice Audio in Audacity?
When slicing audio in Audacity, users employ audio slicing techniques for editing audio files, enhancing sound quality, and mastering audio tracks. This enables layering sound clips, adding background music, using audio effects, exporting audio files, and troubleshooting audio issues.
How to Split in Audacity Shortcut?
To split audio in Audacity using keyboard shortcuts, users position the selection tool, then press Ctrl + I (Cmd + I for Mac). This audio editing technique streamlines workflow optimization, supporting sound design, project management, and efficient user interface navigation.
How Do I Split Audio Into Two Parts?
To split audio into two parts during audio editing or music production, users select the split point, utilize the split command, then apply sound design, vocal processing, audio effects, noise reduction, track layering, and mastering techniques for creative mixing.
How Do I Cut Unwanted Audio in Audacity?
To cut unwanted audio in Audacity, users utilize audio editing tools: select the segment, apply noise reduction or volume adjustment as needed, manage tracks, add sound effects, organize projects, mix music, and export files in desired audio formats.
Conclusion
Mastering audio slicing in Audacity streamlines editing and creative workflows. By configuring the software, visualizing waveforms, and utilizing the Selection and Slicer tools, users achieve precise cuts. Organized labeling enhances beatmaking efficiency, while seamless rearrangement and export options allow for flexible project output. These techniques enable both rapid and detailed audio manipulation, making Audacity a powerful choice for anyone seeking a straightforward yet versatile approach to slicing audio tracks for music production or editing purposes.