To cut audio in Audacity, first import the file using “File > Import > Audio” or drag-and-drop. Use the selection tool to highlight the exact audio segment to keep, applying zoom controls for precision. Confirm selection accuracy by previewing playback. Activate the trim function with “Edit > Remove Special > Trim Audio” or use Control/Command + T. Export the new file via “File > Export.” The following steps outline further refinements and export settings.
Key Takeaways
- Import your audio file into Audacity by selecting “File” > “Import” > “Audio” or using drag-and-drop.
- Use the selection tool to highlight the specific segment of audio you want to keep or remove.
- Zoom in on the waveform for precise selection and adjust boundaries as needed for accuracy.
- Preview your selection by pressing play, ensuring only the intended section is highlighted.
- Cut or trim the audio using Command + T (Mac) or Control + T (PC), then export the edited file via “File” > “Export”.
Understanding Audacity’s Interface
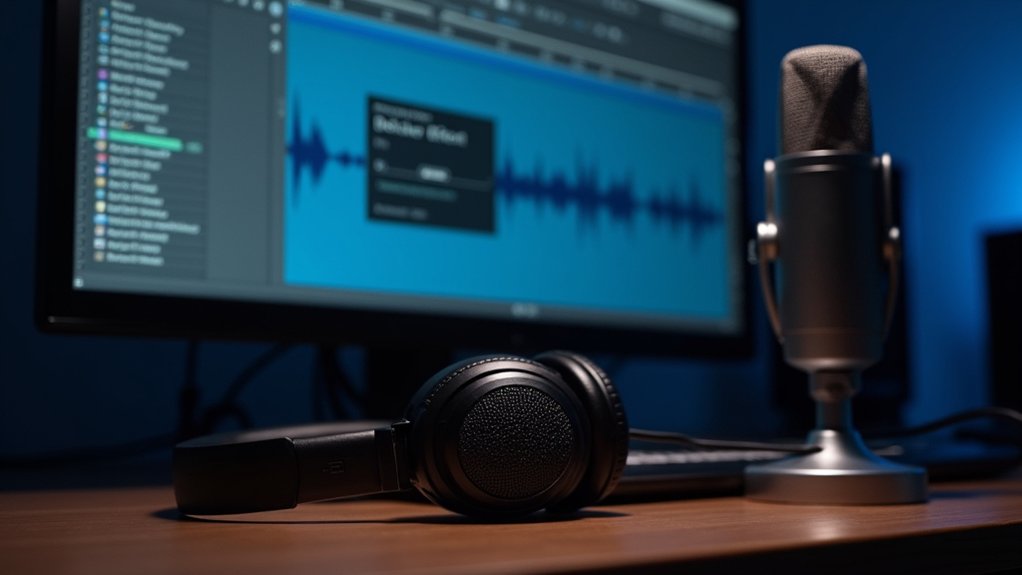
Audacity’s interface presents a multi-track view that enables users to visualize and edit several audio tracks concurrently, optimizing workflow for complex audio projects. The central waveform display provides a detailed representation of each track’s audio signal, allowing precise identification of peaks, silences, and dynamic changes. To interact with the audio, users deploy the selection tool—depicted as a cursor icon—to highlight target regions within tracks. This tool is essential when aiming to trim audio, as it defines the exact segment for editing operations. Directly above, the transport controls facilitate playback, recording, and navigation. The menu bar, including the Edit menu, grants access to critical commands such as cut, copy, and delete. Utilizing the Selection Tool enables users to identify and isolate specific audio segments effectively, ensuring precise and accurate edits. Collectively, these features guarantee users can efficiently prepare tracks for detailed audio manipulation.
Importing Your Audio File
To begin editing in Audacity, users must first import an audio file in a supported format such as WAV, MP3, or AIFF. This can be accomplished either by selecting “File” > “Import” > “Audio” from the menu or by utilizing drag-and-drop functionality within the workspace. Upon successful import, the audio waveform is displayed in the main editing window for further manipulation. You can also use the keyboard shortcut Ctrl + Shift + I to quickly access the import function for convenience.
Supported Audio File Types
Compatibility with a broad range of audio formats is a key feature of Audacity, enabling users to import files such as WAV, AIFF, MP3, and OGG directly into the workspace. This versatility guarantees that the tool accommodates most project requirements. Importing audio is a fundamental process: users must verify the required encoders, like LAME for MP3, are installed to guarantee seamless operation. For format-specific details, the Audacity documentation or help menu provides thorough guidance. Once the import process is completed, the audio waveform appears in the timeline, ready for editing.
| Format | Notes |
|---|---|
| WAV | Uncompressed, high-quality audio |
| AIFF | Apple’s uncompressed audio format |
| MP3 | Requires LAME encoder for import |
| OGG | Open-source, compressed audio format |
| FLAC | Lossless compression, high fidelity |
Drag-And-Drop Importing
Many users benefit from the efficiency of drag-and-drop importing, which streamlines the process of bringing audio files into the Audacity workspace. This method allows for rapid integration of a piece of audio by simply selecting the desired file from the file explorer or desktop and dropping it into Audacity.
It is essential to verify that the audio file is in a compatible format, such as WAV, MP3, or AIFF, to guarantee seamless import. Upon successful import, Audacity automatically generates a new track for each file, facilitating immediate editing and use of tools like the time shift tool.
- Select the compatible audio file(s) in your file explorer.
- Drag and drop the piece of audio directly into Audacity’s workspace.
- Audacity creates a new track for each imported file.
File Menu Import Steps
Accessing the File menu in Audacity provides a structured method for importing audio files into the workspace. Users begin by selecting “File,” then “Import,” and finally “Audio” to invoke the file browser. Alternatively, the keyboard shortcut Command + Shift + I (Mac) or Control + Shift + I (PC) expedites this process. Audacity’s file format compatibility supports WAV, MP3, and AIFF, reducing import error troubleshooting related to unsupported formats. After selecting and opening the desired file, Audacity automatically creates a new track, facilitating precise audio track organization. If an import fails, users should verify file integrity and confirm that the format is supported. The following table outlines the process:
| Step | Action | Purpose |
|---|---|---|
| 1 | File > Import > Audio | Access import function |
| 2 | Select audio file | guarantee file format compatibility |
| 3 | Click “Open” | Initiate import |
| 4 | Confirm track in workspace | Enable audio track organization |
Precise editing in Audacity depends on effective navigation and waveform visibility. Users can employ zoom shortcuts, such as Command + 1 to zoom in and Command + 3 to zoom out, or access zoom controls from the View menu for finer control. Enhanced waveform visibility allows for more accurate selection and adjustment of audio segments. Regular saving of the project mitigates the risk of data loss during editing.
Zoom Shortcuts and Controls
A range of zoom controls in Audacity enables users to navigate audio waveforms with high precision during the editing process.
Mastery of zoom techniques is crucial for editing efficiency and achieving ideal waveform clarity. Users can utilize the View menu or dedicated keyboard shortcuts—Command + 1 and Command + 3 on Mac, or Control + 1 and Control + 3 on PC—to zoom in and out as needed.
Adjusting zoom levels allows for meticulous selection of specific audio segments, which is essential before trimming or making detailed edits. The following controls support effective navigation:
- Zoom In: Increases waveform detail for precise segment selection.
- Zoom Out: Provides a broader view for quick navigation through lengthy tracks.
- Shortcut Familiarity: Accelerates workflow, ensuring efficient and accurate editing.
Enhancing Waveform Visibility
Clear waveform visualization is fundamental for executing accurate edits in Audacity. Enhancing waveform visibility directly impacts editing precision, as it allows users to discern detailed audio features such as transient peaks and silences.
Employing zoom techniques—accessible via the View menu or by using keyboard shortcuts like Command + 1 (zoom in) and Command + 3 (zoom out)—enables dynamic adjustment of waveform clarity. When zoomed in, the selection tool becomes markedly more effective, facilitating fine-grained audio segment selection for precise trimming.
Regular modulation of zoom levels throughout the editing process guarantees both broad overviews and meticulous, close-up editing as needed. Ultimately, maintaining ideal waveform clarity prevents unintentional cuts and preserves the integrity of the intended audio, supporting a professional and error-free editing workflow.
Selecting the Desired Audio Segment
The selection tool in Audacity enables users to define the exact audio segment for editing by clicking and dragging across the waveform. This approach is foundational to effective audio selection techniques, allowing precise control over which portions of the track are isolated.
For ideal waveform highlighting tips and isolation accuracy methods, users should utilize available zoom functions and edge adjustment features.
To efficiently select the desired segment:
- Activate the selection tool, then click and drag over the target waveform area to highlight it.
- Refine the selection by adjusting the boundaries; hover over the selection edges until the finger icon appears, then drag for fine-tuning.
- Employ zoom options from the View menu or use keyboard shortcuts (e.g., Command + 1) to enhance selection precision and visibility.
Accurate selection is critical before proceeding with further editing steps.
Previewing Your Selection
Confirming the accuracy of an audio selection in Audacity requires playback of the highlighted segment using the preview function. To initiate this process, the user employs the selection tool to highlight the desired portion of the audio waveform. The segment can then be reviewed using audio playback techniques, specifically by pressing the spacebar, which triggers playback of only the selected range. Selection precision tips recommend zooming into the waveform for finer control and improved visibility, ensuring that the boundaries of the selection are exact. This step is essential for enhancing the listening experience, as it verifies that only the intended audio will be affected in subsequent edits. Accurate previewing supports cleaner final edits by confirming that the correct audio portion is targeted before any trimming occurs. Implementing noise reduction techniques can further enhance the audio quality by removing background noise during the editing process.
Adjusting Your Selection for Accuracy
When refining an audio selection in Audacity, precise adjustment is achieved by utilizing the selection tool to click and drag over the targeted segment of the waveform. Employing advanced selection techniques, users can further enhance audio precision by dragging the edges of the highlighted region with the finger icon, thereby including or excluding specific audio sections. For ideal editing tips, it is recommended to zoom in using the View menu or keyboard shortcuts, increasing waveform visibility for finer control. The time display at the top of the window aids in setting exact selection boundaries. To guarantee the desired segment is isolated, playback of the chosen region is essential. Key steps in this process include: 1. Zooming for detailed waveform inspection 2. Adjusting selection edges with the finger icon 3. Verifying with playback and time display. Using noise reduction tools helps enhance audio clarity, ensuring the highest quality of your edited segments.
Using the Trim Function to Cut Audio
Initiate audio trimming in Audacity by selecting the desired segment with the selection tool, ensuring the correct portion is highlighted for editing.
For ideal Selection Precision, users may zoom in on the waveform via the View menu or employ keyboard shortcuts (Command + 1 to zoom in, Command + 3 to zoom out), allowing for detailed control over the highlighted section.
To perform the trim operation, navigate to the Edit menu, select “Remove Special,” and then choose “Trim Audio.” Alternatively, the Command + T (Mac) or Control + T (PC) shortcuts can be utilized for efficiency.
This Trim Technique removes all audio outside the selected region, leaving only the focused segment. This approach streamlines the Audio Editing workflow, presenting a concise, isolated audio section ready for further modifications or export.
Repositioning the Trimmed Audio
Once the unnecessary audio has been removed using the trim function, the next step involves repositioning the remaining segment for ideal playback alignment. Efficient repositioning techniques guarantee seamless playback from the beginning of the track. In Audacity, the Time Shift Tool (shortcut: F5) facilitates precise audio alignment. The trimmed segment should be clicked and dragged to the zero-second mark on the timeline. For enhanced accuracy, users can zoom in on the waveform (Command + 1) and make micro-adjustments to the segment’s start position. Confirming the alignment by playing back the track guarantees no unintended silence precedes the audio. Using Audacity’s level meters helps ensure that playback levels remain consistent and free from distortion.
- Select the Time Shift Tool (F5) for repositioning techniques.
- Drag the audio to the timeline’s zero mark for seamless playback.
- Zoom in for precise audio alignment and verify playback integrity.
Saving or Exporting Your Edited Audio File
Exporting the edited audio in Audacity requires maneuvering to the ‘File’ menu and selecting ‘Export’ to access various file format options such as WAV or MP3. After making precise audio cuts, users must guarantee the audio is positioned correctly at the track’s start, using the time shift tool for ideal playback. During export, Audacity presents several export settings options, including file format choices and audio quality considerations such as MP3 bitrate selection. Users can specify the file name and destination folder for organized file management. Post-export, verification is recommended by playing the output in a media player. It is advisable to normalize audio levels during export to ensure the overall track volume is consistent and avoids clipping.
| Export Step | Key Consideration |
|---|---|
| Select File Format | WAV, MP3, and others available |
| Adjust Export Settings | Bitrate, sample rate, metadata |
| Confirm Audio Quality | Playback in external media player |
Frequently Asked Questions
How Do I Cut Part of Audio in Audacity?
To cut part of audio in Audacity, users employ audio trimming techniques by selecting the waveform, utilizing editing shortcuts like Command/Control + T, and refining segments. This process enhances sound effects and guarantees precise audio editing workflow.
How Do I Cut a Piece of Audio?
Cutting a piece of audio involves selecting the desired waveform segment using audio editing techniques, utilizing software features for precision. Comparing available tools, users prioritize sound quality enhancement by ensuring clean edits and seamless shifts within digital audio workstations.
Where Is the Cut Button in Audacity?
The Cut options in Audacity are accessible through the Edit menu under “Remove Special,” the scissors icon on the toolbar, and via tool shortcuts: Control + X (PC) or Command + X (Mac), facilitating efficient audio editing workflows.
How to Cut and Move Audio in Audacity?
To perform audio editing techniques in Audacity, users employ the selection tool to highlight audio, apply the cut command, and utilize the time shift tool. These Audacity tips and sound manipulation methods enable precise rearrangement of audio segments.
Conclusion
In conclusion, cutting audio in Audacity involves a systematic process: understanding the workspace, importing files, maneuvering with zoom tools, making precise selections, previewing, and adjusting the selection. Utilizing the Trim function allows for efficient removal of unwanted sections. Users can then reposition audio as needed before saving or exporting the final product. By adhering to these step-by-step procedures and utilizing Audacity’s terminology-specific tools, users can achieve accurate and professional-quality audio edits.