Ableton Live’s Looper device allows users to capture, layer, and overdub audio in real time, supporting hands-free operation via MIDI controllers or foot pedals. Begin by creating an audio track, inserting the Looper, and recording the initial phrase. Overdub additional instruments with precise metronome timing, utilizing the ‘Drag Me’ feature for swift loop export. Advanced settings enable seamless tempo sync and grid alignment. Further details cover multi-layer recording and MIDI mapping for live performance efficiency.
Key Takeaways
- Integrate Ableton’s Looper device on an audio track and set your desired loop length for quick, hands-free looping.
- Activate the metronome and Tempo Control to ensure your loops are recorded in perfect sync with your project.
- Use overdub mode to layer multiple musical elements, such as drums, melodies, and effects, within the same Looper instance.
- Map Looper controls to a MIDI controller or foot pedal for effortless recording, overdubbing, and playback during live performance or studio sessions.
- Employ the ‘Drag Me’ feature to quickly transfer recorded loops from Looper to audio tracks for further editing and arrangement.
Creating Your First Project in Ableton Live
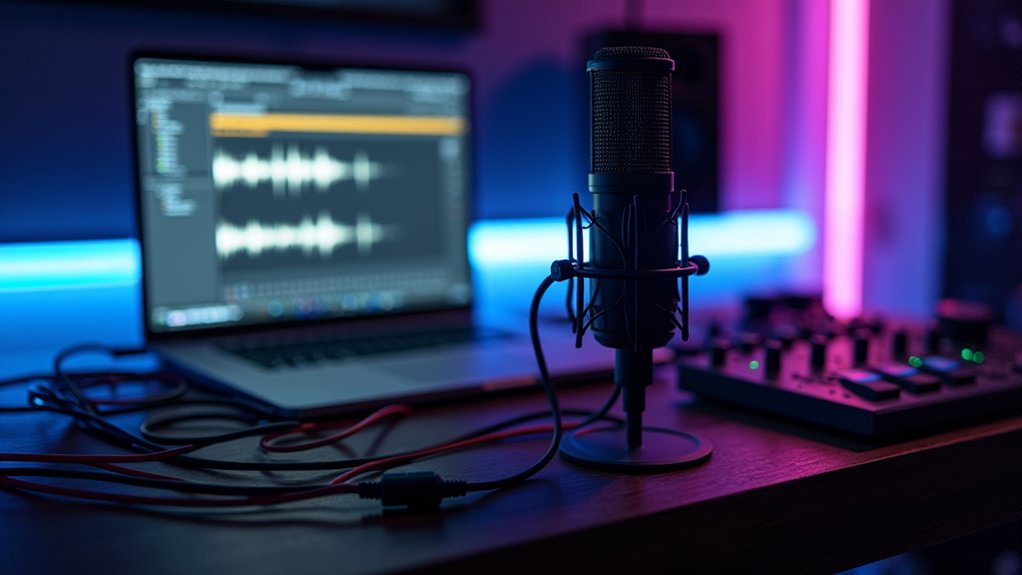
To initiate a new project in Ableton Live, users should create an audio track—using the Ctrl/Cmd-T shortcut—to accommodate vocal recordings or other audio inputs. This foundational workflow step prepares the session for effective audio capture and subsequent processing. Integrating the Looper plugin onto this new channel establishes a dedicated loop workflow, allowing seamless overdubbing and creative arrangement. The metronome should be activated to guarantee precise timing and synchronization during recording, particularly critical when layering percussive elements like Kick, Snare, and Hi-Hats. Users are advised to familiarize themselves with their audio interface routing and microphone placement before recording. Mastering the split between Session View and Arrangement View can greatly enhance the flexibility and creativity during the loop creation process. This initial setup in Ableton Live creates a structured environment, supporting efficient loop creation and facilitating an organized approach to building complex audio arrangements from the ground up.
Configuring the Looper Device
Once the audio track is prepared and the Looper plugin is inserted, configuring the device parameters is the next step for optimized workflow. Looper settings optimization begins by selecting the appropriate Song Control mode: set to None for live performance flexibility, or Follow Song Tempo for studio synchronization. Adjust the Tempo Control precisely; this is critical for preventing timing drift and ensuring seamless loop integration. Users should familiarize themselves with Loop Length and Overdub settings, as these parameters define recording and layering efficiency. Mapping Looper controls—especially the big + button for overdubs—to a MIDI controller or foot pedal is highly recommended for hands-free operation during live sets. For a successful live DJ performance, it is essential to regularly practice with your setup and become comfortable with the dynamic environment.
| Parameter | Studio Use | Live Use |
|---|---|---|
| Song Control | Follow Song Tempo | None |
| Tempo Control | Match Project BPM | Manual/Auto Adjust |
| Loop Length | Fixed | Adaptable |
| Overdub Settings | Pre-configured | Dynamic |
| MIDI Mapping | Optional | Essential |
Establishing Your Drum Pattern With Overdubs
To establish a cohesive drum pattern using Ableton Looper, the workflow typically begins by recording a kick drum as the foundational layer with the device set to record-enable. Subsequent overdubs are executed via the large + button, facilitating the precise addition of hi-hats and snare elements to the initial loop. This iterative layering process enables real-time refinement of groove and timing, utilizing Looper’s flexibility for complex rhythm construction. Additionally, real-time audio warping allows for independent manipulation of audio clip timing and tempo, ensuring that each layer fits seamlessly within the mix.
Building Foundational Kick Layer
Initiating the drum pattern begins with capturing a solid kick drum layer using Ableton Looper’s record-enabled function. This foundational step requires precise attention to timing accuracy, ensuring the primary beat is both steady and unwavering.
Users should engage in kick sound exploration, auditioning various samples or analog drum machine sources to determine which timbres best suit the intended rhythm. After configuring the desired tempo, the Looper’s record-enabled mode mitigates unwanted gaps or latency, preserving rhythm consistency throughout the pattern.
Once the ideal kick sequence is established, the big + button on Looper enables seamless overdubbing, allowing subsequent layers to lock in with the foundational groove. This workflow is critical for maintaining structural integrity across all future drum overdubs, supporting a cohesive beat architecture.
Layering Snare and Hats
Progressing from the established kick layer, the workflow advances to snare and hi-hat integration using Ableton Looper’s overdub capabilities. The user arms the Looper for overdubbing and activates the big + button to introduce snare techniques, ensuring precise placement for ideal rhythmic dynamics.
With the snare layer in place, attention shifts to hi hat variations, utilizing both closed and open hat articulations to enhance groove complexity. Strategic overdubbing with MIDI controllers or finger drumming pads enables iterative refinement. The interplay between snare and hi-hat is critical for cohesive drum programming.
- Overdub snare patterns by engaging the Looper’s record-enable and + button features.
- Explore hi hat variations for dynamic interplay with the kick and snare.
- Adjust rhythm structures to achieve nuanced rhythmic dynamics in the loop.
Perfecting Groove With Overdubs
Refining the drum pattern in Ableton Looper involves methodical overdubbing, beginning with a solid kick foundation and incrementally layering snare and hi-hat elements via the Looper’s record-enable and + button controls.
Establishing overdub dynamics is essential—manipulate the timing and velocity of each layer to inject groove variation and stave off mechanical repetition. The Looper’s multitrack capabilities enable multiple overdub passes, empowering users to audition and select ideal takes for heightened rhythmic complexity.
Regular monitoring of layered loops ensures phase alignment and sonic coherence, with each addition evaluated for its contribution to the overall groove. By emphasizing subtle velocity changes and micro-timing adjustments, the process transforms static drum loops into nuanced, organic patterns, resulting in a polished, professional rhythmic backbone.
Layering Additional Instruments and Sounds
With a drum foundation established, users can employ Ableton Looper’s overdub function to craft melodic layers using bass, guitar, or MIDI-controlled synths. Integrating synth textures through external hardware or software instruments expands the sonic palette, while targeted percussion overdubs enhance groove dynamics. Each layer can be processed independently with effects racks for greater depth and clarity within the session workflow. To enhance creativity in beat-making, follow structured approaches to sound selection, pattern laying, and groove refinement.
Crafting Melodic Layers
After establishing a foundational drum pattern, the user selects complementary melodic instruments—such as synthesizers or guitars—to build additional layers within Ableton’s Looper device.
Utilizing the overdub function, each melodic phrase is recorded in sync with the primary rhythm, facilitating real-time melodic harmony exploration.
Dynamic layering techniques are critical; users vary velocity, articulation, and onboard effects to guarantee each added instrument maintains its own sonic identity.
Attention to sound texture variation is paramount, as each layer contributes to the overall depth and spatial quality of the loop.
The Drag Me feature enables rapid transfer of crafted melodic loops to audio tracks for advanced editing and refinement.
- Employ overdub to stack harmonically rich lines
- Adjust dynamics and effects for unique layer presence
- Utilize Drag Me for non-destructive post-processing
Integrating Synth Textures
Building upon established melodic layers, the integration of synth textures leverages Ableton’s Looper to further expand the sonic palette.
Producers begin by selecting a synth instrument with timbral characteristics that complement pre-existing drum layers, ensuring cohesive synth soundscapes. Employing the Looper’s overdub function, multiple passes allow for advanced layering techniques—each take contributing to harmonic complexity and spatial richness.
To achieve seamless texture blending, effects such as reverb and delay are applied, imparting depth and dimensionality to the layered elements. Real-time parameter adjustments via MIDI mapping facilitate dynamic modulation during live performances or recording sessions, enhancing expressive control.
Utilizing the Drag Me feature, recorded synth loops are efficiently transferred to audio tracks, enabling additional post-processing and precise integration within the project’s overall structure.
Enhancing Groove With Percussion
Elevating rhythmic complexity, producers utilize Ableton’s Looper to layer additional percussion instruments such as shakers, tambourines, and claps, complementing established drum patterns.
Capitalizing on the overdub function, users can capture multiple takes, stacking nuanced percussion textures to enrich groove dynamics.
Effective layering techniques involve deliberate variation in velocity and timing, imparting organic movement and preventing static repetition.
Applying spatial effects—reverb and delay—on percussion tracks further expands the sonic field, providing clarity and depth within dense arrangements.
Hardware controllers like Push or APC40 can streamline real-time manipulation, ensuring tight integration with Looper’s workflow.
Key considerations for maximizing groove impact include:
- Experimenting with contrasting percussion textures for rhythmic interest
- Applying subtle timing offsets for swing and human feel
- Balancing effect processing to maintain clarity in the mix
Transferring Loops for Further Editing
Seamlessly transferring loops from Ableton’s Looper to an audio track leverages the device’s ‘Drag Me’ feature, enabling efficient workflow shifts from live looping to detailed audio editing. Once a loop is captured, clicking and dragging the ‘Drag Me’ area deposits the loop as an audio clip onto any target track. This workflow is essential for loop management strategies and robust audio clip organization, facilitating efficient editing techniques such as waveform manipulation, time-stretching, and pitch adjustments with Ableton’s native tools. By employing grid snapping, you can further enhance the precision of your loops when working in the arrangement view. The following table outlines the technical process:
| Step | Functionality Gained |
|---|---|
| Record in Looper | Live loop creation |
| Drag to Audio Track | Converts to audio clip |
| Edit in Arrangement | Detailed waveform control |
| Free Looper | Ready for new recordings |
This process optimizes creative flexibility and resource allocation.
Mapping Looper Controls to MIDI Devices
Although Ableton’s Looper is highly intuitive with mouse or trackpad input, integrating MIDI device control enhances workflow efficiency, particularly for live performance and hands-free operation.
For precise MIDI controller setup, users initiate MIDI Map mode by pressing Ctrl/Cmd-M. Selecting the prominent + button within the Looper interface, then actuating a button on the MIDI controller, creates a direct Looper shortcut. This custom mapping is especially valuable for overdubbing, allowing seamless recording shifts without manual intervention.
It is crucial to verify the MIDI controller is correctly connected and recognized by Ableton Live before mapping. Saving these custom mappings within the project guarantees continuity across sessions.
- Streamlines overdub and record activation for hands-free use
- Enables quick, tactile Looper shortcuts during performance
- Custom mappings are preserved by saving project settings
Set takeover mode to ‘value scaling’ in Ableton for immediate response from MIDI control surfaces, ensuring efficient and intuitive integration with Looper functionality.
Enhancing Workflow With Creative Looping Techniques
With MIDI mapping configured for hands-free Looper operation, producers can further optimize their workflow by applying advanced looping techniques within Ableton Live.
Utilizing looping strategies such as real-time audio overdubbing enables seamless layering of bass lines, percussion, and melodic elements. By synchronizing Looper’s Tempo Control to the project tempo, rhythmic improvisation remains tight and cohesive throughout complex arrangements.
The integration of foot pedals or MIDI controllers mapped to the Looper’s big + button accelerates the overdubbing process, eliminating manual interruptions and fostering uninterrupted creative experimentation.
Additionally, the Drag Me feature allows for swift export of loops into audio tracks, facilitating further sound design and arrangement.
Regular rescans of Ableton Live ensure all installed plugins are recognized, keeping your setup up-to-date and functioning smoothly.
These workflow enhancements empower producers to build intricate soundscapes, maximize creative output, and innovate with evolving loop-based textures.
Frequently Asked Questions
How Do You Loop in Ableton Simpler?
To loop in Ableton Simpler, users select a waveform section, enable Loop, and adjust markers for precise looping techniques. Integrating audio effects and performance tips, they manipulate timing, pitch, and changes for advanced workflow and creative gear applications.
How to Loop Audio Track in Ableton?
Audio looping techniques in Ableton involve creating an audio track, inserting the Looper device, and utilizing MIDI controllers for hands-free operation. Looping best practices include tempo synchronization and creative loop applications, such as overdubbing and exporting loops for further arrangement.
How to Loop Without Warp in Ableton?
Looping techniques in Ableton without warp involve disabling warp mode for precise audio manipulation, ensuring original timing is preserved. Users adjust loop brackets manually, relying on accurate beat synchronization and hardware controllers for seamless, unwarped playback in a professional workflow.
How Does Live Looping Work?
Live looping involves capturing and replaying audio clips in real time during live performance. Musicians utilize looping techniques with loop pedals or DAW plugins, enabling continuous audio manipulation and layering to construct complex arrangements using minimal gear and hands-on workflow.
Conclusion
Ableton Live’s Looper device streamlines the looping workflow, enabling users to construct complex audio arrangements with minimal friction. By configuring Looper parameters, utilizing MIDI controller assignments, and utilizing overdub features, musicians can layer rhythms, harmonies, and textures in real time. The seamless transfer of loops to Session or Arrangement View further enhances editing flexibility. Integrating Looper with Push or external MIDI footswitches raises both studio production and live performance, making looping an essential technique for modern music creation.