The FL Studio Mixer streamlines audio routing, level control, and organization. Users should access it via F9, utilize faders for precise gain staging, and monitor the Master track to avoid clipping. Grouping, color-coding tracks, and employing bus channels enhance workflow efficiency. Fast plugin access, automation, and clear project naming optimize session management. Employ regular backups and use incremental saves for data security. Deeper techniques—including advanced EQ and chain routing—offer expanded control for those seeking refined mixing results.
Key Takeaways
- Use color-coding and naming to organize mixer tracks for faster workflow and easy identification.
- Rout multiple tracks to a bus channel for unified processing and efficient volume control.
- Monitor the Master peak meter to keep output below 0 dB and prevent clipping.
- Create automation clips by right-clicking mixer controls for precise effect modulation.
- Regularly save project versions and use zipped loop packages to protect against data loss.
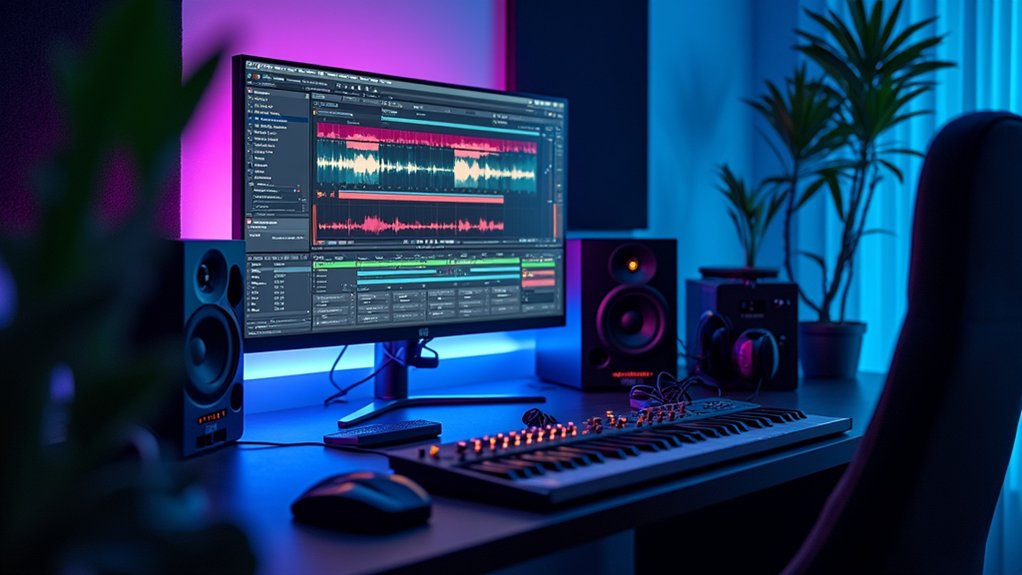
Efficient navigation of the FL Studio Mixer is fundamental for precise audio control and workflow optimization. The mixer is accessed via F9 or the on-screen button, presenting a workspace segmented into three main sections.
The left section provides immediate access to track volume, panning, and effects slots, vital for quick adjustments on individual mixer tracks. The central section handles routing, enabling users to send mixer tracks to various effect chains or buses, important for advanced signal flow configurations.
The right section accommodates additional mixer tracks or dedicated send channels. Organizational features—such as unique numbering, naming, and color-coding—facilitate rapid identification and management of mixer tracks.
Customization options, including track routing and waveform display, enable users to tailor the workflow, ensuring streamlined project navigation and enhanced operational efficiency.
Setting Output Levels and Avoiding Clipping
Maintain precise control over output levels in FL Studio by utilizing both the Main volume knob and the Master Mixer track fader to prevent digital clipping.
Effective workflow demands careful monitoring of the Master track peak meter—any orange indicators signal levels exceeding 0 dB, resulting in distortion upon rendering.
Regularly scrutinize Mixer Track faders and each Channel volume knob, ensuring that no individual element pushes the sum over the critical 0 dB threshold during mixing.
Employ tools such as the Fruity Limiter on the Master track to manage transient peaks and preserve headroom.
It is essential to keep the Master Mixer track below 0 dB throughout the session and especially before exporting audio files to guarantee clarity and prevent unwanted clipping artifacts in the final output.
Consider using sidechain compression to dynamically adjust instrument levels during vocal passages, which can help maintain a balanced mix while preventing any elements from overpowering the vocals.
Fader Gain Versus Channel Volume
While both fader gain and channel volume adjust levels within FL Studio’s Mixer, their points of application and impact on the signal chain differ markedly.
Channel volume is positioned pre-FX, meaning any adjustments directly affect the amplitude of the signal entering the effects chain. This can radically alter the behavior of dynamics processors, distortion, or modulation effects, as these units respond to input level changes.
Conversely, fader gain is applied post-FX, modifying only the final level of the processed signal routed to the master channel. This enables precise output control without disturbing the internal FX balance.
For workflow optimization, practitioners should set channel volume during sound design and initial gain-staging, reserving fader gain for mixing and final output adjustments. This distinction prevents unintended distortion and facilitates cleaner, more controlled mixes.
Organizing Tracks With Grouping and Color-Coding
One of the most effective strategies for managing complex sessions in the FL Studio Mixer is the use of grouping and color-coding. Grouping tracks enables users to collectively control related channels—such as drums, synths, or vocals—streamlining tasks like volume balancing and global effect processing. To facilitate this, each mixer track can be uniquely named and assigned a distinct color. Right-clicking a track header allows for quick color selection, and multiple tracks can be selected and colored simultaneously for consistent visual grouping. This approach provides immediate visual cues, accelerating navigation and minimizing workflow interruptions. Employing both grouping tracks and color-coding not only enhances session organization but also improves mix clarity, allowing for rapid identification and adjustment of elements in even the most intricate arrangements. To further enhance your workspace, explore additional themes available for customizing the overall look of your FL Studio environment.
Creating and Using Bus Channels
Leverage bus channels in FL Studio to streamline the mixing process by routing multiple audio tracks to a single mixer channel. Bus channels are essential for efficient collective processing and level control of grouped sounds, such as drums or backing vocals. To establish a bus channel, select the source mixer tracks, right-click the intended bus channel, and choose “Route to this track.” This facilitates unified processing—such as applying compression or reverb—on the bus channel rather than inserting effects on each individual track. Adjusting the bus channel’s volume provides overarching control without modifying individual track levels. For ideal workflow, deploy multiple bus channels for distinct groups, maintaining mix clarity and organization.
| Function | Action | Benefit |
|---|---|---|
| Group Routing | Route tracks to bus channel | Unified processing |
| Effect Application | Add FX to bus channel | Simplifies workflow |
| Volume Control | Adjust bus channel fader | Balanced group levels |
Building Effective FX Chains
FX chain configuration is a vital component of mixing in FL Studio, enabling precise control over sound shaping and processing. Building effective FX chains begins by inserting effects onto individual mixer tracks, with up to ten slots per track for flexible signal routing and wet/dry blending.
Strategic effect placement is essential; reordering effects such as compressors and reverbs can dramatically change the audio result. Sending tracks to dedicated reverb or delay channels via the mixer’s routing section creates spatial depth and dimension. Understanding reverb parameters and techniques can enhance the clarity and emotional impact of your mix.
Output faders should be used post-processing to maintain ideal gain staging and prevent clipping, especially after adding time-based effects.
Submixing related tracks streamlines building effective FX chains, allowing for collective processing and simplified workflow management, which is vital in complex mix sessions.
Utilizing Peak Meters and Db Scales
Peak meter color changes in FL Studio, particularly the shift to orange above 0 dB, provide immediate visual cues for potential signal clipping.
Operators should use the dB scale to monitor both individual track and master levels, ensuring all peaks remain below the digital threshold to prevent distortion.
Consistent referencing of these meters throughout the workflow supports ideal gain staging and clean final output.
Interpreting Peak Meter Colors
Visual feedback from the FL Studio mixer’s peak meters provides essential real-time information about signal levels throughout the mixing process.
The color changes on each peak meter are particularly informative: signals remain green at safe operating levels, shift yellow as they approach 0 dB, and turn orange when exceeding 0 dB. An orange indicator reflects that the signal has surpassed the digital ceiling, signaling a potential for clipping and distortion.
For technical workflow, it is recommended to keep audio peaks below 0 dB, with -12 dB being a conservative target during mixing for adequate headroom. Regularly referencing the Master Mixer track’s peak meter guarantees no track unintentionally exceeds these thresholds.
Understanding these visual cues is critical for maintaining peak signal integrity and preventing audio degradation during later stages.
Preventing Digital Clipping
Monitoring audio levels with precision is essential to prevent digital clipping in FL Studio’s mixer environment. Digital clipping occurs when signal peaks exceed 0 dB, introducing unwanted distortion into the audio stream.
Practically, users should vigilantly observe the peak meters, as these display real-time levels and turn orange to highlight imminent clipping. It is recommended to maintain recorded sounds peaking around -12 dB during mixing, securing adequate headroom and preserving dynamic range.
Consistently check the Master Track peak meter, ensuring it remains below 0 dB to avoid clipping in the rendered output. Employ limiting and compression on individual tracks to control transients and manage overall mix levels.
This approach safeguards the final mix from signal overload, guaranteeing a clean, professional-sounding result.
Monitoring With Db Scales
When mixing in FL Studio, precise control over output levels is achieved by referencing the dB scales on the mixer’s peak meters. Monitoring with dB scales is essential for maintaining ideal headroom and preventing digital clipping.
The peak meter visually displays the signal level, turning orange as it nears or surpasses 0 dB, signaling potential distortion. Best practice dictates keeping the Master Mixer track peak below 0 dB, ideally around -6 dB, to guarantee sufficient headroom.
Volume adjustments via Mixer faders—applied post-effects—and channel volume knobs—applied pre-effects—allow for fine-tuning levels at each stage.
Consistently monitoring with dB scales throughout the mix workflow guarantees a balanced output and mitigates the risk of unwanted clipping, preserving audio integrity for mastering and export.
Applying Fast Mixer EQ for Quick Adjustments
Streamline the mixing workflow by utilizing FL Studio’s Fast Mixer EQ, which enables rapid frequency adjustments directly on mixer channels without opening additional parametric EQ windows.
The Fast Mixer EQ is optimized for efficiency, making it ideal for routine EQ tasks such as attenuating muddiness with a high-pass filter or accentuating presence using a targeted frequency boost. This tool provides immediate visual feedback and maintains audio integrity by executing clean, artifact-free adjustments.
Producers benefit from this embedded equalizer by saving significant time, allowing greater attention to creative mix decisions rather than technical troubleshooting.
Practical applications of the Fast Mixer EQ include:
- Instantly removing low-end rumble with a high-pass filter
- Swiftly taming harshness via high-frequency attenuation
- Shaping tonal balance without plugin management overhead
- Making basic EQ moves directly from the mixer interface
Streamlining Workflow With Plugin Management
Efficient plugin management is vital for maintaining a streamlined production workflow in FL Studio. Utilizing the “Keep on Top” setting for priority plugins, organizing plugin windows by category, and employing the Plugin Picker for rapid access can greatly reduce time spent searching during sessions. By regularly rescanning for newly installed plugins after installations or updates, users can ensure that their tools are always up-to-date and available. These practices guarantee that essential tools remain accessible and workflow interruptions are minimized.
Utilizing Keep on Top
How can producers maintain seamless access to essential plugins during complex sessions? Utilizing the Keep on Top feature in FL Studio offers an effective solution.
By right-clicking the title bar of any plugin window and enabling Keep on Top, critical tools remain visible above all other windows. This prevents workflow interruptions caused by searching for buried plugin interfaces, especially when toggling between multiple tracks and effects in real time.
The feature streamlines parameter adjustments, reduces window clutter, and allows users to focus on creative decisions rather than window management.
Key workflow advantages include:
- Immediate access to frequently used effects and instruments
- Reduced time spent toggling or searching for plugin windows
- Enhanced focus when fine-tuning parameters during mixing
- Improved management efficiency in sessions with numerous audio elements
Organizing Plugin Windows
Plugin window organization is essential for maintaining an efficient mixing and production environment in FL Studio. Users can streamline workflow by grouping plugins into categories such as effects and instruments within the plugin database, optimizing the process when opening plugins for mixer tracks by pressing the desired channel.
Utilizing the “Keep on Top” function for critical plugin windows guarantees they remain visible, reducing interruptions during mixing. The “Favorites” feature in the plugin picker offers fast access to frequently used plugins, minimizing time spent searching.
Strategic resizing of plugin windows enhances screen real estate management, allowing for simultaneous manipulation of multiple modules. Regularly purging unused or obsolete plugins from the list mitigates clutter and accelerates project loading, ultimately supporting a focused and productive session.
Quick Plugin Access
Building on organized plugin windows, rapid access to plugins further enhances workflow efficiency in FL Studio. Quick plugin access minimizes downtime during production by allowing users to engage directly with essential tools.
Utilizing features such as the “Keep on Top” option guarantees crucial plugins remain visible and interactive. Utilizing keyboard shortcuts like “F2” or “F3” expedites searching through the Packs folder for samples and effects.
Custom plugin categories in the Plugin Database facilitate a tailored workflow, enabling users to group frequently used plugins for instant availability. Right-click functionality on plugin headers allows for immediate opening or closing of plugins, optimizing workflow shifts.
Additionally, marking essential tools in the “Favorites” menu provides a dedicated location for swift retrieval.
- Use “Keep on Top” for important plugins
- Assign plugins to custom categories
- Mark essential tools as Favorites
- Employ right-click actions for fast toggling
Efficient Automation of Mixer Parameters
Efficiently automating mixer parameters in FL Studio streamlines dynamic control over volume, panning, and effects throughout a project.
To create automation clip functionality, users right-click the desired mixer knob or fader—such as Gain or Pan—and select “Create automation clip.” This action generates a dedicated automation lane in the Playlist, enabling precise parameter modulation over time.
Double-clicking the automation clip and using “Copy state” permits rapid duplication of complex automation point arrangements across multiple tracks, greatly accelerating workflow.
Automating the Gain fader is particularly effective for post-effect volume shaping, while panning automation enhances spatial coherence and movement.
For organizational clarity, color-code and appropriately name automation clips. This practice differentiates them from audio and MIDI data, facilitating streamlined navigation within complex project arrangements.
To ensure accurate sound shifts when automating mixer parameters, regularly adjust the Graph Editor and fine-tune the MIN and MAX knobs.
Best Practices for Saving Projects and Backups
A robust project saving and backup strategy in FL Studio minimizes the risk of data loss and streamlines workflow continuity. Users managing complex mixer chains, including intricate Parametric EQ settings, benefit from methodical file management.
Setting a dedicated project folder via Options > General Settings > Project Tab guarantees all assets—audio, project files, mixer presets—are centralized for easy retrieval.
Employing File > Export > Zipped loop package captures every element, including Parametric EQ configurations, for seamless restoration on different systems. Incremental “Save As” versions safeguard against accidental overwrites, preserving progressive mix adjustments.
Off-site redundancy, such as cloud storage or external drives, offers additional protection from hardware failure. FL Studio’s project recovery feature provides automatic backups during unforeseen crashes.
- Centralize all project files in a dedicated folder
- Export zipped loop packages for thorough backups
- Save incremental project versions with clear naming conventions
- Utilize off-site or cloud storage for redundancy
Frequently Asked Questions
How to Use the Mixer on FL Studio?
To utilize the Mixer in FL Studio, users employ Mixer Techniques such as channel assignment, effect routing, volume automation, and gain-staging. Workflow efficiency increases by customizing track colors, names, and display options, supporting effective signal flow and audio management.
What Is the Mixer Limit in FL Studio?
The mixer limit in FL Studio is set at 125 mixer tracks, defining its Mixer Capabilities. Users should structure their workflow to maximize routing efficiency, utilize submixes, and employ color-coding for ideal organization within these constraints.
How to Solo Mixer Channel FL Studio?
To isolate audio, users engage the Solo Function by clicking the “S” button on a mixer channel. This workflow mutes all other tracks, enabling precise monitoring. Multiple channels can be soloed simultaneously for advanced mix referencing and adjustment.
Do Professional Musicians Use FL Studio?
FL Studio usage is prevalent among professional musicians due to its streamlined workflow, advanced MIDI routing, plugin compatibility, and extensive automation tools. Industry practitioners leverage its flexible architecture and frequent updates to execute complex, production-ready audio projects efficiently.
Conclusion
Mastering the FL Studio mixer demands a workflow-focused approach: understanding signal routing, maintaining ideal gain staging, and utilizing group tracks for organizational clarity. Employing color-coding and track grouping streamlines project management, while using bus channels and the Fast Mixer EQ enables efficient processing. Proper plugin management and automation of mixer parameters further enhance productivity. Consistently saving projects and backups guarantees session integrity. Adopting these practical techniques boosts both mix quality and overall studio efficiency in FL Studio.