The FL Studio Piano Roll empowers precise MIDI programming through advanced features like configurable grid snapping, ghost note referencing for harmonization, and the strum tool to humanize chords. Creative workflows include drawing and resizing notes, rapid layer-based deletions, and color-coding for visual organization. Utilizing quantize and legato tools guarantees tight timing and fluid phrasing. Ghost note opacity adjustments, velocity layering, and streamlined batch editing further optimize MIDI craftsmanship. Further exploration will reveal even deeper creative and technical tricks.
Key Takeaways
- Use ghost notes to visualize harmonies and guide melodic or chord writing without leaving the current piano roll.
- Enable and adjust grid settings for precise note placement, ensuring tighter rhythms and cleaner arrangements.
- Experiment with slide notes and legato features for expressive melodies and smooth transitions between MIDI notes.
- Utilize velocity and panning controls for dynamic, lively performances and a wider stereo image.
- Apply quantization and the slice tool to tighten timing and efficiently edit complex MIDI patterns.
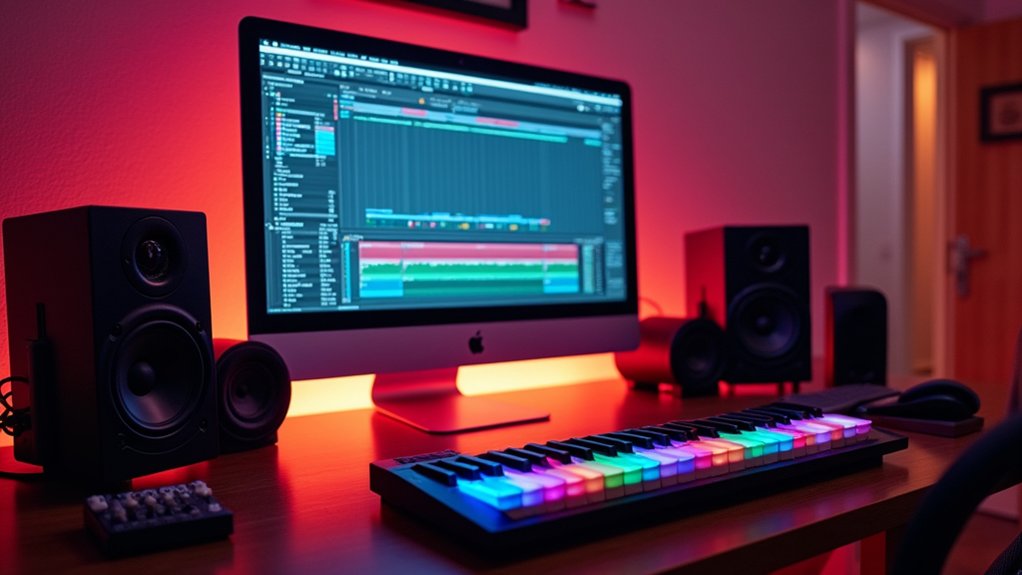
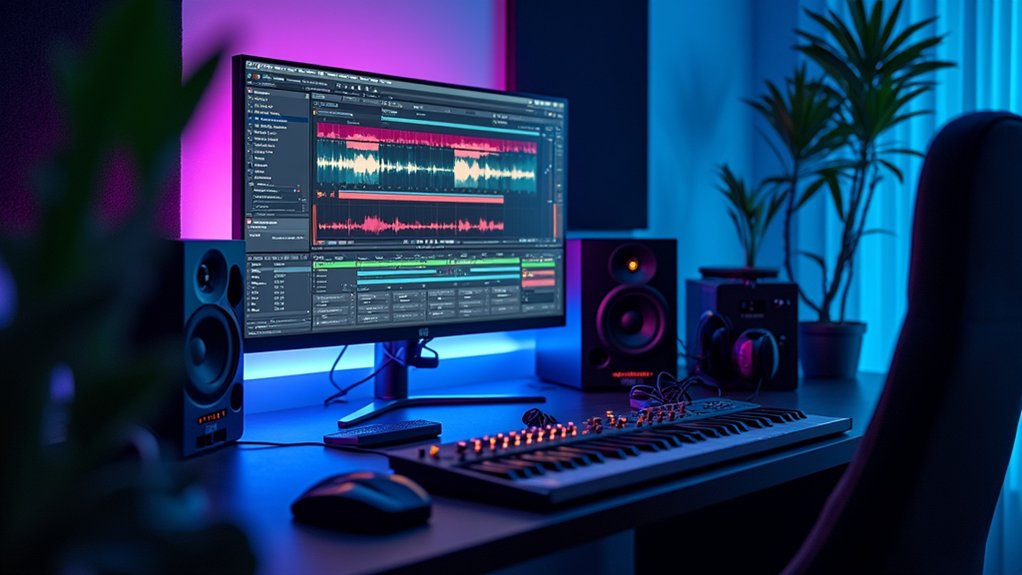
Exploring the FL Studio Piano Roll Interface
Although many digital audio workstations offer MIDI editing capabilities, the FL Studio piano roll distinguishes itself through an intuitive visual interface that streamlines composition and arrangement workflows.
The piano roll in FL Studio is engineered for granular MIDI editing, featuring configurable grid settings—such as the recommended half beat—for meticulous note placement and rhythm manipulation.
Workflow is further enhanced by toggling key labels within the view settings, providing immediate pitch and scale context for efficient note allocation.
Essential editing tools, including the quick legato and slice functions, enable rapid chord length uniformity and precise segmentation, respectively.
The piano roll’s zoom functionality optimizes the visual workspace, allowing for detailed arrangement and editing at any resolution.
Collectively, these features position FL Studio’s piano roll as a robust centerpiece for MIDI-based music creation.
Efficient workflow in FL Studio begins with direct access to the piano roll, which is initiated by right-clicking the target instrument within the channel rack or selecting it through the step sequencer’s menu.
In music production, make sure the workspace is optimized by enabling key labels from the view settings—this visual cue is essential for rapid pitch identification.
Navigation is divided into two primary actions: panning and precise movement. Use a middle mouse click to pan across the piano roll, facilitating swift shifts between octaves and measures. For granular adjustments, holding the shift key while right-clicking enables meticulous navigation.
To exit, simply click the cross icon at the top right or press escape. These techniques streamline MIDI editing, ensuring creative flow remains uninterrupted.
Understanding Snap to Grid and Grid Settings
Once navigation within the piano roll is mastered, attention shifts to the Snap to Grid feature, a core component in structuring MIDI data with accuracy. Snap benefits are evident in the way notes automatically align to a specified grid, ensuring impeccable timing and spacing throughout the composition. Grid adjustments are accessible via the piano roll toolbar, empowering users to select resolutions such as bar, half beat, or quarter note. The half beat setting is frequently chosen for its equilibrium between rhythmic flexibility and melodic precision. Temporarily bypassing grid constraints by holding Shift allows nuanced note alignment, ideal for advanced editing. This workflow-centric approach directly supports creative intent while maintaining technical rigor.
| Grid Setting | Use Case |
|---|---|
| Bar | Broad rhythmic structure |
| Half Beat | Balanced precision |
| Quarter Note | Detailed rhythmic subdivision |
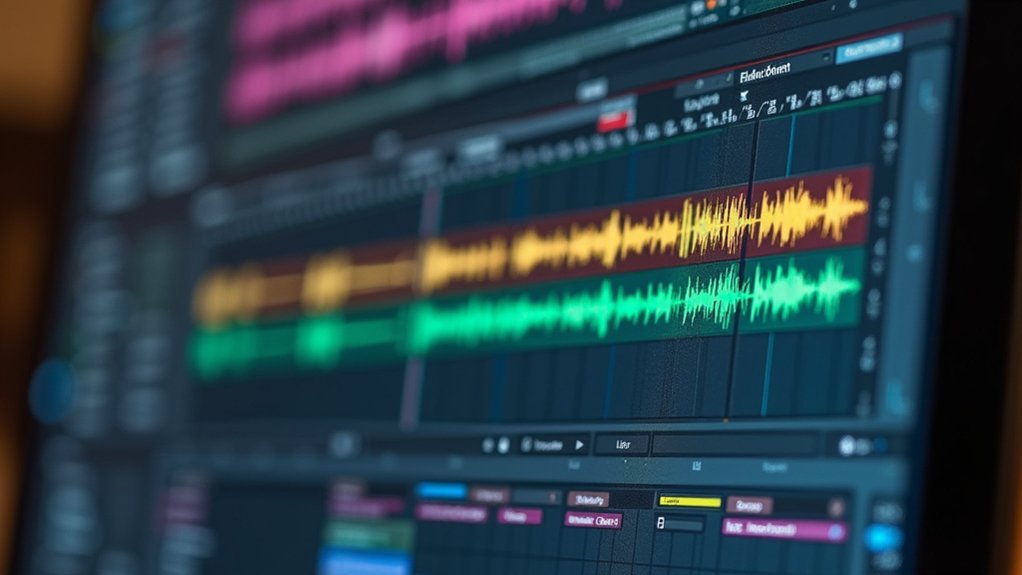
Drawing, Resizing, and Deleting Notes
Efficient note input in FL Studio’s piano roll involves drawing custom chords by simultaneously placing multiple notes, streamlining harmonic experimentation.
Resizing notes is optimized via edge-dragging or enabling left-side adjustment for granular control over note length and rhythmic placement.
Rapid deletion is achieved with right-click gestures or keystroke commands, supporting a fluid and iterative workflow.
Drawing Custom Chords
Harnessing the precision of FL Studio’s piano roll, users can construct custom chords by deploying the draw tool directly onto the grid, simultaneously plotting multiple notes to form harmonically rich structures.
This allows for experimentation with chord voicing techniques, as users position notes to create inversions and extensions that articulate distinct tonal colors. By clicking and dragging, complex harmonic arrangements are swiftly realized, laying a foundation for rhythmic variations explorations within the MIDI sequence.
For workflow efficiency, unwanted notes can be eliminated via right-click drag or by selecting and pressing the delete key, ensuring a clean arrangement.
Further organization is achieved by color coding notes, aiding in visual differentiation of chord sections—streamlining the iterative process of building, refining, and experimenting with unique chord progressions.
Resizing Notes Easily
Beyond shaping unique chord progressions, the piano roll‘s grid-based interface empowers precise manipulation of individual note lengths and positions for intricate compositional control.
Utilizing edge resizing methods, users can click and drag a note’s boundary to adjust duration, with left-edge resizing enabled via settings for enhanced flexibility. This facilitates rapid adaptation of melodic or harmonic material, especially when combined with note snapping techniques—aligning note edges precisely to grid increments for rhythmic consistency.
Efficient note alignment is further supported by visual cues and color coding, allowing for streamlined identification and manipulation of related note groups. The quick legato tool automates length adjustment, ensuring seamless shifts and professional phrasing.
Mastery of these resizing workflows greatly accelerates MIDI editing, enabling detailed expression and tight arrangement within FL Studio’s robust piano roll environment.
Deleting Notes Quickly
Maneuvering the FL Studio piano roll, users streamline note editing by employing direct manipulation techniques: drawing new notes with a simple click, resizing durations via edge dragging, and erasing unwanted notes through right-click-and-drag gestures. These note management techniques underpin efficient editing workflows by allowing immediate adjustment and deletion of MIDI data. Right-click-and-drag stands out for rapid bulk note removal, enabling swift correction and arrangement without interrupting creative momentum. Precision in note placement and duration is further enhanced by grid snapping, with default settings calibrated for half-beat increments. For seamless navigation, the middle mouse button allows for viewport movement, maintaining focus on the editing area. Such integrated controls collectively contribute to enhancing MIDI precision within FL Studio.
| Technique | Workflow Enhancement |
|---|---|
| Right-click-and-drag | Rapid note deletion |
| Edge dragging | Precise duration adjustments |
| Grid snap | Accurate timing alignment |
Utilizing Ghost Notes for Reference
Many producers rely on ghost notes in FL Studio’s piano roll as a precise visual aid when constructing harmonies or layering melodies. By enabling ghost notes through the “View” menu, users gain immediate access to translucent representations of MIDI data from other channels, streamlining the process of composing melodies that align with existing arrangements.
The primary ghost note benefits include enhanced workflow efficiency and improved musical cohesion, as these references eliminate the guesswork in melodic placement and voicing. Adjusting ghost note opacity allows for ideal visual clarity, keeping the creative process focused while maintaining necessary context.
Utilizing ghost notes accelerates decision-making, enabling producers to quickly assess harmonic relationships and craft intricate layers without inadvertently modifying original MIDI sequences, thereby enhancing arrangement strategies.
Custom Chord Creation and Editing
Custom chord creation in FL Studio’s Piano Roll leverages the draw function for rapid placement of unique chord shapes, streamlining harmonic experimentation.
Users can refine these structures by resizing notes—especially from the left edge for tight voicing control—or muting individual notes to audition different chord variations on the fly.
This workflow empowers precise harmonic editing and facilitates non-destructive exploration of complex chordal textures.
Drawing Unique Chord Shapes
Crafting unique chord shapes in FL Studio’s Piano Roll involves strategically placing individual notes on the grid with the draw tool, allowing precise control over harmonic structure and voicing.
Producers can experiment with custom chord voicings by selecting pitch and interval combinations not found in standard chord presets. This granular approach opens creative possibilities for chord extension techniques—adding sevenths, ninths, or altered tones to achieve distinctive textures.
Harmonious note selections are facilitated by visual feedback, enabling users to quickly audition and refine each chord’s color. For workflow optimization, color coding distinct custom chords streamlines identification within complex arrangements.
Resizing and Muting Notes
When refining chord progressions in FL Studio’s Piano Roll, precise manipulation of note length and activity is essential for tailored harmonic results. Resizing notes—by dragging their edges—empowers creators to sculpt chord durations for complex voicings and dynamic control.
Activating resizing from the left in the settings further enhances flexibility for custom chord creation. Selective muting techniques allow experimentation with note layering, letting users audition alternative voicings or rhythmic patterns without data loss.
The quick legato tool is invaluable for equalizing note lengths, ensuring seamless shifts. Color coding aids in organizing intricate arrangements, visually distinguishing harmonic structures.
- Drag note edges to resize for nuanced timing.
- Enable left-edge resizing for granular edits.
- Mute notes to test alternate voicings non-destructively.
- Apply quick legato for uniform chord articulation.
- Color code notes for streamlined visual management.
Sliding Notes for Expressive MIDI
Expressiveness in MIDI composition is enhanced through the strategic use of sliding notes within FL Studio’s piano roll. Slide techniques involve enabling the slide button in note properties, granting granular control over pitch shifts for seamless, fluid melodic motion.
By selecting target notes and converting them into slide notes, users can dictate how and when notes glide to new pitches, enabling expressive dynamics not achievable with static note placement. The duration of the pitch glide is manipulated by dragging the note’s right edge, allowing tailored slide times from rapid bends to languid sweeps.
Precision in slide execution relies on appropriate snap to grid settings, ensuring rhythmic integrity. Creative workflows often combine pitch slides with velocity modulation, integrating nuanced articulation and dynamic contour into MIDI passages for more lifelike performances.
Applying Legato and the Mute Function
Although often overlooked, the legato and mute functions within FL Studio’s piano roll are essential for refining MIDI articulation and arrangement. Utilizing legato techniques, producers can guarantee seamless and expressive shifts between notes by auto-adjusting durations, particularly in melodic or harmonic passages. The quick legato tool equalizes the lengths of selected chords, streamlining workflow and enhancing musical fluidity.
Conversely, mute strategies empower users to isolate elements, enabling focused editing or temporary silencing without data loss. Both features are conveniently located in the piano roll toolbar, supporting efficient workflow integration and nuanced sound design.
- Apply legato to selected notes for fluid melodic movement.
- Use the mute tool to silence specific MIDI notes during playback.
- Combine legato techniques with expressive shifts in chord progressions.
- Access both functions directly from the piano roll’s toolbar.
- Employ mute strategies to audition arrangements and manage complexity.
Cutting and Selecting Notes Efficiently
Efficient note editing in FL Studio’s Piano Roll relies on mastering the Slice tool for granular segmentation and rapid restructuring of MIDI data.
Multi-note selection workflows—such as box selection, Ctrl-assisted clicking, and global selection shortcuts—enable precise batch manipulation.
Integrating quick delete commands further optimizes the arrangement process, supporting non-destructive experimentation and accelerated creative iterations.
Using the Slice Tool
Harnessing the Slice Tool in FL Studio transforms the piano roll into a precise editing environment, where MIDI notes and chords can be segmented with surgical accuracy.
Producers activate the Slice Tool from the toolbar or by using its shortcut, streamlining their workflow for rapid intervention. Advanced slicing techniques allow users to dissect complex chords or melodies, enabling distinct rhythmic variations and fostering creative sound design possibilities.
Once split, each MIDI fragment can be manipulated independently—moved, deleted, or re-sized—unlocking intricate arrangements that enhance musical structure.
- Instantly access the Slice Tool via the toolbar or shortcut key for seamless workflow.
- Create rhythmic variations by slicing long notes into dynamic, staccato segments.
- Apply advanced slicing techniques to rearrange chord progressions or melodies.
- Enable creative sound design by isolating and manipulating individual note fragments.
- Easily undo or refine slices for non-destructive editing and experimentation.
Multi-Note Selection Techniques
Many producers rely on advanced multi-note selection techniques in FL Studio’s piano roll to expedite intricate editing tasks and streamline compositional workflows.
Efficient note grouping techniques begin with holding Ctrl while clicking individual notes or employing the selection tool to drag across multiple notes. For broader selection efficiency, combining Shift with mouse movement creates a rectangular selection area, allowing rapid aggregation of contiguous notes.
The Ctrl + A shortcut instantly highlights all notes, a foundational step for bulk transformations. Creative workflow enhancements include color coding selected note groups via the edit menu, introducing visual segmentation for complex arrangements.
These selection efficiency tips underpin quick editing strategies, facilitating batch manipulations such as quantization or velocity adjustments. Mastery of multi-note selection directly accelerates MIDI editing precision within FL Studio’s piano roll.
Quick Delete Shortcuts
Accelerating note removal in FL Studio’s piano roll revolves around utilizing shortcut-driven workflows and context-sensitive tools. Employing quick delete techniques streamlines MIDI editing, enabling producers to maintain creative momentum.
Efficient note removal is achieved through right-click dragging, which erases multiple notes in a single gesture, and utilizing the “Select all” command followed by the delete key for batch operations. The slice tool adds granular control, allowing precise cutting of note edges for tailored edits.
Additionally, selective muting offers non-destructive fast editing methods, preserving arrangement flexibility. Navigational shortcuts such as middle mouse click or shift + right-click further optimize note targeting and selection.
- Right-click and drag for bulk note deletion
- Use “Select all” + delete for mass removal
- Slice tool for precise note trimming
- Mute function for non-destructive silencing
- Shift + right-click for swift note selection
Velocity, Panning, and Note Expression
Fine-tuning velocity and panning within FL Studio’s piano roll transforms static MIDI notes into expressive, lifelike performances. By utilizing velocity layering techniques, users can sculpt nuanced dynamics—emphasizing particular notes while softening others—directly through the velocity handles beneath each note event. This granular control enables dynamic note articulation, ensuring that passages breathe with musicality rather than sounding robotic. Simultaneously, panning automation strategies allow individual notes to be positioned precisely across the stereo field. This spatial manipulation creates depth and stereo width, enriching the overall sonic environment. Combining velocity and panning adjustments yields intricate sound textures, as notes not only vary in loudness but also in perceived location. Velocity randomization enhances dynamism and realism in musical compositions, simulating the expressiveness of live performances. Such workflow empowers producers to craft compelling, humanized MIDI arrangements within their FL Studio compositions.
Using the Strum Tool for Realism
While velocity and panning adjustments provide foundational expressiveness in MIDI arrangements, achieving authentic instrumental realism often requires subtle temporal variation. The Strum Tool in FL Studio addresses this need by simulating strumming techniques, introducing nuanced timing variations and velocity adjustments to selected notes.
Accessed via the Tools menu, this feature enables producers to craft lifelike guitar or keyboard passages by offsetting note onsets and modulating dynamics in a controlled manner. The Strum Tool’s “Time” and “Velocity” parameters offer granular control, allowing users to sculpt the degree of rhythmic displacement and dynamic contrast.
This workflow not only emulates human performance, but also deepens the expressive palette of any MIDI-driven composition.
- Access via Tools > Strum in the piano roll
- Select target notes for strumming techniques
- Adjust “Time” for onset timing variations
- Modify “Velocity” for expressive velocity adjustments
- Preview in real-time for instant creative feedback
Quantizing Notes for Perfect Timing
Although expressive timing lends a human touch to MIDI performances, precise rhythmic alignment often underpins polished productions.
In FL Studio’s Piano Roll, quantizing is initiated via the tools menu, allowing immediate access to note alignment techniques. Producers select the target notes and apply quantization, typically using a half beat grid setting to balance rhythmic precision with musicality.
Quantization strength adjustment is pivotal—tighter settings snap notes rigidly to the grid for robotic accuracy, while looser values retain subtle timing variations for realism. This workflow enables systematic timing discrepancies correction without sacrificing groove.
Accessing the Quantize tool by pressing Alt + Q streamlines the process, providing options for snap settings and sensitivity adjustments to further refine alignment precision.
After quantizing, critical listening is essential, as complex passages can yield unexpected shifts; individual note positions may require manual fine-tuning for ideal results, ensuring each MIDI phrase remains both tight and expressive.
Pattern Painting and MIDI Organization
Streamlining MIDI arrangement in FL Studio hinges on effective pattern painting and meticulous organization within the Piano Roll.
Advanced MIDI arrangement techniques leverage the draw function for rapid chord construction, facilitating inventive pattern layering strategies and harmonic exploration.
Utilizing selection tools enhances note grouping methods, empowering producers to isolate and mute sections for non-destructive edits.
The ctrl + b shortcut exponentially accelerates pattern duplication, essential for rapid arrangement without interrupting creative momentum.
Consistent application of snap to grid—ideally set to half beat—ensures rhythmic integrity across layered MIDI patterns.
- Rapid chord creation via the draw function for custom progressions
- Efficient note grouping and isolation using selection and mute tools
- Accelerated arrangement with ctrl + b for pattern repetition
- Snap to grid for quantized pattern layering strategies
- Organizational clarity through methodical MIDI arrangement techniques
Color Coding and Workflow Optimization
Color coding in FL Studio’s Piano Roll provides immediate visual organization by assigning distinct hues to different MIDI note groups or song sections.
This technique enables streamlined MIDI editing, allowing users to quickly locate, select, and manipulate targeted musical elements within complex arrangements.
Such workflow optimization is particularly valuable for large projects and collaborative environments, where visual clarity accelerates both creativity and production efficiency.
Visual Organization With Colors
Efficient session management in FL Studio’s piano roll hinges on strategic visual organization, where color coding serves as a pivotal workflow enhancer.
Utilizing color psychology, producers can intuitively assign emotionally resonant hues—such as calming blues for bass or vibrant reds for lead melodies—creating an immediate visual lexicon. Purposeful color combinations not only segment instrument parts but also prevent cognitive overload in dense arrangements.
Maintaining color consistency across sessions accelerates recognition and minimizes editing friction. The color assignment feature, accessible via the edit menu, empowers users to demarcate sections or motifs for rapid identification, thereby optimizing compositional flow.
- Assign unique colors to each instrument type
- Use warm vs. cool color combinations for contrast
- Standardize color consistency across all projects
- Group related MIDI segments with analogous colors
- Employ color psychology to cue musical function
Streamlined MIDI Editing
Building on the structured clarity that color organization provides, optimized MIDI editing in FL Studio leverages these visual cues to expedite compositional decisions and error correction.
By systematically color coding note groups via the edit menu—using “select all” for mass assignment—producers streamline pattern organization strategies, rapidly distinguishing instruments, sections, or motifs within dense arrangements.
This visual segmentation supports efficient application of MIDI quantization techniques, such as aligning multiple colored note clusters to the grid for rhythmic consistency.
Integrating color labels with note expression methods—such as employing the quick legato tool or selectively muting regions—enables rapid identification and manipulation of expressive elements.
Ultimately, persistent color management, when combined with other workflow tools, transforms the piano roll into a visually intuitive interface for dynamic, error-resistant MIDI editing.
Frequently Asked Questions
How Do I Make My Piano Sound Better in FL Studio?
Optimizing piano sound design in FL Studio involves precise MIDI velocity adjustments for dynamic expression, strategic layering of piano sounds for depth, and employing DAW features like strum and quantization to achieve realistic timing and nuanced articulation in MIDI performances.
What Makes FL Studio Piano Roll Good?
The FL Studio piano roll features advanced MIDI editing capabilities, customizable automation tools, and a versatile interface. These elements streamline workflow, facilitate creative manipulation of notes, and allow precise control over timing and expression for nuanced music production.
How Do You Use MIDI on Piano Roll FL Studio?
When utilizing MIDI on the FL Studio piano roll, users employ MIDI editing techniques such as drawing and resizing notes, apply MIDI quantization tips for precise timing, and leverage piano roll shortcuts to streamline workflow and enhance creative arrangements.
What Is Ctrl+L in FL Studio?
Ctrl + L in FL Studio acts as a powerful MIDI shortcut, instantly linking a selected channel to the active playlist pattern. This workflow-centric feature streamlines piano roll organization, enhancing creative efficiency when managing complex MIDI arrangements within FL Studio.
Conclusion
Mastering the FL Studio Piano Roll enhances MIDI composition through precise navigation, strategic grid manipulation, and advanced note editing. Integrating ghost notes and the strum tool injects realism, while quantization guarantees rhythmic integrity. Efficient pattern painting and meticulous MIDI organization streamline workflow, and color coding enhances visual clarity. By utilizing these essential tricks, producers gain granular control and creative flexibility, transforming the Piano Roll into a powerful hub for innovative, professional-grade music production within FL Studio.