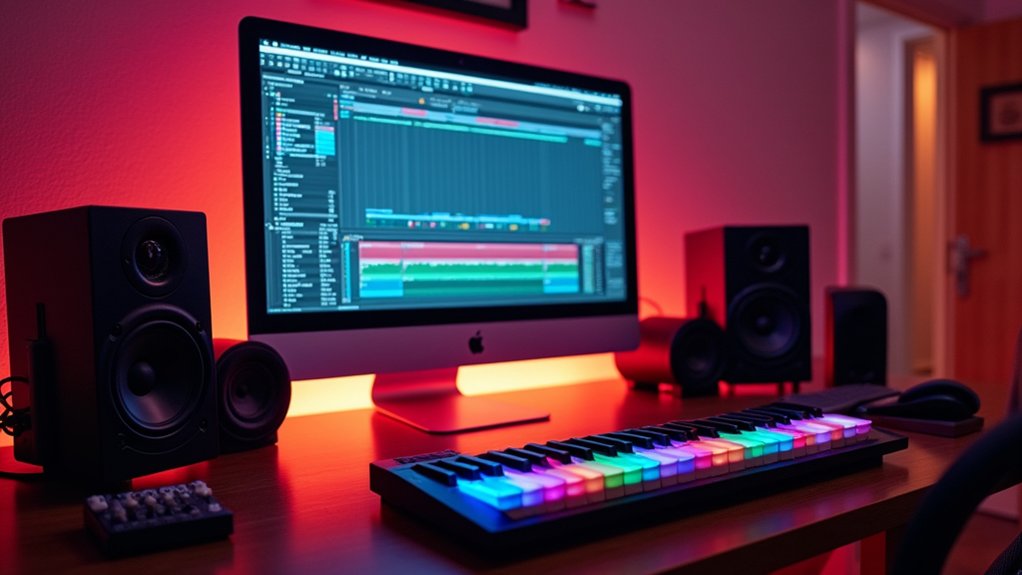
To record MIDI in FL Studio, first connect and enable the MIDI controller in Options > MIDI Settings. Select the desired instrument in the Channel Rack, configure input and arm the track for recording. Activate the metronome and count-in for tight timing, then click record and capture both notes and automation. After recording, use the Piano Roll to edit timing, velocity, or delete mistakes. Fine-tune quantization and snap settings for perfect groove. Next steps provide more advanced workflow details.
Key Takeaways
- Connect and enable your MIDI controller in FL Studio’s MIDI settings, ensuring it’s properly recognized before starting a session.
- Select your desired instrument channel in the Channel Rack and load a VST or plugin for MIDI input.
- Arm the target track for recording, activate the metronome and count-in, then press record and choose “notes and automation.”
- After recording, access the Piano Roll to review, edit, and fine-tune MIDI notes for timing, pitch, and velocity.
- Use quantization and snap-to-grid features to correct timing issues, ensuring your MIDI performance aligns perfectly with the project tempo.
Setting Up Your MIDI Controller in FL Studio
Proper configuration of a MIDI controller in FL Studio is essential for seamless integration and ideal workflow.
Begin by connecting the MIDI controller to the computer and powering it on prior to launching FL Studio. After startup, navigate to the “Options” menu and select “MIDI Settings.”
Take a look under the “Input” section to locate the connected controller. Enabling the device by checking the “Enable” box guarantees that MIDI data is properly transmitted.
For optimal mapping and advanced functionality, set the “Controller type” to match the specific model. A big fan of workflow efficiency will appreciate observing the MIDI activity indicators when pressing keys or pads, confirming proper recognition.
This foundational setup streamlines the process of capturing MIDI data reliably within the FL Studio environment.
Choosing the Right Channel and Instrument
Instrument selection forms the backbone of effective MIDI recording in FL Studio, demanding precise channel assignment within the Channel Rack. Users should first select their intended instrument channel by clicking the appropriate slot—this could be a synth, bass, or drum plugin. To introduce a new instrument, load a VST or native FL Studio plugin into the channel slot. Verify the correct MIDI input device is chosen in the MIDI settings to guarantee the controller triggers the selected channel. Adjust volume and pan for each channel to achieve a balanced mix before recording. For best results, spend a little bit of time confirming these settings, as improper configuration may lead to workflow interruptions. To maintain an organized plugin setup, utilize the Plugin Manager to create custom folders and add frequently used plugins to favorites, enhancing production efficiency.
| Step | Action | Tip |
|---|---|---|
| Channel Selection | Click Channel Rack slot | Choose instrument wisely |
| Load Instrument | Add VST/native plugin | Experiment a little bit |
| Input Device | Set MIDI controller | Verify it’s enabled |
Arranging Patterns in the Playlist
Efficiently arranging MIDI patterns in the FL Studio Playlist involves selecting the target track for each instrument and visually placing the desired patterns onto the timeline.
Employing advanced pattern arrangement techniques, users can optimize their workflow by dragging patterns, such as bass or drums, to the correct track and aligning them to the timeline.
Utilize playlist organization tips like the snap-to-grid feature for precise bar alignment and seamless integration with the project tempo. For efficient MIDI pattern workflows, patterns can be duplicated with Ctrl-drag to extend sections or create variations.
Double-clicking a pattern in the playlist provides quick access to the MIDI editor for real-time adjustments.
- Snap-to-grid guarantees tight timing and clean arrangement
- Duplicate patterns to streamline repetitive sections
- Access MIDI editor directly for rapid pattern refinement
Enabling the Metronome for Accurate Timing
For precise MIDI recording, users should activate the metronome by clicking its icon in the top toolbar, ensuring consistent timing.
FL Studio allows customization of metronome sound options via right-click, enabling adjustments to better suit the monitoring environment.
This setup assists in maintaining accurate rhythm and synchronization throughout the recording workflow.
Activating Metronome in Toolbar
Clicking the metronome icon—located in the top toolbar and resembling a small clock or triangle—enables a steady click track, which is essential for maintaining accurate timing during MIDI recording in FL Studio.
The metronome aids in achieving tight performances by providing a reference pulse synchronized to the project’s tempo. Users should verify the metronome is activated before starting any recording session to maximize metronome timing precision.
Precise workflow adjustments, such as metronome volume adjustments, can be made via the audio mixer to set a preferable monitoring level without overpowering the track content.
Additionally, initial metronome sound customization options allow users to tailor the click’s tonal character for better audibility.
- Quickly locate and activate the metronome icon in the toolbar
- Adjust metronome volume in the mixer for balanced monitoring
- Use metronome for consistent timing throughout MIDI recording
Customizing Metronome Sound Options
Once the metronome is active in the transport panel, further customization of its sound options enhances workflow efficiency and timing accuracy during MIDI recording.
Users can access metronome sound customization by steering to the “Options” menu, where selectable sound samples allow differentiation between beats and downbeat accents. Changing metronome accents guarantees clear auditory cues, especially when working in unconventional time signatures—configurable directly in the metronome settings.
Adjusting metronome tempo is synchronized with the project’s BPM, but precision adjustments can be made in the transport panel to match specific session requirements. For peak monitoring, adjusting the metronome volume in the audio settings prevents masking or distraction.
Utilizing the count-in feature provides preparatory bars, solidifying sync before recording initiates, further improving temporal precision.
Configuring the Count-In Feature
Before initiating a MIDI recording session in FL Studio, configuring the count-in feature guarantees precise timing by providing a preparatory metronome click. The count-in delivers an audible cue, helping musicians lock in with the project tempo before actual data capture begins.
To activate this, access the metronome settings located on the main toolbar, ensuring the metronome is enabled for clear monitoring. The count-in duration, set to 1 bar by default, can be adjusted in the options menu to tailor the preparatory window—crucial for complex passages or ensemble workflows.
Previewing the count-in by hitting play verifies that the metronome functions as expected, optimizing workflow efficiency.
- Count in benefits: Enhances timing accuracy for MIDI input.
- Adjusting duration: Customize preparatory length to session needs.
- Metronome settings: Centralized control for consistent cueing.
Selecting Recording Modes and Options
Selecting the appropriate recording mode in FL Studio involves specifying whether to capture notes, automation, or both.
Users should enable the count-in feature for precise performance entry and adjust quantization settings to control MIDI timing correction.
Activating these options streamlines the workflow and guarantees accurate data capture during recording sessions.
Choosing Recording Data Types
A crucial step in setting up MIDI recording in FL Studio involves configuring the recording data types to match the session’s objectives. Users must select the appropriate data types—such as “notes and automation”—from the recording options to guarantee thorough capture of both musical input and automation parameters.
This targeted approach maximizes workflow efficiency for advanced MIDI recording techniques and automation integration. It is recommended to verify the correct track is armed before recording to avoid misplacement of MIDI data.
For best performance enhancement tips, adjust the snap settings to record with or without quantization as needed. After completion, disarm the record button to avoid unintentional data overwrites.
- Capture both note and automation data for flexible editing
- Always verify the intended track is selected before recording
- Adjust snap/grid settings for precise or freeform MIDI input
Enabling Count-In Feature
Precision in MIDI recording workflows is enhanced through the use of FL Studio’s count-in feature, which introduces a metronome click for a designated duration—typically one bar—before actual recording commences.
Enabling the count-in function from the recording options panel allows for deliberate recording preparation, granting performers a temporal buffer to position their hands and mentally map the upcoming MIDI input.
The count-in advantages are most evident when tackling complex passages, as the pre-roll metronome guarantees the performer is locked in to the project’s tempo grid.
For ideal timing improvement, it is recommended to activate the metronome in conjunction with the count-in. Users can specify the count-in duration or toggle the feature on and off, tailoring the workflow to the demands of each production scenario.
Setting Quantization Preferences
With the count-in feature providing a preparatory temporal buffer, attention shifts to setting quantization preferences and selecting appropriate recording modes in FL Studio.
Users can optimize their workflow by choosing “notes and automation” as the recording mode, ensuring both MIDI and real-time automation data are captured.
Adjusting the snap to grid setting is fundamental; stricter values enforce precise timing, while looser settings accommodate expressive, freeform input.
Quantization techniques are accessed via the tool drop-down, offering both quick quantization and advanced, granular options for MIDI editing.
Sensitivity controls refine which notes are affected, enabling targeted timing corrections.
Upon configuring recording preferences, confirm and apply changes, then audit playback for accuracy.
- Select “notes and automation” for thorough recording
- Adjust snap to grid for timing flexibility
- Use quantization sensitivity for precise MIDI editing
Initiating the Recording Process
Begin the recording process in FL Studio by selecting the target track for the MIDI instrument in either the mixer or playlist.
For ideal track management, verify the chosen channel is correctly routed and armed for recording. Activate the metronome to maintain precise timing and reinforce solid recording techniques during your MIDI performance.
Utilize the count-in feature—typically set to one bar—to secure a preparatory interval before the take commences, allowing for better synchronization with the project tempo.
Click the record button and, when prompted, select “notes and automation” to specify the type of data captured.
Once the MIDI performance is complete, terminate recording by pressing the spacebar or stop button. Disarm recording mode on the track to prevent unintentional overwriting during subsequent editing sessions.
Capturing Notes and Automation During Recording
Capturing Notes and Automation During Recording
Selecting “notes and automation” from the recording options in FL Studio enables simultaneous capture of MIDI note data and real-time parameter movements. This workflow is vital for producers seeking to record expressive performances while dynamically manipulating controls, such as filter cutoffs or effect sends. Engaging the metronome guarantees quantized timing, fundamental for capturing dynamics and maintaining rhythmic precision. Utilizing the count-in (default: 1 bar) allows performers to prepare, resulting in more accurate takes. While recording, both note events and automation clips are embedded within the Playlist or Piano Roll, providing an all-encompassing basis for subsequent editing. This approach is particularly effective when layering effects or adjusting velocities in post-production. Quantization aligns MIDI notes with the time-grid, ensuring that recorded performances maintain a consistent rhythmic feel conducive to high-quality music production.
Stopping and Saving Your Performance
Terminate the recording process in FL Studio by pressing the spacebar or selecting the stop button in the transport panel; this action immediately concludes the session and commits all captured MIDI data to the active pattern. For best workflow, disarm recording mode by clicking the record button again, minimizing the risk of unintentional overwrites during subsequent sessions. Effective recording techniques include promptly saving progress using Ctrl + S, a fundamental saving strategy to prevent data loss. The MIDI pattern remains accessible in the playlist, allowing for seamless repositioning along the timeline. Once confident in the captured performance, users may apply quantization and timing adjustments to finalize the MIDI data. Employing these performance tips guarantees the integrity and retrievability of recorded material throughout the production process. To further reduce composition time, consider utilizing existing samples as foundational elements to expedite the creative process and enhance productivity.
| Recording Techniques | Saving Strategies |
|---|---|
| Disarm recording mode | Use Ctrl + S often |
| Drag pattern in playlist | Commit finalized data |
Reviewing MIDI Data in the Playlist
Once MIDI recording concludes, the captured data automatically populates the playlist on the designated track, ready for immediate evaluation and adjustment.
Users should leverage MIDI data visualization directly in the playlist for quick inspection of recorded patterns. The flexibility of the playlist allows for immediate repositioning or resizing of MIDI clips, optimizing workflow before deeper note-level edits.
Playback techniques enable users to audition the recorded MIDI in context, verifying timing and arrangement. For rapid workflow, editing shortcuts such as selecting, moving, or deleting entire MIDI clips streamline the review process without opening detailed editors.
- Use MIDI data visualization in the playlist for high-level assessment of patterns.
- Apply editing shortcuts for fast clip management and arrangement tweaks.
- Employ playback techniques to analyze timing and synchronization within the project.
Incorporating color coding in FL Studio can further enhance organization by allowing users to quickly identify different MIDI clips based on their assigned colors, thereby streamlining the editing process.
To begin editing MIDI data, the user must access the Piano Roll by selecting the target instrument and opening its Piano Roll window from either the Channel Rack or Playlist context menu.
Selecting the correct MIDI pattern guarantees modifications are applied to the intended sequence.
Efficient navigation of editing tools such as the pencil and selection tools streamlines precise note manipulation within the Piano Roll grid.
Accessing the Piano Roll
Efficient MIDI editing in FL Studio centers around the Piano Roll, a dedicated interface for visualizing and manipulating note data. To initiate MIDI note manipulation, users must first access the Piano Roll for the relevant instrument track. This can be accomplished by either right-clicking the instrument in the Channel Rack and selecting “Piano Roll” or by clicking the instrument’s name within the Playlist and choosing “Piano Roll” from the top menu.
Once inside, the visual interface navigation becomes intuitive, presenting pitch vertically and time horizontally. Essential Piano Roll features, such as the Brush Tool and Paint Tool, streamline note input and modification, facilitating rapid workflow adjustments.
- Access the Piano Roll via Channel Rack or Playlist for any instrument
- Utilize visual interface navigation for precision editing
- Employ specialized Piano Roll features for efficient MIDI note manipulation
Selecting MIDI Patterns
While maneuvering complex project arrangements in FL Studio, users must efficiently select MIDI patterns for targeted editing.
MIDI pattern selection begins by locating the desired pattern within the Playlist and double-clicking it to open the Piano Roll interface. This action facilitates direct access to editing MIDI notes, offering granular control over pitch, length, and velocity parameters.
For streamlined workflow, Piano Roll navigation includes a pattern drop-down menu at the top, allowing rapid switching between various MIDI patterns without leaving the editing context.
Zoom tools within the Piano Roll are essential for focusing on specific MIDI regions, enhancing editing accuracy.
Additionally, right-clicking on notes provides immediate access to core editing functions—copy, paste, and delete—supporting efficient arrangement adjustments and precision in MIDI composition workflows.
After selecting a MIDI pattern within the Playlist, direct access to detailed note editing is achieved by double-clicking the pattern, which launches the Piano Roll interface. Here, users gain granular control over note articulation, applying precise adjustments to note start points, lengths, and velocities.
Utilizing editing shortcuts, such as right-clicking to delete notes or dragging to alter duration, streamlines the workflow. The zoom functionality enables close inspection for micro-editing, essential when refining timing and implementing MIDI effects. Quantization tools are readily available, ensuring accurate grid alignment for improved rhythmic consistency.
The Piano Roll supports advanced manipulation, allowing integration of MIDI effects and batch edits for complex arrangements.
- Precise note articulation via click-and-drag or shortcut commands
- Rapid application of MIDI effects directly within the Piano Roll
- Efficient navigation using zoom and grid-based editing shortcuts
Deleting and Modifying Unwanted Notes
Navigate to the piano roll by double-clicking the recorded pattern; here, individual MIDI notes can be deleted instantly by right-clicking them.
For advanced MIDI note editing, select and drag notes to adjust pitch or modify duration for precise arrangement within the grid. Piano roll techniques such as zooming enhance visibility, allowing for accurate selection and manipulation of densely packed notes.
To alter dynamics, use the note velocity adjustment tool, typically found at the bottom of the piano roll, to refine the expressive qualities of each note.
After implementing deletions or modifications, playback the sequence to verify that edits uphold musical intent and coherence. Efficient workflow relies on iterative listening and visual inspection to guarantee all unwanted notes are addressed without disrupting the desired MIDI performance.
Identifying and Addressing Timing Issues
Pinpointing timing discrepancies in a MIDI performance requires close inspection of note placement within the piano roll. Users are advised to zoom in and compare each note’s start point to the grid lines, which serve as visual reference for proper MIDI alignment.
The snap to grid feature should be enabled during initial recording to reduce manual corrections. For further refinement, notes can be individually selected and adjusted by right-clicking and dragging them into precise positions.
Playback is essential after each edit to audit timing improvements in context. Employing quantization techniques with adjustable sensitivity can automate the correction process, but manual intervention may still be necessary for outlier notes.
- Zoom in on the piano roll to check note/grid alignment
- Use snap to grid for ideal MIDI alignment
- Manually adjust or delete problematic notes
Applying Quantization to Align Notes
Streamline MIDI timing by utilizing FL Studio’s quantization tools to automatically align recorded notes with the project grid.
Begin by selecting the recorded MIDI pattern, then access quantization techniques through the tool drop-down menu. For ideal note alignment, adjust the snap to grid settings—choosing between strict or loose grid divisions to control the rigidity of timing adjustments.
The sensitivity parameter allows users to specify which notes within a passage are affected, tailoring quantization to certain notes or timing ranges. Additionally, set the quantization start time to confine adjustments to targeted sections of MIDI data, preserving natural variations elsewhere.
Once quantization is applied, playback the MIDI sequence to audit the effectiveness of timing corrections, ensuring the result achieves the intended rhythmic precision before proceeding further.
Fine-Tuning Quantization Settings for Precision
To achieve ideal timing accuracy, users can adjust quantization sensitivity to control which notes are affected during processing.
Selecting specific snap-to-grid options further refines note placement, allowing for either rigid or more natural timing.
Combining these parameters enables precise correction tailored to the musical context of the MIDI performance.
Adjusting Quantization Sensitivity
Once MIDI data has been recorded in FL Studio, quantization sensitivity can be adjusted for precise timing control by accessing the quantization settings from the tool drop-down menu.
Sensitivity governs how aggressively quantization techniques are applied, allowing for tailored correction of timing errors. A higher sensitivity setting forces notes closer to the grid, maximizing rhythmic precision but potentially diminishing musical expression and disrupting natural MIDI groove.
Conversely, lower sensitivity preserves more of the original performance nuances. Users can monitor real-time playback to evaluate the impact of adjustments, ensuring the quantized result aligns with the intended feel.
Always scrutinize quantized passages for unintended shifts that may require manual correction.
- Fine-tune quantization sensitivity to balance precision and feel
- Preview playback to audit timing changes
- Review and manually adjust outlier notes for peak groove
Choosing Snap-to-Grid Options
While precise timing is essential in MIDI sequencing, selecting the appropriate Snap-to-Grid setting in FL Studio forms the foundation for accurate note placement and effective quantization.
Users can perform a snap settings comparison by toggling between options such as “line,” “cell,” or “none,” each offering distinct grid alignment techniques. For instance, “line” provides coarse alignment suitable for rhythmic structure, while “cell” supports finer subdivisions, ideal for intricate passages.
Disabling snap (“none”) allows for freehand placement, useful for humanizing sequences. Fine-tuning quantization involves utilizing the sensitivity slider and quantization amount within the tool drop-down menu, enabling granular control over note start times.
These quantization benefits streamline editing, reduce timing errors, and yield professional results, especially when integrating complex MIDI performances into tight rhythmic frameworks.
Frequently Asked Questions
How Do I Record Everything in FL Studio?
To record everything in FL Studio, users configure MIDI settings, select recording techniques such as “notes and automation,” and leverage DAW integration. Accurate workflow involves arming tracks, enabling the metronome, and using quantization for post-recording timing adjustments.
How Do I Record MIDI Output?
To record MIDI output, users configure MIDI settings, assign proper MIDI channels, and connect MIDI devices. Activating record mode, they select “notes and automation,” monitor input, and finalize by reviewing or quantizing the captured MIDI performance for accuracy.
Why Won’t My Midi Keyboard Record in FL Studio?
When MIDI keyboard recording fails in FL Studio, users should perform MIDI keyboard troubleshooting by verifying FL Studio settings, ensuring the USB connection is secure, assigning the correct input port, and confirming track arming and recording mode selection.
How Do I Loop MIDI in FL Studio?
Looping MIDI in FL Studio involves using MIDI loop techniques such as extending patterns, configuring loop region settings in the playlist, and enabling playback looping. For precision, MIDI quantization tips recommend adjusting note timing and activating the metronome during editing.
Conclusion
Mastering MIDI recording in FL Studio involves both proper hardware integration and methodical workflow management. By configuring controller settings, selecting appropriate channels, using metronome and count-in features, and utilizing quantization, users can achieve precise, professional results. Efficient pattern arrangement and non-destructive editing provide maximum creative flexibility. Troubleshooting timing discrepancies and applying tailored quantization settings further refine output. Adhering to these best practices streamlines the production process, enabling consistent, high-quality MIDI recordings within FL Studio’s robust environment.