To remove low-end rumble in Audacity, a high-pass filter is used to attenuate frequencies below a selected cutoff, typically set between 20 Hz and 40 Hz for rumble, or 60 Hz to 120 Hz for voice. Users should select a roll-off, such as 24 dB/octave, for effective suppression without compromising desired frequencies. Accurate application preserves audio clarity and integrity. Detailed step-by-step instructions for precise filtering and further enhancement methods are provided in the following sections.
Key Takeaways
- Open your audio in Audacity, select the track or section, and go to Effect > High Pass Filter.
- Set the cutoff frequency between 20 Hz and 40 Hz to target low-end rumble without affecting desired audio.
- Choose a roll-off of 24 dB per octave for effective attenuation of unwanted low frequencies.
- Preview the filter effect before applying to ensure clarity and prevent loss of important audio content.
- Always keep an unprocessed backup and export the filtered audio in a standard format like WAV.
Understanding the Purpose of a High-Pass Filter
A high-pass filter is an audio processing tool implemented to attenuate low-frequency components while permitting higher frequencies to remain unaffected. It functions by reducing the amplitude of signals below a designated cutoff frequency, thereby targeting unwanted low-end noise such as rumble or electrical hum.
The cutoff frequency is a critical parameter, commonly set between 60 Hz and 120 Hz for voice recordings, marking the threshold where attenuation begins—typically at a rate defined by the filter’s roll-off, measured in dB per octave.
Selecting an appropriate cutoff frequency guarantees the preservation of essential audio characteristics, especially in voice recordings where excessive filtering may remove warmth or clarity. Properly applied, a high-pass filter enhances recording quality and clarity without compromising higher-frequency content.
Identifying Low-End Rumble in Audio Recordings
How does one detect subtle disturbances in the lowest registers of an audio recording? Low-end rumble, typically manifesting between 25 and 40 Hz, is a form of low frequency noise that often emerges during quiet musical passages.
Its origins may include mechanical vibrations from the turntable, imperfections in vinyl, or environmental noise sources. Rumble is characterized by a persistent, repetitive low frequency sound that can obscure desirable audio content.
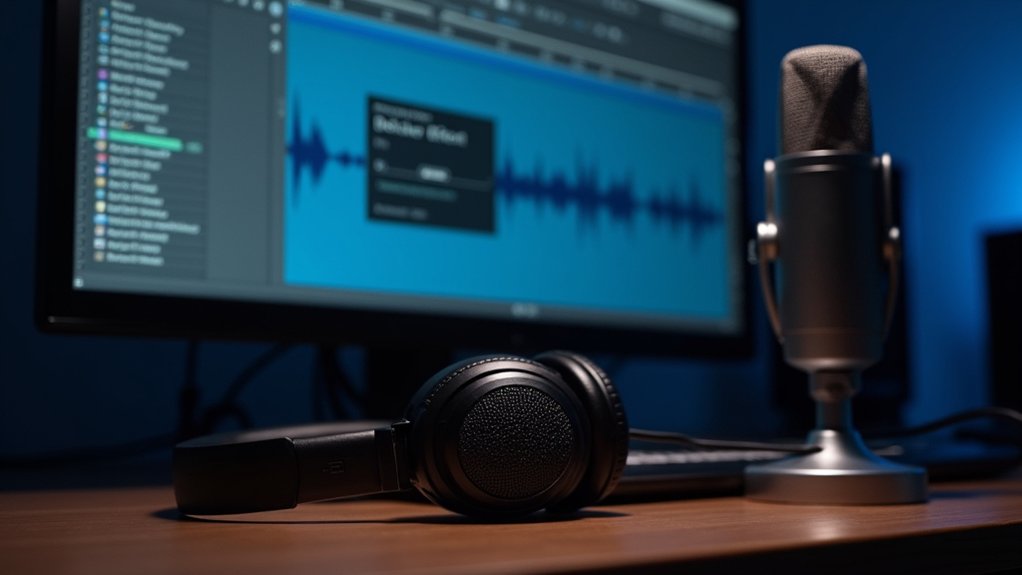
To identify this noise, practitioners employ audio analysis tools such as the Spectrogram in Audacity, which provides a visual representation of frequency content over time.
Choosing the Appropriate Cutoff Frequency
Selecting an ideal cutoff frequency is critical for effective high-pass filtering in Audacity, as this parameter determines which low-frequency content will be attenuated or preserved. The cutoff frequency defines the threshold below which the High Pass Filter reduces audio energy.
For general rumble removal, a typical starting point is 20 Hz; however, evaluating the audio may warrant initial settings as low as 10 Hz or upward to 15 Hz, especially if the signal contains substantial subsonic components. Since rumble frequently exists in the 25-40 Hz range, precise adjustment is necessary to target unwanted noise while maintaining audio integrity.
For voice recordings, higher cutoff frequencies, such as 60 Hz to 120 Hz, can eliminate rumble while retaining vocal warmth. Continuous monitoring and iterative adjustment are recommended. To eliminate background noise, using Audacity’s Noise Reduction effect before applying a high-pass filter can further enhance the clarity of the audio.
Selecting the Right Roll-off for Your Needs
While configuring a high-pass filter in Audacity, the roll-off parameter warrants careful attention due to its direct influence on the sharpness of frequency attenuation below the cutoff point.
The roll-off, measured in decibels per octave, governs how abruptly frequencies are reduced once they fall under the designated threshold. Typical options range from 6 dB to 48 dB per octave. For most de-rumble applications, a 24 dB roll-off is recommended, achieving substantial low-end suppression without incurring significant artifacts.
Conversely, a 12 dB roll-off provides gentler attenuation, preserving more musical content while still mitigating low-frequency buildup. However, excessively steep roll-off settings, such as 48 dB, may induce ringing artifacts on transient material.
Ideal roll-off selection should always reflect the unique characteristics of the source audio.
Step-by-Step Guide to Applying a High-Pass Filter in Audacity
Once the appropriate roll-off has been determined based on the audio material, the application process in Audacity proceeds in a structured manner.
The user first selects the desired audio track, then accesses the Effect menu and chooses “High-Pass Filter.” Within the dialog, the critical parameter is the cutoff frequency, typically set around 15 Hz to effectively apply a high-pass filter targeting low-end rumble while preserving core audio components.
The roll-off value—such as 24 dB/octave—is then selected to define the steepness of frequency attenuation below the cutoff. Upon confirming settings, clicking OK applies the filter.
Post-processing, critical listening is recommended to verify that unwanted low-frequency content has been reduced and overall sound quality remains intact, with further adjustments made as necessary.
Comparing Different Roll-Off Settings: 6 Db to 48 Db
The range of roll-off settings available in Audacity’s high-pass filter, spanning from 6 dB to 48 dB per octave, directly influences the degree of low-frequency attenuation applied to an audio signal.
A 6 dB roll-off implements a gentle slope, allowing most low frequencies to pass while providing subtle tonal correction. Increasing to a 12 dB roll-off enhances attenuation, offering moderate suppression of low-end content and improving clarity.
The 24 dB roll-off delivers more pronounced reduction, effectively minimizing unwanted rumble. At the upper end, 36 dB and 48 dB roll-off settings yield steep attenuation, with the 48 dB option nearly eliminating all low frequencies.
Selecting the ideal roll-off involves evaluating the audio material and balancing rumble removal with preservation of desired sound characteristics.
Best Practices for Podcast and Voice Recording Cleanup
For ideal voice recording cleanup in Audacity, selection of an appropriate cutoff frequency—typically between 60 Hz and 120 Hz—is essential to suppress low-frequency noise while preserving vocal integrity.
Slope selection, such as 12 dB or 24 dB per octave, should be matched to the severity of unwanted rumble and the tonal characteristics of the voice.
Careful adjustment of these parameters guarantees effective filtering without compromising the natural timbre of the recording.
Choosing Cutoff Frequency
When applying a high-pass filter in Audacity for podcast and voice recording cleanup, selecting an appropriate cutoff frequency is crucial to balance noise reduction and vocal integrity.
The recommended cutoff frequency range for voice recordings is between 60 Hz and 120 Hz, effectively removing low-frequency rumble while preserving vocal warmth. For most podcast applications, an 80 Hz cutoff frequency efficiently eliminates common low-end noise without compromising vocal clarity.
It is important to tailor the cutoff frequency to individual voice characteristics; higher-pitched voices may retain more natural timbre with a slightly lower cutoff.
Always audition the high-pass filter effect on a short segment before global application to guarantee critical audio components remain unaffected. This process guarantees ideal removal of unwanted low-frequency content while maintaining desired audio fidelity.
Slope Selection Tips
Selecting an appropriate cutoff frequency establishes the foundation for effective noise reduction, yet the slope of the high-pass filter plays a pivotal role in shaping the final vocal quality.
In Audacity, a 12 dB per octave slope is generally recommended for voice recordings, as it provides moderate attenuation of sub-bass rumble while preserving vocal warmth and natural resonance. This slope setting guarantees clarity without overly thinning the voice.
For more rigorous low-frequency removal—such as in environments with persistent rumble—a 24 dB per octave slope may be employed, but caution is advised: steeper slopes can introduce phase artifacts or render vocals unnaturally sharp.
Practitioners should always apply the high-pass filter with the desired cutoff and slope before additional processing, and audition settings per voice type to maintain timbral integrity.
Avoiding Common Pitfalls When Filtering Bass Frequencies
Although high-pass filtering in Audacity is a fundamental technique for removing low-frequency rumble, improper application can compromise audio integrity.
When using a filter to cut subsonic frequencies, practitioners must set the cutoff point judiciously—starting near 15 Hz is ideal for targeted Noise Removal without sacrificing essential bass elements. Selecting a roll-off such as 24 dB/octave guarantees effective attenuation while minimizing the risk of filter-induced artifacts or ringing.
Overly aggressive settings can thin the audio, stripping richness and musicality. It is recommended to preview the filtered audio and iteratively adjust parameters, confirming that the tonal balance is preserved.
Testing the filter on short segments before processing the entire track facilitates precise calibration and prevents the inadvertent loss of desirable low-frequency content.
Combining High-Pass Filtering With Other Noise Removal Tools
Integrating a high-pass filter with additional noise removal tools streamlines the process of eliminating low-frequency rumble and broader noise issues in audio tracks. The recommended workflow involves applying a high-pass filter set at a 15 Hz cutoff with a 24 dB/octave roll-off to attenuate subsonic content before implementing noise reduction. This sequence minimizes the risk of introducing artifacts during subsequent processing and preserves the integrity of the audio signal. After high-pass filtering, deploying a noise reduction plugin—particularly when its noise profile is captured from a silent section—enables targeted attenuation of persistent unwanted sounds across other frequency bands. Adjustments to attack and decay parameters in the noise reduction stage are essential, as they affect transient preservation and overall clarity. Continuous monitoring guarantees peak results. Using a 3:1 compression ratio ensures that sound quality is maintained while controlling audio dynamics, which complements the high-pass filtering process.
Evaluating the Impact on Audio Quality
When implementing a high-pass filter in Audacity, the primary consideration is its effect on audio quality, particularly regarding the removal of low-frequency rumble without sacrificing essential musical content. The process requires precise adjustment of cutoff frequency and roll-off slope. A typical configuration—15 Hz cutoff at 24 dB/octave—effectively attenuates unwanted subsonic energy, enhancing clarity and preserving overall sound quality. However, applying the filter too aggressively may result in undesirable artifacts or perceptible thinness. Continuous monitoring during processing is critical, especially when musical content exists in the targeted frequency range. Comparative testing of filter parameters across various audio segments supports the identification of ideal settings. Additionally, using dynamic range management can help balance the audio for clarity and prevent distortion. The table below summarizes key aspects of evaluating the filter’s impact:
| Parameter | Evaluation Focus |
|---|---|
| Cutoff Frequency | Rumble removal effectiveness |
| Roll-off Slope | Preservation of clarity |
| Auditory Artifacts | Detection and minimization |
| Sound Quality | Retention of musical content |
Saving and Backing Up Edited Audio Files
Proper file management is critical after applying a high-pass filter in Audacity, requiring systematic exporting of processed audio files in standardized formats such as WAV or AIF.
A robust backup file structure should include clearly labeled folders and multiple storage locations to safeguard against data loss.
Retaining unaltered original source copies guarantees future reprocessing capabilities and reliable version control throughout the editing workflow.
Exporting Processed Audio Files
Ensuring the integrity of edited audio demands a systematic approach to exporting and preserving files throughout the production workflow.
After applying a high-pass filter in Audacity to remove the rumble, practitioners should prioritize exporting processed audio files using technically appropriate formats.
Initial captures are best exported as 16-bit AIF files to maximize fidelity for subsequent stages. Once processing is complete, the preferred export format is a 32-bit WAV file, which increases dynamic range and maintains compatibility with restoration tools such as ClickRepair.
To further safeguard the processed audio, multiple redundant backups should be made on external drives.
Implementing consistent, descriptive file naming conventions and segregating original, processed, and backup files prevents confusion and facilitates rapid retrieval for future adjustments, ensuring robust data preservation.
Organizing Backup File Structure
A systematic approach to file organization is essential for preserving audio project integrity throughout the editing and archiving process. Each project should reside within a dedicated folder, encompassing original captures, edited iterations, and exported deliverables.
Applying standardized file naming conventions—incorporating elements such as project name, date, and version—facilitates chronological tracking and error-free retrieval. To mitigate data loss risk, it is critical to execute regular backup routines, copying project folders to external drives or secure cloud repositories.
Edited audio should be exported in multiple formats, such as 16-bit AIF for further processing and 32-bit WAV for specialized tasks, optimizing future flexibility. Additionally, including a thorough text file documenting applied processing settings guarantees repeatability and continuity across subsequent workflow stages.
Maintaining Original Source Copies
Building on a structured file organization system, maintaining original source copies is fundamental for safeguarding audio project integrity throughout editing workflows. Engineers should always export the initial audio capture as a 16-bit AIF file, preserving frequency content before any processing occurs.
This master file serves as a reference point, ensuring the ability to revert or reprocess with emerging techniques. Subsequent processing should be followed by exporting edited versions as 32-bit WAV files to maximize fidelity for further tasks, such as ClickRepair.
Maintaining original source copies alongside incremental edits—saved as distinct project files—supports version control, tracking workflow progression, and mitigating risks of data loss. Multiple backups on external drives are recommended to further insulate against hardware failure and to facilitate recovery of previous frequency states when necessary.
Additional Resources for Audio Restoration and Processing
While mastering the use of high-pass filters in Audacity demands both technical understanding and practical experience, a range of specialized resources can greatly streamline the audio restoration process.
Practitioners seeking precision in deploying a Filter Plugin or constructing an accurate Noise Profile can benefit from authoritative documentation and community expertise. Understanding how to roll off bass frequencies below 100Hz is crucial for enhancing clarity and reducing noise in audio tracks.
The following resources provide targeted support for effective audio processing workflows:
- Audacity Wiki and Manual: Offers extensive technical guidance on configuring high-pass filters, Filter Plugin parameters, and advanced Noise Profile techniques.
- Buanzo Site and AudioNyq Blog: Delivers in-depth tutorials and articles on high-pass filter strategies, including practical examples of low-end rumble removal and sound quality optimization.
- Audacity Support Forum and Video Tutorials: Enables real-time troubleshooting, peer advice, and step-by-step demonstrations for refining audio restoration processes.
Frequently Asked Questions
How Do You Remove Rumble in Audacity?
To remove rumble in Audacity, one must first identify rumble sources and analyze their frequency range. Adjust filter settings by applying a high-pass filter, fine-tuning cutoff frequency and roll-off, then monitor audio to guarantee ideal low-frequency attenuation.
Does High-Pass Filter Remove Noise?
The current question addresses high pass effectiveness in noise reduction. A high-pass filter attenuates frequencies below a set cutoff, efficiently reducing low-frequency noise while preserving desired content, making it a precise, process-oriented tool for targeted noise reduction applications.
Which EQ Filter Will Remove Low-Frequency Noise Rumble?
To achieve low frequency attenuation and audio clarity enhancement, a high-pass EQ filter is utilized. This filter precisely attenuates frequencies below a specified threshold, effectively suppressing low-frequency noise rumble while preserving the integrity of higher-frequency content.
What Does a High-Pass Filter Do in Audacity?
A high-pass filter in Audacity processes audio by attenuating frequencies below a set cutoff, allowing higher frequencies to remain. This method provides high pass benefits, enhancing audio clarity by systematically removing low-frequency content that may obscure detail.
Conclusion
Applying a high-pass filter in Audacity effectively mitigates low-end rumble, enhancing audio clarity through precise frequency attenuation. By carefully selecting the cutoff frequency and roll-off, users can target unwanted low-frequency noise without compromising essential tonal information. Integrating high-pass filtering with supplementary noise reduction tools further optimizes audio restoration. Systematic evaluation guarantees minimal artifact introduction, while diligent saving and backup protocols preserve edited files. Employing these process-driven techniques supports professional-grade results in audio post-processing workflows.