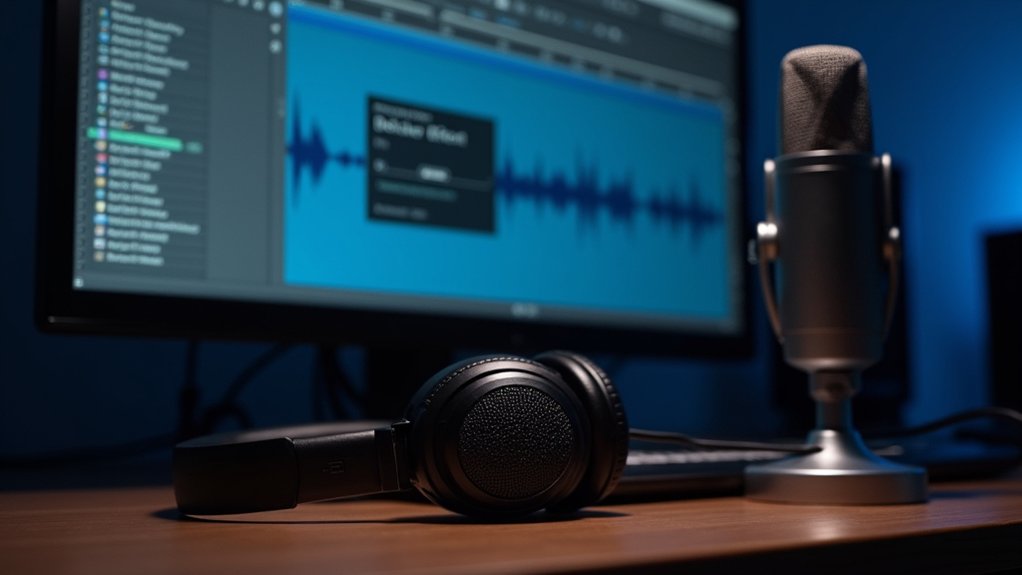
Cutting audio clips in Audacity begins by selecting the desired segment with the Selection Tool, zooming in for precise boundaries. Unwanted sections are removed using the Cut function or Delete shortcuts, while the Silence Tool enables seamless edits without disrupting timing. Playback verification confirms edit accuracy, and audio is exported with ideal sample rate and bit depth settings. Mastery of these tools guarantees efficient, quality-driven editing—subsequent steps can enhance professional outcomes.
Key Takeaways
- Use the selection tool to highlight the exact portion of audio you want to cut or edit.
- Zoom in on the waveform for precise selection and accurate editing of audio boundaries.
- Remove unwanted sections by highlighting them and pressing Command + X (Mac) or Control + X (PC).
- Preview your edits by playing back the selected area to ensure only the intended audio is cut.
- Export your edited audio using “File > Export” and choose the desired file format and quality settings.
Getting Started With Audacity’S Selection Tool
Initiate precise editing in Audacity by utilizing the selection tool, which enables the user to click and drag over specific segments of the audio waveform for targeted highlighting.
This technique allows for the isolation of desired audio components, such as the first, second, or third acapella, by accurately defining start and end points within the waveform. The selection tool is essential for users aiming to trim, delete, or apply effects to only particular sections of an audio track.
Adjustments to the highlighted region can be made by repositioning the boundaries with the finger icon, offering granular control over the selection.
Playback of the targeted segment, triggered by the spacebar, provides immediate auditory confirmation, ensuring only the intended portion is selected before proceeding with further edits.
Additionally, zooming for accuracy enhances the precision of your selections by providing a detailed view of the waveform, making it easier to identify the exact points for trimming or editing.
Once a segment is highlighted with the selection tool, achieving pinpoint accuracy requires effective navigation and zoom control within Audacity.
Zooming in on the audio waveform is indispensable for detailed editing, enabling users to isolate precise audio boundaries. The View menu or keyboard shortcuts—Command + 1 (Mac) or Control + 1 (PC) for zooming in, and Command + 3 (Mac) or Control + 3 (PC) for zooming out—facilitate rapid magnification adjustments.
This granular perspective assists in distinguishing between transient sounds, silence, or noise.
- Zoom in on the audio waveform to expose minute details, ensuring exact segment selection.
- Use keyboard shortcuts for swift zoom changes without interrupting workflow.
- Navigate horizontally to scan larger sections while maintaining zoomed precision.
- Employ playback to audibly verify the chosen segment aligns with intended edit points.
Adding fade in/out effects can create smoother transitions between audio segments, enhancing the overall listening experience.
Using the Cut Tool to Remove Unwanted Sections
To remove specific portions of audio in Audacity, users begin by selecting the unwanted segment using the selection tool. Precise removal is achieved through the application of keyboard shortcuts—Command + X on Mac or Control + X on PC—or by accessing the Cut function in the Edit menu. Playback verification is recommended to verify the edit maintains audio integrity prior to saving or exporting the project. For optimal results, ensure all audio clips have a uniform sample rate to maintain consistent audio quality throughout your project.
Selecting Unwanted Audio Segments
Identify and isolate unwanted audio segments by employing Audacity’s selection tool, which enables precise highlighting of specific waveform regions targeted for removal.
The process of selecting unwanted audio segments is critical for effective audio editing, ensuring only the intended portions are trimmed while maintaining the integrity of the desired content.
Users should visually inspect the waveform, then click and drag to highlight the segment slated for removal. Playback of the selection can verify accuracy prior to executing any modifications.
To help visualize the workflow:
- Zoom in on the waveform for granular control during selection.
- Click and drag the selection tool across the precise start and end points of the unwanted segment.
- Use playback to confirm the selection aligns with the intended trim audio boundaries.
- Highlighted regions are now ready for further editing or removal.
Utilizing Cut Shortcut Keys
After accurately highlighting unwanted audio segments with the selection tool, the next step involves removing these portions using Audacity’s cut functionality. The cut tool allows for rapid excision of selected audio, streamlining the editing workflow. By pressing Command + X on Mac or Control + X on PC, the highlighted segment is immediately removed and stored in the clipboard for potential reinsertion. This method is effective for eliminating extraneous noises, pauses, or errors, thereby improving the continuity of the audio track. The technical process guarantees that only the designated section is affected, preserving the integrity of the surrounding content. The table below summarizes essential actions for utilizing the cut tool efficiently:
| Action | Shortcut/Description |
|---|---|
| Select Audio | Use Selection Tool |
| Cut (Mac) | Command + X |
| Cut (PC) | Control + X |
| Paste | Command/Control + V |
| Save Project | File > Save |
Previewing Edits Before Saving
Previewing audio edits prior to saving assures that only the intended sections are removed, maintaining the integrity of the project.
In Audacity, previewing edits before saving is critical when using the cut tool to remove unwanted sections. This process involves precise selection, playback verification, and waveform inspection to ascertain accuracy.
The following steps outline an efficient workflow:
- Activate the Selection Tool: Accurately highlight the segment targeted for removal, ensuring no essential audio is included.
- Zoom for Precision: Use Command + 1 to zoom in on the waveform, enhancing visibility for meticulous selection.
- Playback the Selection: Utilize the playback feature to review the chosen area, confirming it matches the intended edit.
- Confirm Before Cutting: After previewing edits before saving, apply the cut only when confident no valuable audio is lost.
Deleting Audio Segments for Cleaner Tracks
For ideal editing in Audacity, users begin by employing the selection tool to accurately highlight unwanted audio sections within the waveform. Precise removal is achieved through the Edit menu or dedicated keyboard shortcuts, ensuring targeted segments are efficiently deleted. To maintain seamless audio flow, subsequent adjustment with the time shift tool aligns remaining clips and prevents unintended gaps. Users can zoom in on the waveform for accurate selection, enhancing the precision of start and end points during the editing process.
Selecting Unwanted Audio Sections
Accurately isolating and removing undesired audio segments in Audacity is crucial for producing clean, professional tracks. The process of selecting unwanted audio sections begins with activating the Selection Tool.
Users should zoom in (Command + 1) to gain a detailed waveform view, allowing for meticulous boundary setting. Highlighting the precise audio region guarantees that only the intended segment is targeted for removal.
Employing the “Remove Special” functions under the Edit menu offers additional control over deletion and preserves adjacent content integrity.
- Initiate the Selection Tool and zoom for granular waveform analysis.
- Click and drag to highlight the exact unwanted audio section.
- Use the Delete key or Edit > Delete/Remove Special for segment elimination.
- Preview the edited audio to confirm seamlessness and accuracy of the cut.
Precise Segment Removal Techniques
Achieving cleaner tracks in Audacity relies on methodical segment removal using precise editing techniques. The process begins with the selection tool, which allows users to accurately highlight the targeted audio region by clicking and dragging across the waveform.
For heightened accuracy, zooming in on the waveform—accessible via the View menu or keyboard shortcuts (Command + 1 for Mac, Control + 1 for PC)—enables detailed examination of audio boundaries. Once the undesired segment is selected, the trimming audio in Audacity function is initiated with Command + T (Mac) or Control + T (PC), efficiently excising the highlighted section and preserving the remainder.
Playback verification confirms the edit meets quality benchmarks. To maintain track uniformity, the time shift tool repositions audio content precisely at the track’s starting point.
Ensuring Seamless Audio Flow
Eliminating disruptive audio segments in Audacity requires systematic use of the selection tool to precisely highlight unwanted regions within the waveform.
Once targeted, these regions can be removed using the Command + T (Mac) or Control + T (PC) shortcut, effectively trimming the track and maintaining ideal audio flow.
Zoom controls (Command + 1 to zoom in, Command + 3 to zoom out) allow for meticulous selection, ensuring no desirable audio is unintentionally deleted.
After excision, the time shift tool enables seamless repositioning of remaining clips, eliminating gaps and maintaining continuous playback.
Regular auditory review is essential to verify smooth transitions.
- Precisely select disruptive segments using the selection tool.
- Apply trim shortcut to remove highlighted areas.
- Utilize time shift tool to close gaps post-deletion.
- Playback and assess for seamless audio continuity.
Applying the Silence Tool for Seamless Edits
Applying the Silence Tool in Audacity enables precise removal of unwanted audio by replacing selected segments with silence, ensuring minimal disruption to the surrounding waveform.
Utilizing the silence tool involves first isolating the undesired audio with the selection tool, followed by activating the “Silence Audio” function located under the Edit menu. For efficiency, users can employ the Command + L (Mac) or Control + L (PC) keyboard shortcuts to apply silence instantly to the highlighted region.
This method is ideal for eliminating gaps, pauses, or background noise, contributing to a more streamlined and professional-sounding track.
After implementing silence, the time shift tool may be engaged to adjust the positioning of adjacent audio clips, preserving continuity and enhancing the overall flow within the Audacity project.
Exporting Your Trimmed Audio File
Once unwanted sections have been silenced and the audio has been arranged as intended, exporting the trimmed file becomes the next procedural step.
To export the audio in Audacity, users should navigate to the File menu and select “Export,” where multiple format options such as WAV, MP3, and OGG are available.
It is essential to verify export settings—bit rate and sample rate—to guarantee peak fidelity and compatibility. For MP3 exports, the installation of the LAME encoder may be required, as it is not bundled with Audacity by default.
- Access the File menu and select “Export.”
- Choose the desired file format (WAV, MP3, OGG).
- Assign a file name and specify the storage location.
- Adjust bit rate/sample rate, then confirm to export the audio.
To ensure the highest quality output, it is recommended to use a sample rate of 44100 Hz and a bit depth of 24-bit when exporting your audio file.
Frequently Asked Questions
How to Cut Audio Clips in Audacity?
To address audio editing in Audacity, one selects the target segment with the selection tool, utilizes zoom for precision, trims via Edit or shortcut, repositions using the time shift tool, and exports the refined audio file in the desired format.
How Do I Cut Audio Into Parts in Audacity?
To address the question of how to cut audio into parts in Audacity, users employ audio editing techniques: selecting segments with the selection tool, refining with zoom, trimming using shortcuts, repositioning via time shift, and exporting for precise results.
Is Audacity Easy to Use for Beginners?
The current question evaluates Audacity’s user interface regarding beginner accessibility. Audacity offers an intuitive layout, streamlined toolsets, and responsive keyboard shortcuts, facilitating efficient navigation and precise audio manipulation, making it technically suitable for novice users seeking process-oriented workflows.
How Do You Cut, Copy, or Paste Audio Clips in Audacity?
Audio editing in Audacity involves selecting the target audio region, then executing cut, copy, or paste functions via keyboard shortcuts or the Edit menu. Users may employ the time shift tool for precise clip positioning post-paste.
Conclusion
In conclusion, precise audio editing in Audacity relies on accurate use of the Selection Tool, effective navigation and zoom functions, and the systematic application of cut and delete operations. Employing the Silence Tool guarantees seamless shifts within the track. Mastery of these processes facilitates the removal of unwanted material and the creation of clean, professional-sounding audio. Upon completion, exporting the refined file preserves all edits, resulting in a polished product suitable for various applications.