Ableton’s Vocoder merges a carrier signal—often a synthesizer or pad—with a vocal modulator to produce robotic, harmonized, or textured vocal effects. Users create separate tracks for the carrier and modulator, routing the carrier into the vocoder device placed on the modulator’s audio track. Adjusting filter bands, Enhance, and formant controls refines speech clarity and timbre. Choice of carrier and modulation depth shapes creative vocal outcomes. Explore further steps for workflow efficiency and advanced sound design.
Key Takeaways
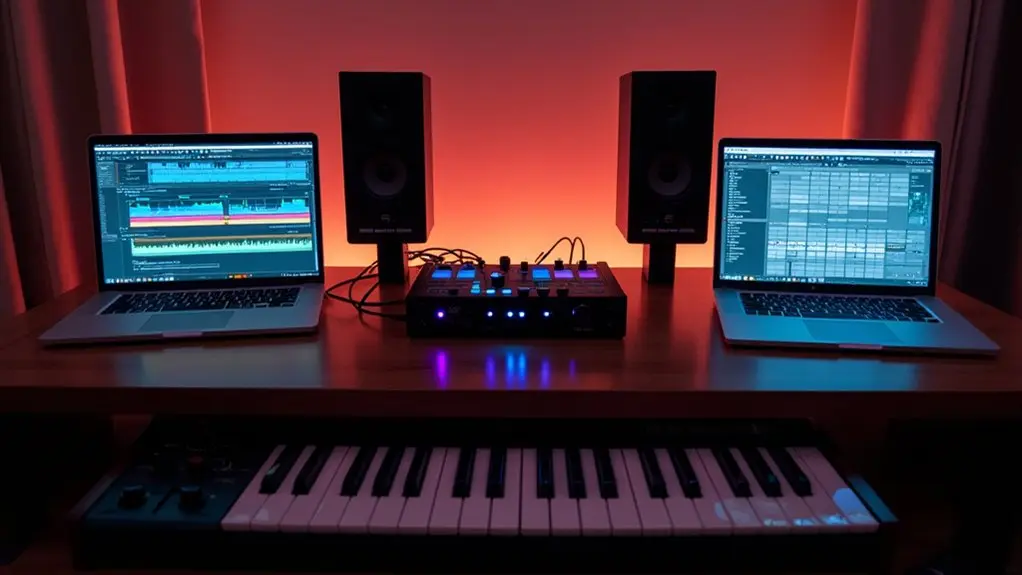
- Set up separate tracks for the modulator (vocal) and carrier (synth) signals, routing the carrier to the vocoder’s “Audio From” input.
- Use harmonically rich carriers like sawtooth synths and adjust the number of filter bands (around 20) to maximize vocal intelligibility.
- Activate the Enhance button to boost clarity and detail, and fine-tune Attack, Release, and Formant controls for expressive effects.
- Experiment with different modulator sources and automate parameters to create unique, evolving vocal textures.
- Save custom vocoder presets and organize them for quick recall and efficient creative workflow in future sessions.
What Is a Vocoder and How Does It Work?
A vocoder is an audio processing tool that merges a harmonically rich carrier signal, typically from a synthesizer, with a modulator signal such as a vocal input to generate synthesized vocal effects.
This audio effect operates by analyzing the amplitude envelope of the modulator signal and imprinting its dynamic characteristics onto the carrier signal, resulting in robotic timbres and unique sonic textures.
Traditional vocoders deploy multiple bandpass filters—ranging from 5 to 40 bands—to segment the carrier and modulator into distinct frequency ranges, enabling detailed spectral manipulation.
The presence of an Enhance function further refines output by normalizing the carrier’s volume and dynamics, thereby improving clarity and intelligibility.
Beyond vocals, the vocoder can impart creative textures to drums or synths by using alternative rhythmic modulator signals.
Key Components: Carrier and Modulator Signals
A vocoder’s effectiveness depends on the strategic selection of carrier signal sources, such as rich synthesizer pads or complex waveforms, and the distinct articulation of the modulator signal, commonly a vocal or percussive element.
Modulator characteristics—clarity, rhythm, and dynamic range—directly influence the intelligibility and texture of the effect.
Proper signal routing, typically involving separate MIDI and audio tracks, is essential to facilitate seamless integration and precise control within the production workflow.
Carrier Signal Source Options
When selecting carrier signal sources for vocoder processing, the choice directly impacts the harmonic structure and overall tonal palette of the output.
In Ableton, producers often employ harmonically dense carrier signals—such as sawtooth or square waves from synthesizers, or lush pad textures—to provide a rich foundation for the vocoded sound. The carrier signal interacts with the modulator signal, which supplies rhythmic and dynamic content, to yield distinct timbral results.
For creative applications, experimenting with different carrier signal types can introduce unique sonic characteristics, from robotic tones to ethereal vocal effects.
Workflow considerations include routing the carrier into the vocoder and utilizing the device’s adjustable filter section to sculpt the frequency content. Ideal carrier selection and filter adjustments are essential for maximizing expressive potential in sound design.
Modulator Signal Characteristics
Clarity and articulation in vocoder processing rely heavily on the characteristics of the modulator signal, which typically introduces rhythmic and dynamic contours through sources such as vocals or percussive elements.
The modulator signal shapes the amplitude envelope that is imposed onto the carrier signal, directly impacting the intelligibility and tonal definition of the effect. Precision in modulator selection and preparation is essential for balancing clarity and the desired level of robotic vocal effects in the output.
When designing vocoded sounds, understanding the interplay between the modulator and carrier signals enables the creation of innovative textures and expressive results.
- Source Material: Crisp, percussive modulator signals enhance amplitude envelope definition.
- Filter Bands: Increasing band count improves clarity; fewer bands emphasize robotic characteristics.
- Balance: Ideal levels between modulator and carrier signals yield intelligible results.
Signal Routing Techniques
Signal flow forms the foundation of effective vocoder processing, with precise routing of carrier and modulator signals determining the resulting timbre and intelligibility. In Ableton Live, ideal signal routing requires separate tracks: one for the modulator signal (typically vocals) and another for the carrier signal (commonly a synthesizer). The Vocoder effect is inserted on the audio track containing the modulator signal. Within Vocoder settings, the “Audio From” dropdown is set to the carrier track, ensuring only the processed signal is audible by muting the carrier track. Balancing the input levels of both signals is essential to avoid a muddy or unintelligible output. Adjusting parameters such as Enhance and Unvoiced further refines articulation.
| Signal Type | Routing Destination |
|---|---|
| Modulator Signal | Audio Track + Vocoder |
| Carrier Signal | “Audio From” in Vocoder |
| Processed Signal | Output Channel |
| Carrier (Muted) | Prevents Direct Output |
| Controls Adjusted | Vocoder Settings |
Setting Up Your Tracks for Vocoder Processing
To initiate vocoder processing in Ableton Live, efficient track setup is essential for accurate modulation and routing.
Begin by establishing dedicated tracks for both modulator and carrier signals. The modulator, commonly a vocal audio track, provides the articulation, while the carrier, typically a MIDI-triggered synthesizer, supplies the harmonic content.
Strategic use of the vocoder plugin in Ableton enables precise control over the blend and clarity of the processed signal.
- Create Tracks: Set up an audio track for the modulator (vocals) and a MIDI track for the carrier (synthesizer) within Ableton.
- Insert Vocoder: Place the vocoder device on the modulator’s audio track, switching it to “External” mode for external carrier input.
- Balance Levels: Adjust input levels, keeping the modulator between -12dB and -6dB, and mute the carrier track to monitor only the processed output.
Additionally, mastering basic features and workflow optimization in Ableton Live will enhance your efficiency and creativity when setting up and using the vocoder.
Routing Audio and MIDI for Effective Vocoding
With tracks established for both modulator and carrier, the next stage involves precise routing to achieve effective vocoding in Ableton Live.
Begin by inserting the Vocoder plugin onto the audio track containing the modulator signal, typically vocals. Set the Vocoder’s Carrier chooser to “External” to enable routing audio from the dedicated MIDI carrier track—often a synthesizer.
In the modulator track, select the carrier signal as the input source using the “Audio From” dropdown menu. To isolate the vocoded output, mute the carrier track, ensuring only the processed blend of the modulator and carrier signals is audible.
Maintain a balanced mix by adjusting input levels; the modulator signal should peak between -12dB and -6dB for clarity and effective sound design results. To enhance your vocoding skills, mastery of quantization techniques can refine timing and dynamics, contributing to a more polished and natural sound in your musical projects.
Choosing the Right Carrier Signal for Your Vocals
Selecting the carrier signal is fundamental to shaping the tonal palette of vocoded vocals, with synthesizer waveforms such as sawtooth and square waves offering harmonic complexity and clarity.
Incorporating alternative carriers like noise or sustained pad sounds introduces varied spectral content, enabling distinctive textural outcomes in the processed signal.
Workflow considerations include auditioning multiple carrier sources to match the desired articulation and sonic character for each vocal application.
Synthesizer Waves for Carriers
A harmonically rich synthesizer wave serves as an ideal carrier signal for vocoding, providing the vital tonal foundation needed for clear and impactful vocal processing.
Selecting a waveform such as a sawtooth or square wave guarantees robust harmonic content, which is essential for the carrier signal to effectively imprint the modulator signal’s nuances onto the vocoded output. The clarity and timbre of the chosen synthesizer wave directly influence the intelligibility and musicality of the effect.
- Sawtooth and Square Waves: These offer dense, harmonically rich spectra, maximizing vocal clarity and presence in the vocoded output.
- Waveform Experimentation: Triangle and pulse waves introduce unique harmonic content, shaping the carrier’s interaction with the modulator signal for varied textures.
- Formant Ratio Optimization: Maintaining a carrier formant ratio between 0.5 and 2.0 preserves intelligibility and enhances blend.
Noise and Pad Carriers
Beyond classic synthesizer waves, alternative carrier signals such as noise and synth pads expand the creative possibilities in vocoder-based vocal processing.
Utilizing noise as a carrier signal imparts a distinct texture and brightness to vocals, enhancing sibilance and overall clarity in the vocoded output.
Conversely, synth pads—owing to their harmonically rich content—offer depth and warmth, especially when carefully balanced with the modulator input.
Maintaining a formant ratio between 0.5 and 2.0 is essential to guarantee the carrier signal complements the vocal modulator and preserves intelligibility.
Adjusting the number of filter bands in the vocoder’s matrix can further refine tonal qualities, with increased bands favoring clarity.
Experimenting with noise, synth pads, and traditional waveforms diversifies sound design and workflow options.
Configuring Vocoder Device Parameters
Configuring the Vocoder device in Ableton Live begins by establishing proper signal routing—assigning an audio track as the modulator, typically for vocals, and a MIDI track as the carrier, such as a synthesizer.
Insert Ableton Vocoder onto the modulator signal’s audio track, then select the desired carrier signal from within the device. Ensuring accurate routing is critical for effective vocoding.
Next, users should fine-tune the number of filter bands, balancing intelligibility and synthetic character. Increasing filter bands yields more definition, while fewer bands accentuate robotic tones.
The Enhance button optimizes carrier dynamics for clarity. Finally, precise adjustment of Attack and Release controls tailors the envelope response, shaping the articulation and expressivity of the processed output.
- Set up modulator and carrier signal routing.
- Adjust filter bands for tonal clarity.
- Refine Attack and Release controls for dynamic shaping.
Enhancing Clarity With Filter Bands and Formant Controls
Enhancing clarity in vocoded vocals relies on optimizing filter band settings and fine-tuning formant shifts.
Increasing the number of active filter bands in Ableton’s Vocoder enables greater spectral resolution and speech intelligibility, while precise adjustment of the formant control shifts the perceived vocal timbre.
Workflow efficiency is improved by balancing band count and formant position to achieve both intelligibility and creative tonal shaping.
Optimizing Filter Band Settings
Effective optimization of vocoder filter band settings is essential for achieving clear and intelligible vocal processing in sound design workflows. The number of filter bands, bandwidth, and formant controls are critical parameters for refining the output of any Vocoder technique.
Adjusting the filter count impacts how the modulator signal is articulated, with around 20 bands typically yielding the most intelligible speech. The Enhance button plays a pivotal role by dynamically adjusting carrier levels for greater consonant clarity.
For further tonal refinement, formant controls allow shifting of the frequency midpoint, affecting the naturalness and timbre of the result.
Key workflow considerations include:
- Select ideal filter band count for clarity.
- Adjust bandwidth for focused or smooth output.
- Utilize Enhance and formant controls to refine intelligibility.
Fine-Tuning Formant Shifts
When refining vocoded vocals for maximum intelligibility, precise manipulation of formant shifts and filter band parameters is essential. The formant control in Ableton’s vocoder effect allows users to shift the midpoint of the frequency spectrum, directly impacting the timbre and perceived character of the vocal input.
Effective formant shifting can help retain natural vocal qualities or introduce creative, synthetic tones by moving the spectral emphasis up or down. To enhance clarity, adjusting filter bands between 20 and 30 provides ideal spectral resolution, making individual syllables more distinct.
The carrier signal’s dynamics can be further stabilized by enabling the Enhance feature, which normalizes output levels. Different filter types, such as Precise and Retro, can be auditioned to adjust settings and sculpt the final vocal tone.
Using the Enhance and Unvoiced Features
Among the key features available in Ableton’s Vocoder, the Enhance and Unvoiced controls play an important role in maximizing vocal clarity and articulation.
The Enhance function normalizes dynamics and equalizes the carrier, resulting in brighter, more intelligible processed vocals. Meanwhile, the Unvoiced control introduces white noise into the vocoder path, vital for preserving sibilance and speech detail.
Fine-tuning the Sensitivity parameter within Unvoiced allows precise management of noise application, directly influencing clarity and intelligibility. These features are essential for professional-sounding vocal sound design.
Consider the following workflow steps:
- Activate Enhance to balance and brighten the carrier signal for processed vocals.
- Engage Unvoiced to inject noise and improve sibilant clarity.
- Adjust Sensitivity for tailored unvoiced detection and effective articulation.
Creating Classic Robotic Vocal Effects
A classic robotic vocal effect is achieved by routing a harmonically rich carrier signal—commonly a sawtooth wave—from a dedicated MIDI track into Ableton’s Vocoder, while an audio track supplies the vocal modulator input.
Within Ableton Live’s Vocoder, set modulation depth between 50-70% to retain intelligibility while imparting the signature robotic timbre. Engage the Enhance button to normalize carrier signal dynamics, which guarantees consonant articulation and clarity.
Adjusting the filter bands to around 20 allows for detailed spectral shaping, essential for controlling the character of the robotic effect. Experimentation with the formant shift parameter further sculpts the tonal quality of the output, yielding subtle variations on the classic robotic sound.
This workflow provides a systematic approach to achieving iconic vocoder-driven vocal textures.
Designing Unique Vocal Textures and Harmonies
Utilizing the vocoder’s flexible architecture enables sound designers to construct intricate vocal textures and harmonies by manipulating both the carrier and modulator inputs.
By carefully selecting a harmonically dense carrier signal—such as a synthesizer—and pairing it with a dynamic modulator signal, like a vocal or rhythmic drum pattern, engineers can sculpt unique vocal characteristics tailored for creative sound design.
Precision in formant shifting and filter band selection further refines the timbre and clarity of the processed sound.
For advanced results:
- Experiment with multiple vocoder instances, each with distinct carrier signals, to layer rich harmonies.
- Adjust formant shifting to morph vocal tone, achieving effects from robotic to ethereal.
- Enable the Enhance feature to increase intelligibility and emphasize consonants for articulate, impactful textures.
Saving and Recalling Your Custom Vocoder Presets
Once intricate vocal textures and harmonies have been crafted with the vocoder, efficient preset management becomes fundamental for a streamlined workflow.
Saving custom presets in Ableton Live is accomplished by clicking the disk icon on the Vocoder device, allowing users to assign unique names and locations within the User Library for rapid recall.
Organization can be optimized by categorizing these presets into dedicated folders based on sound characteristics or project applications, accelerating workflow when searching for specific timbres.
Documenting parameter settings of successful custom presets guarantees consistent sound design across projects.
Regularly updating and refining saved presets keeps the creative palette relevant to evolving production techniques.
For enhanced efficiency, the “Save as Default” function establishes a preferred Vocoder configuration as the starting point for new projects.
Troubleshooting Common Vocoder Signal Issues
Many producers encounter signal inconsistencies when integrating vocoders into vocal processing chains, often stemming from improper input levels, latency, or unbalanced modulator and carrier sources.
Addressing these common issues requires a technical workflow and vigilant monitoring throughout the session. For ideal clarity, the modulator signal should be properly set between -12dB and -6dB, avoiding both clipping and insufficient gain.
The carrier signal must be balanced accordingly, sometimes requiring EQ or high-pass filtering to prevent muddiness and low-end buildup. CPU usage can impact real-time processing; freezing tracks or disabling unused plugins may alleviate strain.
Consider the following steps:
- Adjust modulator and carrier signal levels for transparency and intelligibility.
- Minimize latency by reducing buffer size to 128-256 samples.
- Enhance CPU usage through track freezing and plugin management.
- Using a dedicated audio interface can minimize MIDI latency, improving the overall processing efficiency and sound quality.
Frequently Asked Questions
Is Vocoder the Same as Autotune?
The question addresses whether vocoder effects and autotune are equivalent in vocal processing. Autotune differences lie in pitch correction, while vocoder effects alter timbre for sound design, making each tool distinct within music production workflows and applications.
How to Make Vocals Sound Professional in Ableton?
Achieving professional vocals in Ableton requires a solid vocal recording setup, refined vocal performance techniques, strategic vocal layering techniques, advanced vocal effects processing, and precise vocal mixing tips, ensuring clarity, depth, and cohesion throughout the sound design workflow.
What Is the Best Synth to Use With a Vocoder?
Synth selection for ideal vocoder compatibility prioritizes harmonically rich sources—sawtooth or square waves excel in sound design and creative processing. Ableton’s Operator and Analog synths facilitate effective vocal layering, delivering clarity, presence, and unique timbral variation.
How Do You Sing With a Vocoder?
To sing with a vocoder, users configure vocoder settings by routing vocals and a harmonically rich carrier, apply vocal effects, and manipulate creative layering and sound design elements, utilizing performance techniques to sculpt distinctive, processed vocal textures.
Conclusion
Ableton’s vocoder offers a versatile toolkit for innovative vocal processing, allowing users to sculpt both classic and experimental textures. By understanding carrier and modulator dynamics, configuring precise routing, and selecting ideal source material, producers can achieve everything from articulate robotic effects to intricate harmonies. Effective workflow includes saving custom presets and swiftly addressing signal issues. Mastery of these techniques positions the vocoder as an essential sound design element within any creative production environment.