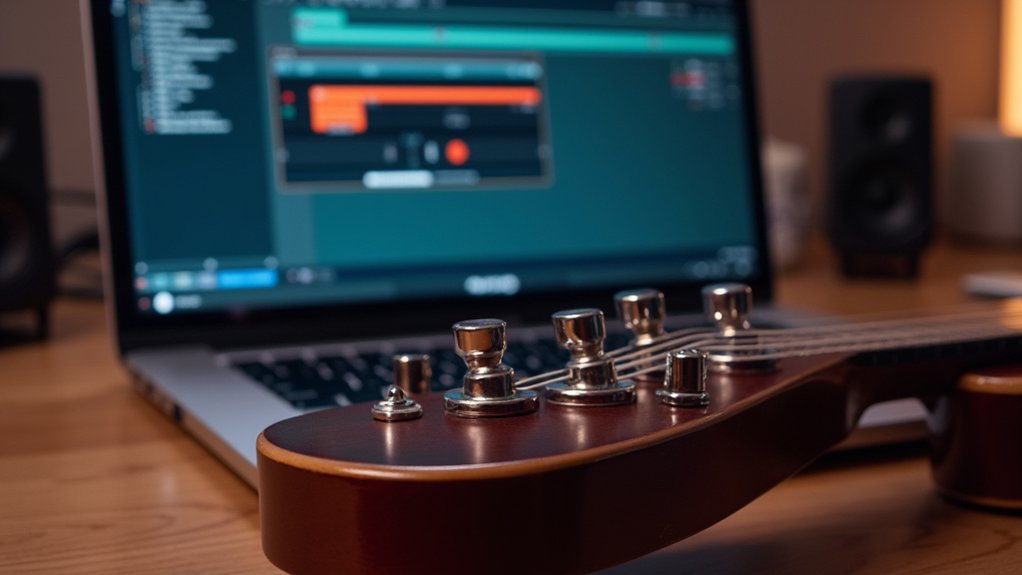
Ableton Live users can reduce unwanted noise by first identifying problematic frequencies, then applying EQ Eight with precise notch filters or high-pass filters to remove hums and rumble. Noise gates help mute low-level background sounds, while denoisers handle continuous noise like hiss. Advanced tools, such as Drum Buss and multiband dynamics, offer further fine-tuning. Integrating third-party plugins increases reduction accuracy. Ideal noise control requires critical listening, frequency analysis, and monitoring throughout the workflow. More refined techniques are available ahead.
Key Takeaways
- Use EQ Eight’s narrow notch filters with a high Q factor to remove problematic frequencies like hum or hiss from your audio.
- Apply a noise gate to mute signals below a set threshold, effectively reducing transient or background noise in vocal and instrument tracks.
- Utilize third-party noise reduction plugins (e.g., iZotope RX, Waves X-Noise) for advanced removal of persistent or complex noise.
- Employ high-pass filters to eliminate low-end rumble and reduce unwanted noise below the vocal or instrument frequency range.
- Monitor noise levels with true peak meters and reference tracks to ensure a clean mix across different playback systems.
Understanding the Types of Noise in Ableton Live
Unwanted noise in Ableton Live encompasses a range of audio artifacts, including background hum, hiss, and white noise, which commonly originate from microphones, electrical interference, or problematic room acoustics.
These noises are generally classified as either transient (short, sporadic bursts) or sustained (continuous), and each type demands a distinct removal technique. Identifying the nature of the noise is critical; for instance, a noise gate can efficiently remove transient, intermittent unwanted sounds, while a de-noiser plugin is more effective for persistent background interference.
Further, ambient noise—such as room reverb and echoes—may be mitigated with tools like the Drum Buss, which adjusts transient response and reverb characteristics.
Properly categorizing noise types streamlines the process to remove unwanted background content and maintain audio fidelity.
Using EQ to Target and Remove Problematic Frequencies
Precise noise reduction in Ableton Live often begins with identifying the specific frequency bands where unwanted sounds occur, such as hums in the low end or hiss in the high frequencies.
Employing EQ Eight, users can apply narrow notch filters to target and attenuate these problematic frequencies with minimal impact on the desired audio signal.
This process relies on careful analysis and adjustment of the Q factor to achieve selective noise removal while preserving overall sound integrity.
Identifying Noise Frequency Bands
How can problematic noise be effectively isolated within an audio track? The process begins with identifying noise frequency bands using a spectrum analyzer, which visually represents the frequency content and reveals where unwanted noise is concentrated.
Typically, low-frequency hums occur around 60 Hz, while high-frequency hiss appears above 10 kHz. By referencing these ranges, engineers can employ Ableton Live’s EQ Eight to reduce unwanted background noise.
Applying a narrow Q factor when cutting frequencies guarantees that only the problematic band is attenuated, preserving the integrity of adjacent audio. Frequency smoothing within the spectrum analyzer further aids in distinguishing steady noise patterns from musical content.
Periodic A/B testing by toggling the EQ Eight enables precise evaluation of noise reduction effectiveness without compromising desired audio quality.
Precision EQ Notch Filtering
When persistent noise occupies specific frequency bands, precision EQ notch filtering provides a targeted solution within Ableton Live’s workflow.
Using EQ Eight, the practitioner can remove unwanted noise by creating a narrow notch at the problematic frequency. The process begins with identifying the offending range via a frequency analyzer or critical listening. A high Q factor isolates the frequency, allowing a reduction of -6 to -12 dB, which attenuates the noise without degrading the overall audio fidelity.
This method is particularly effective for eliminating hums, buzzes, or resonant peaks caused by equipment or less-than-ideal recording conditions.
For best results, precision EQ notch filtering may be combined with noise reduction plugins or noise gates, addressing both continuous and transient noise elements within the production environment.
Applying Noise Gates for Effective Background Noise Control
While managing background noise is essential in audio production, the Noise Gate effect in Ableton Live offers an effective solution by allowing users to set a specific threshold below which unwanted signals are automatically muted.
This process enables users to reduce background noise by guaranteeing only desired audio passes through. To optimize results, users should methodically adjust the threshold, fine-tune attack and release parameters, and monitor real-time gate activity for precise control.
The following steps summarize the application process:
- Insert the noise gate onto the target audio track.
- Adjust the threshold so that the gate opens only for intended audio, minimizing background noise.
- Fine-tune Attack, Release, and Return controls for smooth shifts.
- Monitor the Gate Activity display to guarantee effective noise suppression.
Reducing Ambience With Built-In Multiband Dynamics
The Multiband Dynamics plug-in in Ableton Live offers a dedicated Reduce Ambience preset that applies downward compression to decrease background noise levels.
Users can further optimize the noise reduction process by customizing the threshold, ratio, and band-specific settings to better match the unique spectral profile of their source material.
This approach enables precise control over ambient content while preserving the integrity of the desired audio signal.
Using Reduce Ambience Preset
How can ambient noise be minimized within a mix using Ableton’s native tools?
The Reduce Ambience preset in Ableton’s Multiband Dynamics device is engineered for effective noise reduction, specifically targeting background noise without degrading the primary audio. This preset utilizes downward compression on quieter signal portions, attenuating unwanted ambience.
For best results, engineers should insert the Multiband Dynamics early in the signal chain, guaranteeing background noise is managed before subsequent processing. The preset’s action can be summarized as follows:
- Load Multiband Dynamics and select the Reduce Ambience preset.
- Position the device at the beginning of the track’s effect chain.
- Allow the preset’s downward compression to reduce low-level ambient noise.
- Optionally, combine with EQ or additional compression for refined noise reduction.
This workflow guarantees precise control over unwanted ambience.
Customizing Multiband Dynamics Settings
Beyond relying solely on the Reduce Ambience preset, audio engineers can further optimize noise reduction in Ableton Live by directly adjusting Multiband Dynamics parameters.
Customizing the threshold and ratio settings for each frequency band—low, mid, and high—enables precise targeting of unwanted ambient noise. By placing the Multiband Dynamics plug-in early in the processing chain, engineers guarantee maximum efficacy in diminishing background noise before further signal manipulation.
Fine-tuning the threshold for each band controls the point at which downward compression engages, allowing for adaptive noise suppression tailored to the audio material. Adjusting ratios further refines the degree of noise reduction applied.
Integrating Multiband Dynamics with additional tools, such as EQ and standard compression, can collectively enhance audio clarity and overall quality, yielding professional, noise-free results.
Enhancing Audio Clarity With Drum Buss Settings
Utilizing Drum Buss settings in Ableton Live enables precise control over audio clarity by targeting both transient detail and background noise reduction.
The Drum Buss is engineered for flexibility, offering effective management of unwanted noise and frequency sculpting across various audio sources. To optimize audio clarity and achieve detailed frequency management, users should implement the following process:
- Adjust the Transients knob to enhance or suppress transient attack, minimizing room reverb and reducing background noise.
- Rotate the Damp knob counter-clockwise to attenuate high-frequency noise, yielding a cleaner signal.
- Apply the Drive parameter judiciously to introduce warmth and saturation while controlling dynamic range for enhanced clarity.
- Combine Drum Buss with targeted EQ settings to further eliminate unwanted frequencies and refine the overall tonal balance.
For additional enhancement, integrating FabFilter Pro-Q 3 allows precise frequency adjustments, further elevating mix clarity and ensuring a polished end product.
This systematic approach maximizes audio clarity within Ableton Live.
Leveraging Third-Party Plug-ins for Advanced Noise Reduction
A range of third-party noise reduction plug-ins, including both free and paid solutions, offer advanced processing capabilities that surpass native Ableton tools.
Users can select from popular options such as iZotope RX, Waves X-Noise, and Accusonus ERA-D, considering feature sets and budget constraints.
Integration within Ableton Live is achieved through standard VST or AU formats, allowing seamless insertion into the audio effects chain for targeted noise management.
Popular Noise Reduction Plugins
Third-party noise reduction plugins present advanced solutions for addressing complex audio imperfections that may surpass the capabilities of Ableton’s stock tools.
These popular noise reduction plugins utilize sophisticated algorithms and adaptive learning to identify and remove noise in your audio, allowing for precise control over the removal process.
Employing third-party plug-ins enables users to target specific unwanted frequencies or broadband disturbances, preserving the integrity of the source material.
The following list outlines key options for Removing Noise:
- iZotope RX – Renowned for its spectral repair and intelligent noise profiling.
- Waves X-Noise – Offers real-time noise reduction with intuitive controls.
- Accusonus ERA-D – Features advanced dual-channel processing for difficult noise scenarios.
- CrumplePop AudioDenoise – Utilizes AI-driven detection for background noise removal with user-defined parameters.
Free Vs Paid Options
While many producers rely on premium noise reduction plugins for their robust algorithms and detailed control, free alternatives also offer valuable functionality for audio cleanup within Ableton Live.
Free third-party plugins such as ReaPlugs from REAPER and Bertom Audio Plug-ins provide essential tools—EQ, gates, and compressors—to remove background noise without financial investment.
However, advanced noise reduction often requires paid solutions like iZotope RX or Waves X-Noise, which utilize sophisticated audio analysis to maintain original signal integrity.
AI-driven options, such as CrumplePop AudioDenoise, further streamline the process, automatically detecting and reducing noise with adjustable strength parameters.
Many premium plugins offer a free trial, allowing users to assess their effectiveness in removing unwanted noise before purchasing, accommodating both budget and performance needs.
Integration With Ableton Live
Through utilizing advanced third-party noise reduction plug-ins within Ableton Live, users can achieve superior audio clarity through precise and automated processing workflows.
Integration of these plugins—such as CrumplePop AudioDenoise, iZotope RX, and Waves X-Noise—enables highly effective removal of background noise with customizable controls.
The process of removing background noise with Ableton is streamlined by configuring these plugins as the default external sample editor, facilitating direct editing and seamless workflow.
Employing a gate in combination with third-party plugins can further refine noise reduction results, ensuring professional-grade output without compromising original audio integrity.
- Install and authorize the chosen noise reduction plugin within Ableton.
- Set the plugin as the default external sample editor for efficient access.
- Apply the plugin to problematic audio tracks for removing background noise.
- Combine with Ableton’s gate for enhanced noise suppression.
Setting Up External Sample Editors for Detailed Noise Removal
Configuring an external sample editor within Ableton Live enables precise noise removal beyond the platform’s native capabilities.
The process of setting up an external sample editor begins by accessing Preferences, selecting the File/Folder tab, and designating a preferred application—such as Audacity or iZotope RX—as the default audio editor.
This allows users to remove unwanted noise in Ableton Live by right-clicking an audio clip and choosing “Edit,” which opens the sample in the external environment.
In Audacity, the Effects > Noise Reduction function facilitates creating a noise profile from the target segment, enabling focused reduction.
Once adjustments are complete, exporting the audio as a high-resolution WAV file guarantees fidelity before reimporting into Ableton Live.
This workflow considerably enhances noise reduction capabilities within the DAW.
Comparing Noise Gates and Denoisers: When to Use Each
How does one determine the ideal tool for audio noise management in Ableton Live? The choice between a noise gate and a denoiser depends on the type of audio recordings and the characteristics of the unwanted background noise.
Noise gates operate by allowing audio signals above a set threshold to pass, effectively muting lower-level background noise during quiet sections. Denoisers, conversely, analyze the entire signal to reduce consistent noise throughout, making them suitable for continuous sources like speech.
Consider the following distinctions:
- Noise gates excel in percussive or dynamic material, silencing noise during pauses.
- Denoisers are best for speech or sustained sounds, minimizing noise throughout the track.
- Threshold settings are critical for gates; denoisers rely on signal analysis.
- Combining both can maximize clarity in complex audio recordings.
Tips for Achieving Cleaner Audio in Ableton Live
Selecting the appropriate noise management tool lays the groundwork for effective audio cleanup, but ideal results in Ableton Live depend on a systematic approach to processing.
Removing unwanted noise from audio tracks begins with isolating problem frequencies using EQ Eight; surgically attenuate these bands to improve clarity.
The Noise Gate plug-in, compatible with Ableton, enables dynamic removal by silencing low-level noise during inactive segments—set thresholds with precision for natural gating.
For persistent background noise, shape the Noise Profile using third-party plug-ins compatible with Ableton, such as CrumplePop AudioDenoise, to automate detection and reduction.
The Multiband Dynamics plug-in’s Reduce Ambience preset controls noise across frequency bands, while Drum Buss offers further refinement by adjusting Transients and Damp controls, addressing residual reverb and background artifacts.
Troubleshooting Common Noise Issues in Your Projects
When unexpected noise persists within an Ableton Live project, systematic diagnosis is essential to pinpoint the source and apply effective remediation.
Addressing noisy audio requires a methodical approach to guarantee clean audio signals and prevent signal degradation. The following process provides a structured troubleshooting framework:
- Verify Audio Interface: Confirm that the audio interface is correctly connected and recognized under Preferences > Audio to guarantee stable signal flow.
- Monitor Gain Staging: Regularly assess audio clip gain levels, adjusting with the Gain control or Normalize function to manage noise peaks.
- Apply Gate Plug-in: Isolate and remove low-level background noise during silent passages using a gate plug-in for precise noise gating.
- Use EQ Eight: Employ EQ Eight to surgically attenuate problematic frequencies, particularly between 200 Hz and 1 kHz, where ambient noise often accumulates.
- Utilize True Peak Meters: True Peak Meters effectively monitor inter-sample peaks, ensuring that noise does not result in unwanted distortion during playback.
Frequently Asked Questions
How Do I Get Rid of Unnecessary Background Noise?
To eliminate unnecessary background noise, one employs noise cancellation techniques within audio editing software, applies soundproofing tips to the workspace, and optimizes recording environment adjustments. Combining these methods systematically enhances audio clarity and minimizes unwanted acoustic interference efficiently.
How to Get Rid of Noise in Ableton?
To address the current question, users employ audio enhancement techniques within sound editing software by adjusting noise gate settings, utilizing spectral analysis tools for precise frequency identification, and implementing targeted EQ and dynamic processing to achieve effective noise reduction in audio tracks.
How to Get Rid of Mouth Noises in Ableton?
Addressing mouth noise in Ableton involves precise audio editing techniques such as using EQ Eight to attenuate problematic frequencies, applying Noise Gate and Multiband Dynamics, and utilizing De-Esser plugins to enhance vocal clarity and overall sound quality.
How to Get Rid of Background Hum in Audio?
Addressing background noise in audio editing involves identifying the hum’s frequency, applying precise EQ cuts, and utilizing noise gates. For advanced sound design, multiband dynamics or specialized plugins further minimize unwanted noise while preserving audio fidelity and clarity.
Conclusion
In conclusion, noise reduction in Ableton Live involves a systematic approach utilizing EQ, noise gates, and multiband dynamics to isolate and minimize unwanted frequencies. Employing Drum Buss enhancements, integrating external sample editors, and understanding the distinctions between noise gates and denoisers enables targeted processing. By methodically applying these tools and troubleshooting persistent noise issues, producers can achieve cleaner, more professional audio results, ensuring maximum clarity and fidelity throughout their production workflow in Ableton Live.